We may receive a commission when you use our affiliate links. However, this does not impact our recommendations.
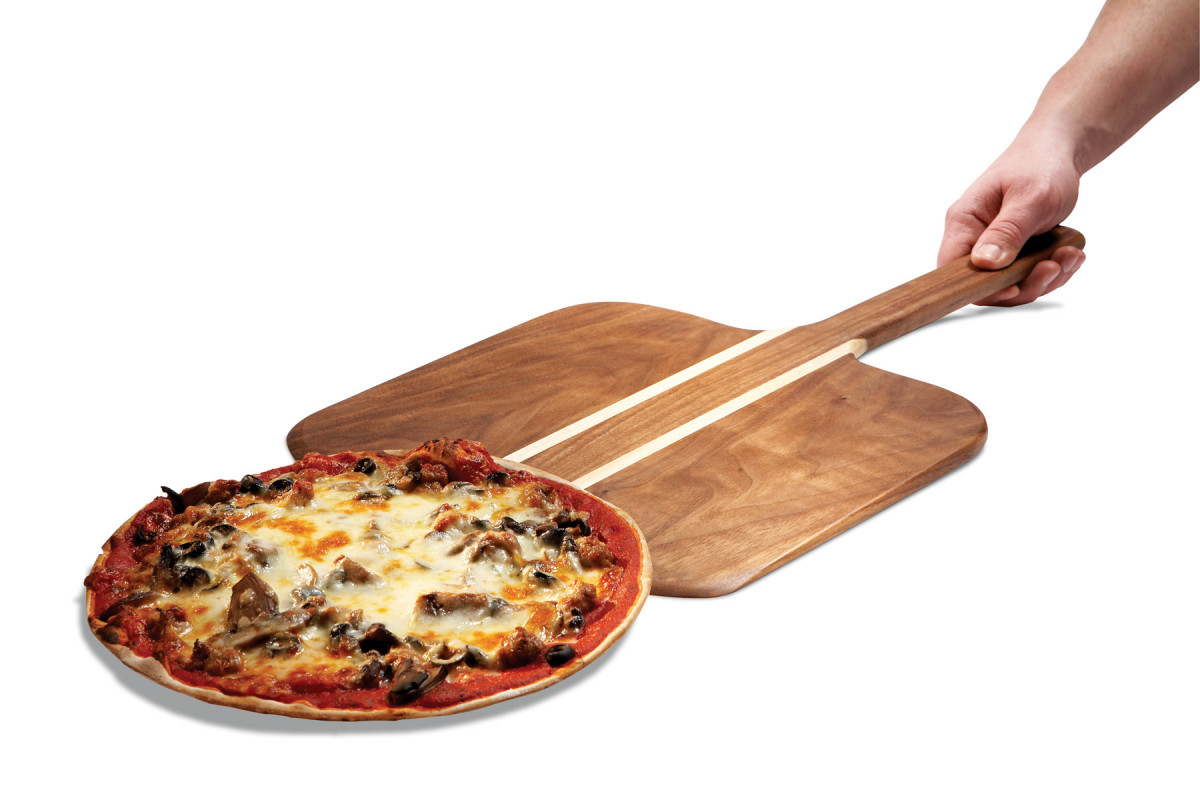 Handle homemade pizza like a pro.
Wednesday is homemade pizza night at our house. Everybody likes something different, so we each make our own personal size pizza. My favorite is hot Italian sausage with tomatoes, mushrooms, and mozzarella. Ready-made crusts make it especially easy, and you can bake them right on the oven rack.
Restaurant chefs use similar paddles (in the trade, they’re called “peels”) to efficiently slide pizzas in and out of the ovens. As a home pizza specialist/woodworker, I decided to create my own paddle. Not only was it fun and easy to make, using my own paddle makes me feel like a proper chef. All I need now is the proper chef’s hat.
All you need to make your own paddle is a board for the handle and blade, a couple thin strips for accents, a 12″ planer, and a simple shop-made tapering sled. The completed peel measures 12-3/8″ wide by 24″ long, perfect for handling 12″ pizzas. Its wide business end is called the blade.
Build the Peel
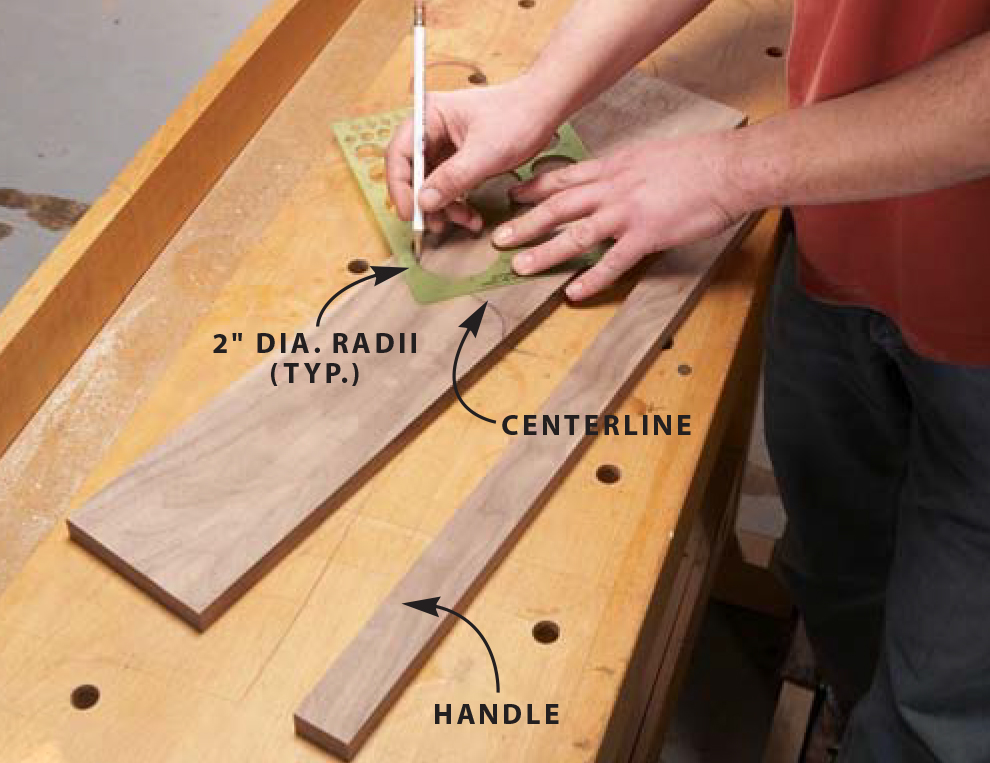
Photo 1. Cut the peel’s three main pieces from a single board. First rip the handle. Then cut the remaining section into the two side pieces. Mark radii on opposite sides of the centerline. Then make the cut on the bandsaw.
Starting with a 3/4″ by 6-1/2″ by 24″ board, rip a 1-3/8″ strip from one side to create the handle (Photo 1). Then use the wide offcut to make the blade pieces. Mark the centerline and draw a small radius at each end, on opposite sides, Then make a single S-shaped bandsaw cut to create a pair of pieces with one rounded (outside) shoulder and one transitional (inside) shoulder.
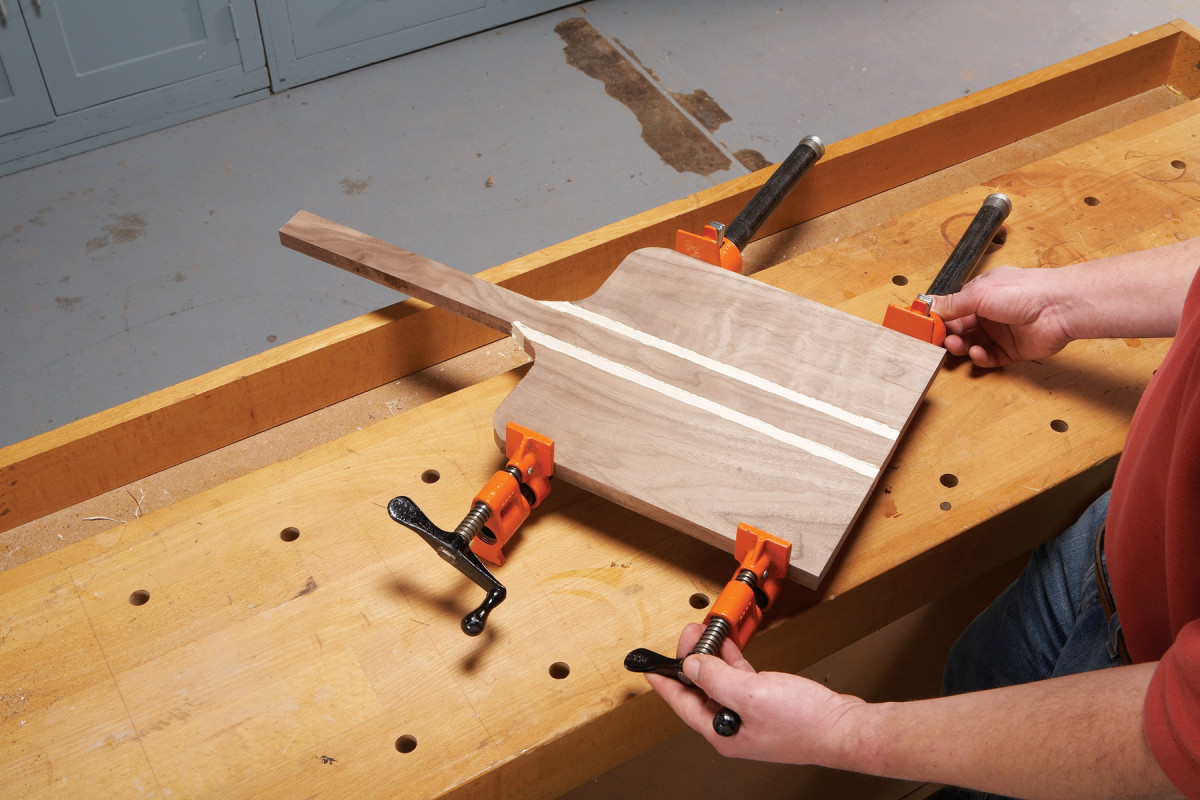
Photo 2. Add accent strips between the handle and the sides and glue the peel together. The wide part that holds the pizza is called the “blade.”
Rip a pair of 3/4″ x 1/2″ x 14″ maple strips to accent the walnut blade. Position all the parts for assembly. You can’t use biscuits or dowels to help with alignment, because the blade is going to be tapered. So make sure the parts are flat. Joint all the edges and then glue and clamp the assembly (Photo 2). Before tapering, plane the peel to 9/16″ thick.
Make the Tapering Sled
The sled is simply a base with a tapered platform that holds the peel at an angle as it passes through the planer (see Fig. A). The platform consists of three long rails that taper from 3/4″ to 0″. To make consistently tapered rails, tack together three 3/4″ by 3/4″ by 24″ blanks, using double sided tape. Band saw the long taper and smooth the cut edge by sanding. Then pull the rails apart.
Glue the front stop to the leading edge of the base. Glue the tapered rails to the sled’s base with the tall ends butted up against the stop. Glue the front support strips between the tall ends of the tapered strips. These strips support the front edge of the peel while planing. Lay the peel on the sled and frame the handle by gluing blocks on both sides and behind. This frame correctly positions the peel on the sled.
Taper the Peel
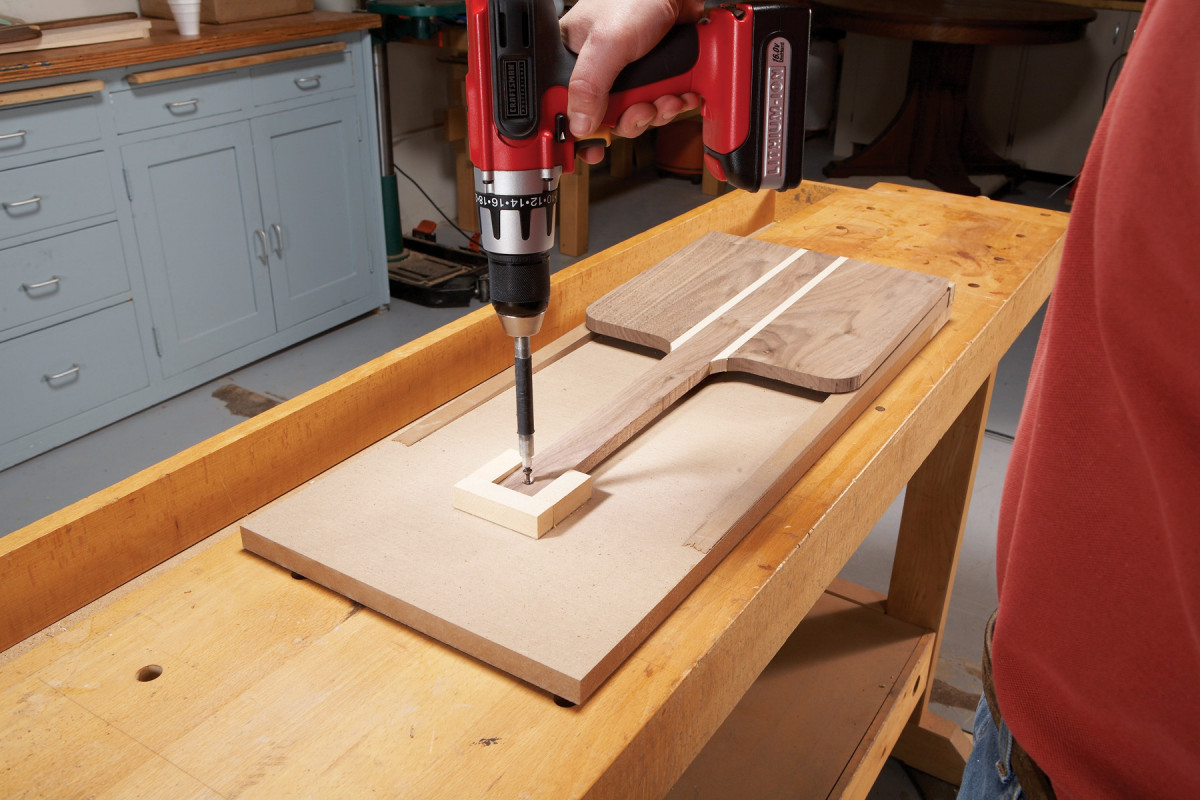
Photo 3. Install the peel in the tapering sled. Secure it by driving a screw through a hanging hole drilled in the end of the handle.
Drill and countersink a hole in the end of the handle. When the peel is finished, you can use this hole to hang it on the wall, but for now, use it to screw the peel to the sled for added security (Photo 3).
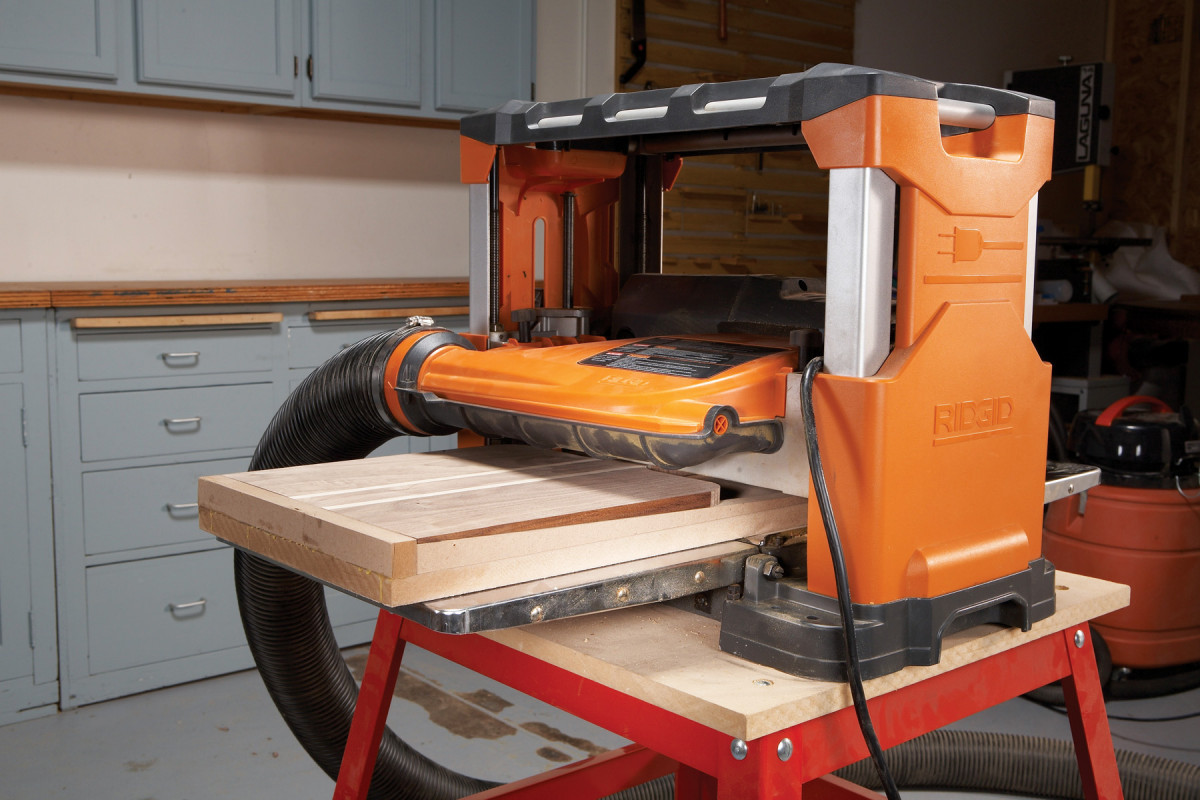
Photo 4. Taper the peel using the planer. Take light passes until the blade’s leading edge is 1/8″ thick.
Start planing (Photo 4), feeding the blade end first. Take light passes to avoid tear-out. Continue until the tip of the blade is 1/8″ thick. Round the corners on the leading edge of the blade.
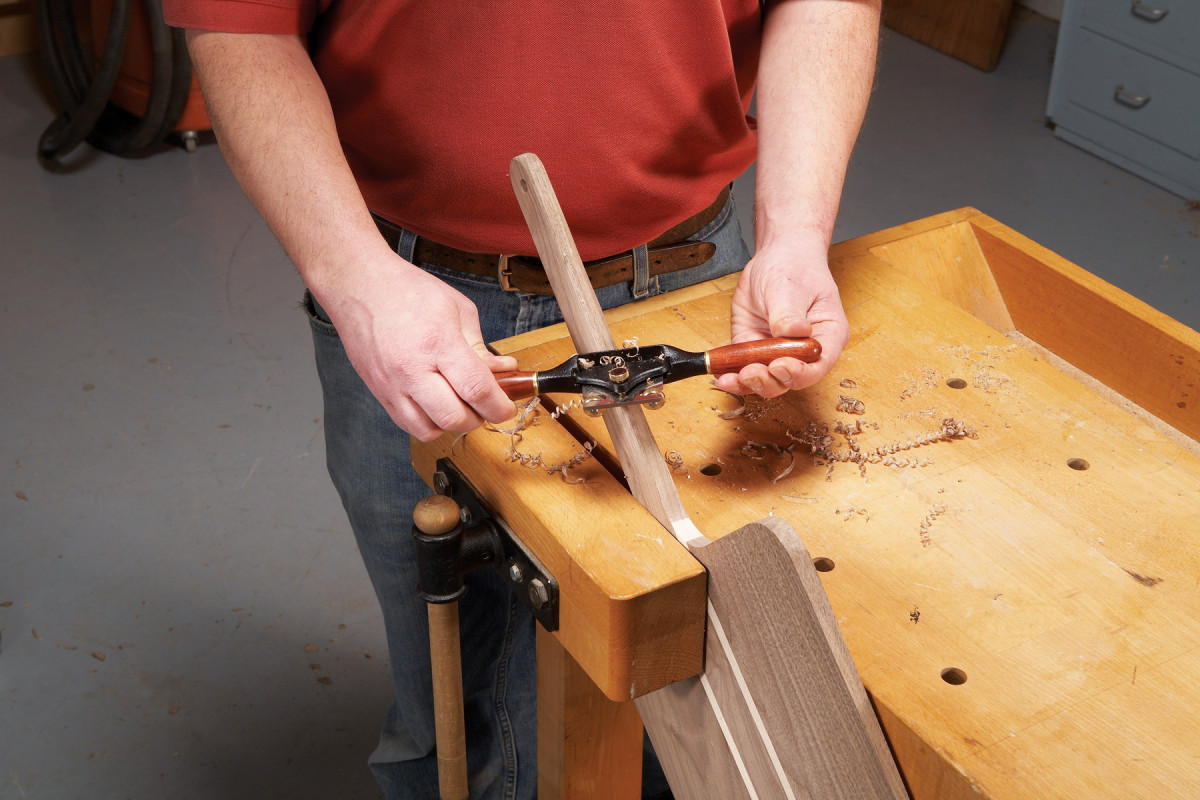
Photo 5. Ease the handle’s sharp edges to create a comfortable grip.
At the top end of each accent strip, extend and fair the transitional curve from the blade piece to the handle. Round over the sharp edges and make the handle comfortable to hold (Photo 5).
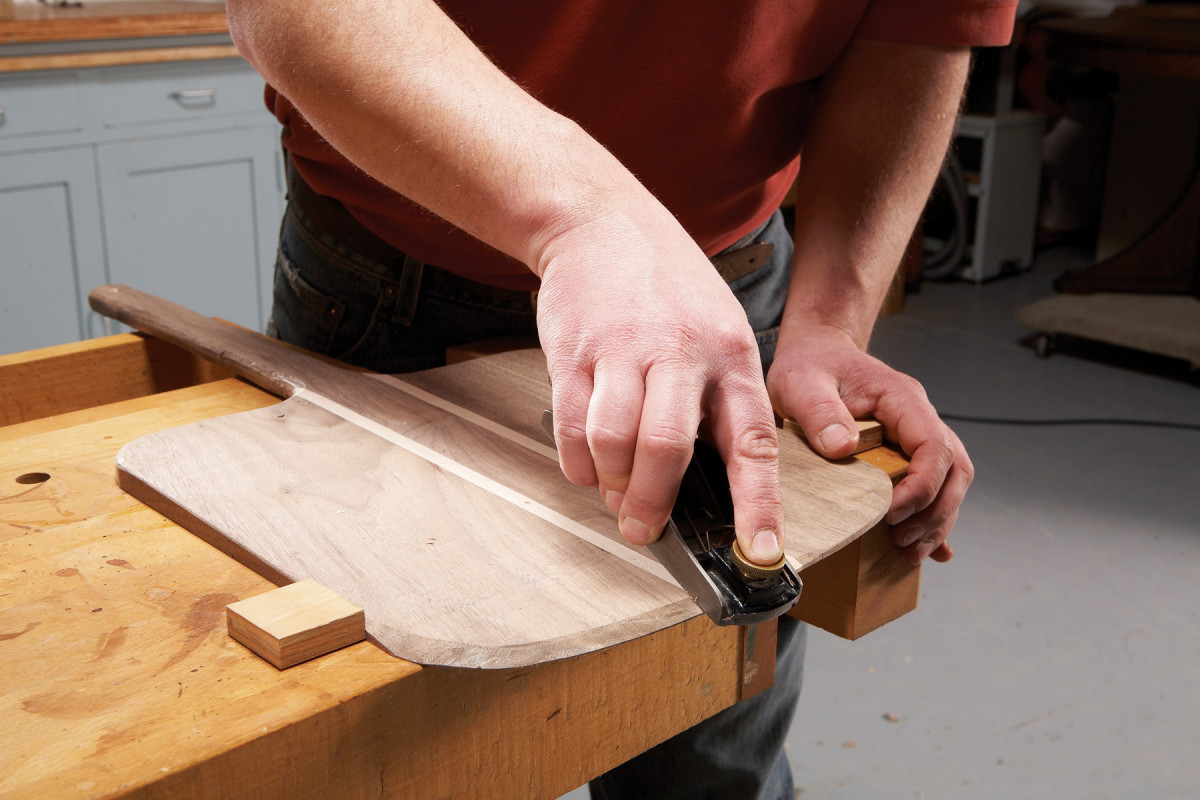
Photo 6. Round the front corners of the blade and bevel its edge to slightly less than 1/16″.
Use a sander or block plane to bevel the leading edge of the blade to 1/16″ thick, or slightly less, so it’s easy to get under the pizza (Photo 6). Finish sand and add a coat of food-safe mineral oil to beautify and protect the wood.
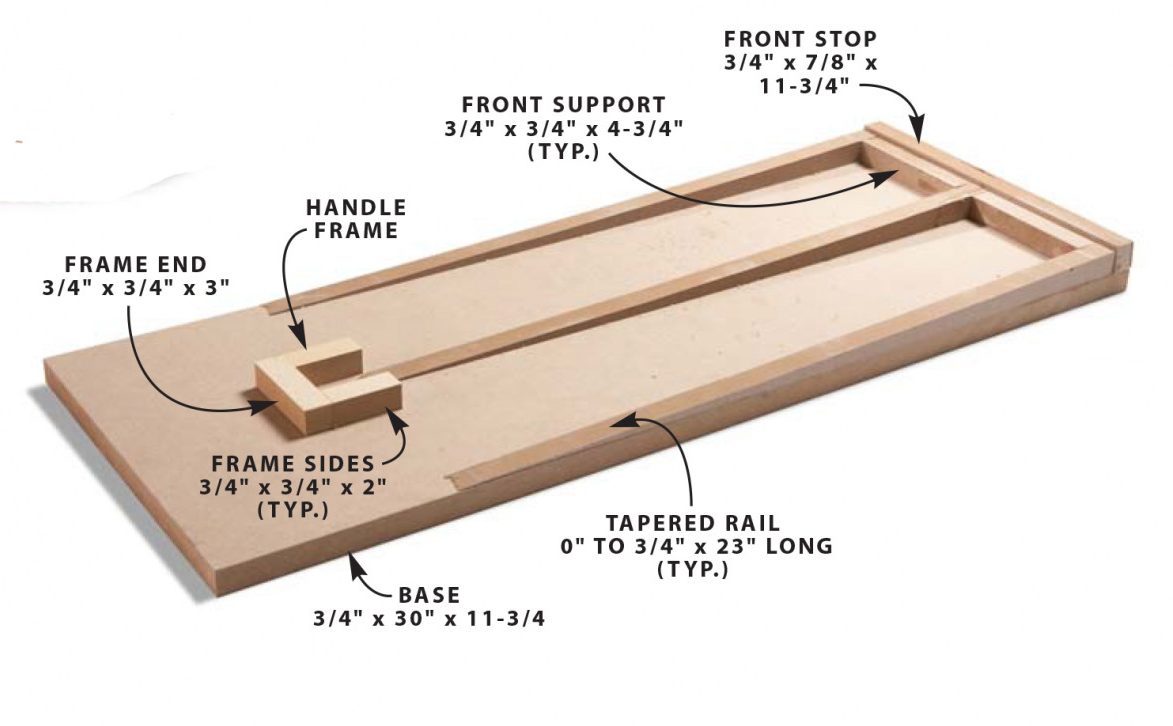
Fig. A
Here are some supplies and tools we find essential in our everyday work around the shop. We may receive a commission from sales referred by our links; however, we have carefully selected these products for their usefulness and quality.