A previous blog post on an improvised flash diffuser for macro photography has been a well visited link on my site. Last week I mentioned my friend, Alan Manson, who has an excellent archive of insect macro photographs. I asked him about the gear and lighting he used and he sent me a diagram of a flash attachment. It worked as a overhead reflector as well as reflecting flash back from behind the subject to provide some backlighting. It seemed an ideal DIY project for a rainy day.
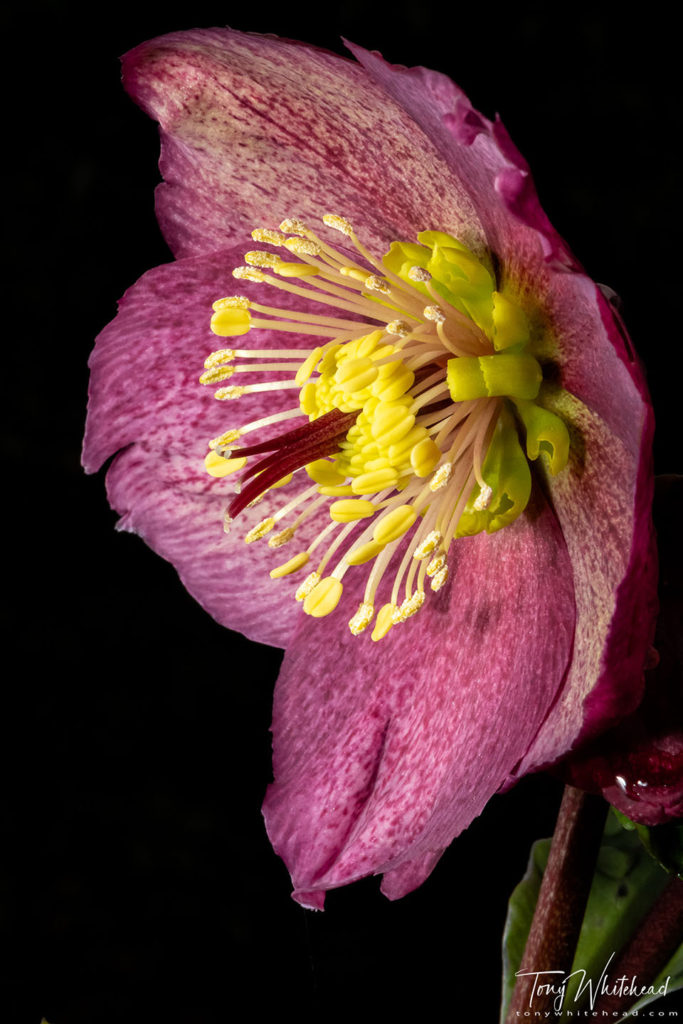
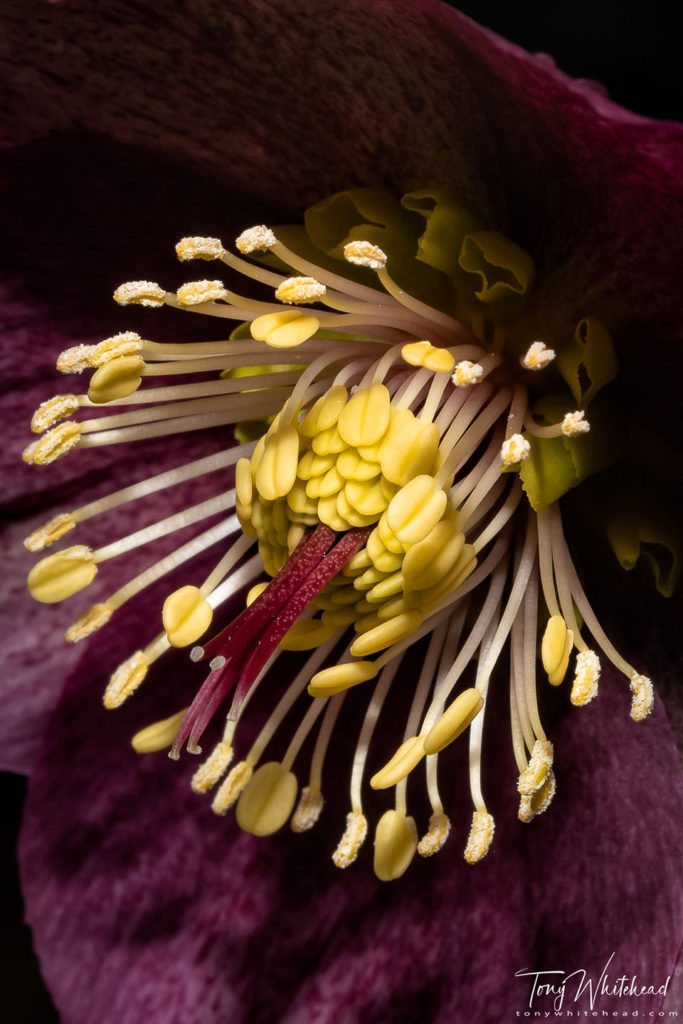
Co-operative weather, a day off and a piece of white foamcore left over from a framing job saw prototype 1 assembled and tested with the help of a rain sprinkled Hellebore.
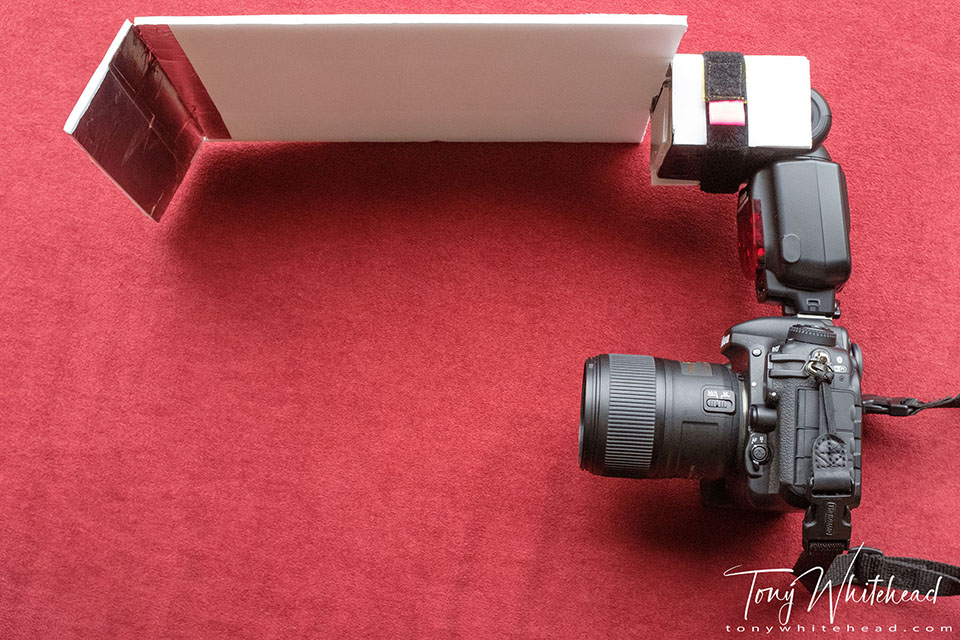
Construction
The following pictures are pretty self-explanatory.
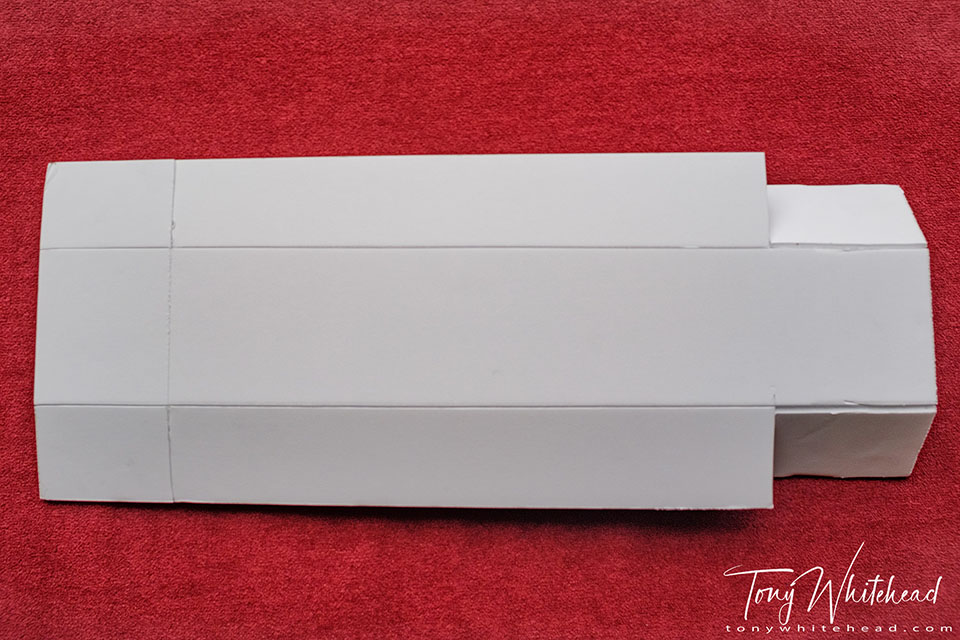
The top skin of the foamcore is incised down into the foam leaving the lower skin intact. The cuts in from the long edges to the long cuts are full thickness. On the left the cut between the two parallel cuts is only the top skin and foam leaving the underskin intact as a hinge for the backlight reflector.
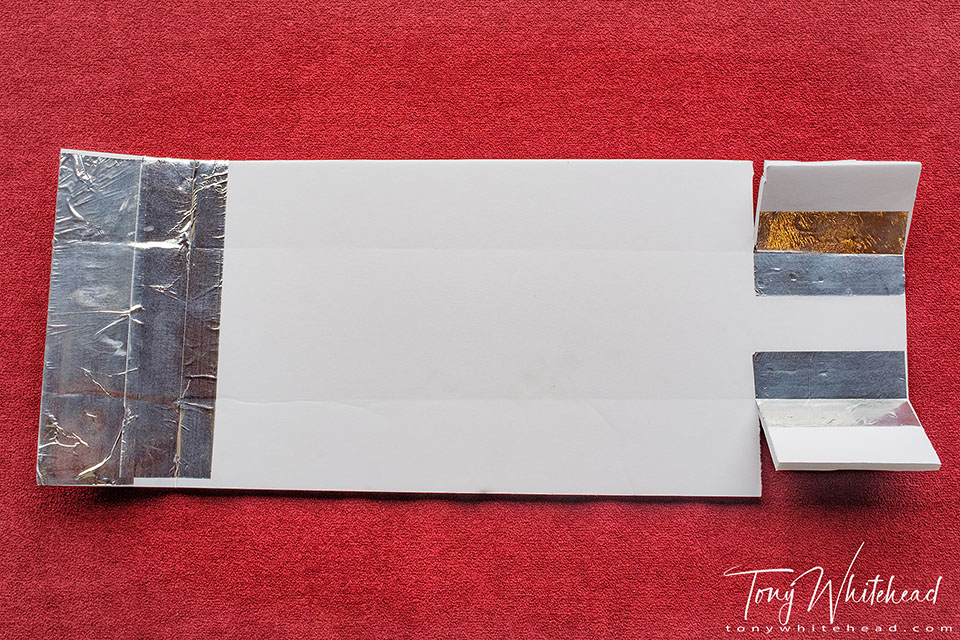
Silver adhesive metallic tape used to reinforce the folds at the end attached to the flash on the right and the hinge at the reflector end on the left. The metal tape holds its position so that the angle of the reflector can be adjusted. Adding another layer may be needed in time to stiffen this if it softens with use.
Testing
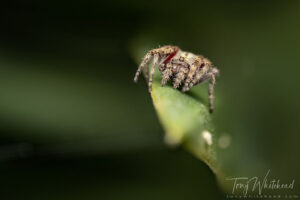
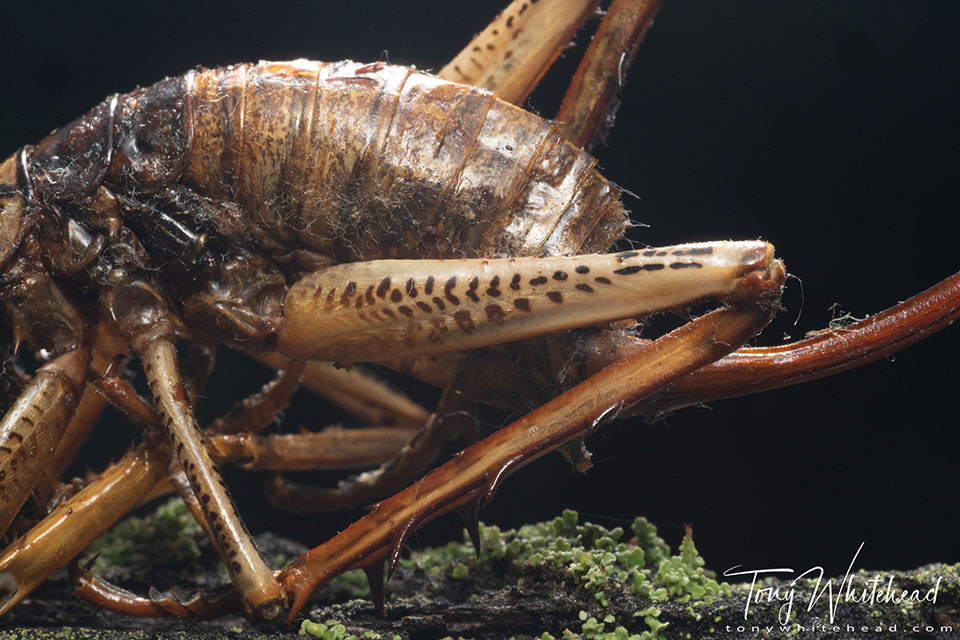
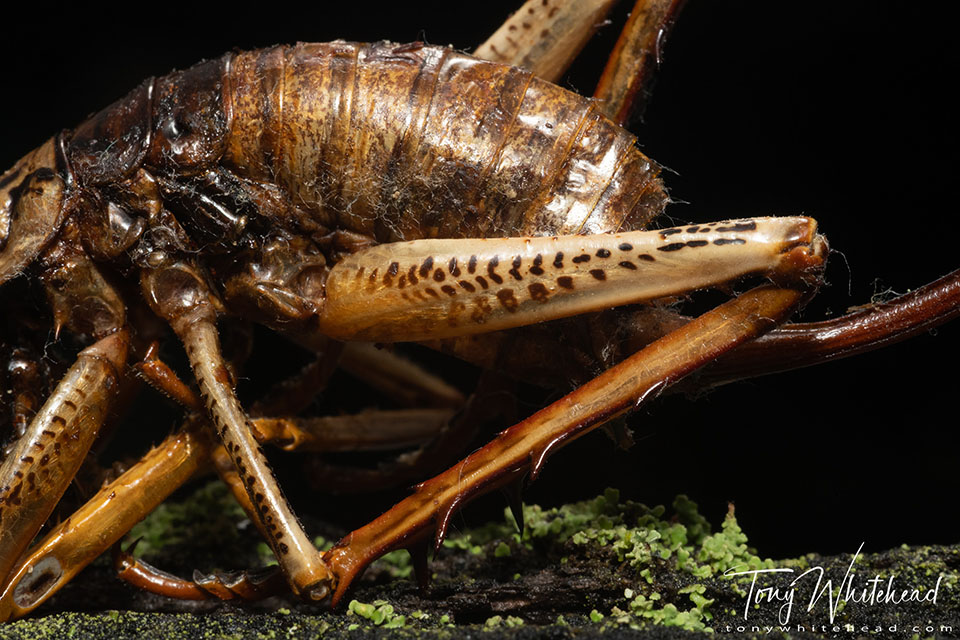
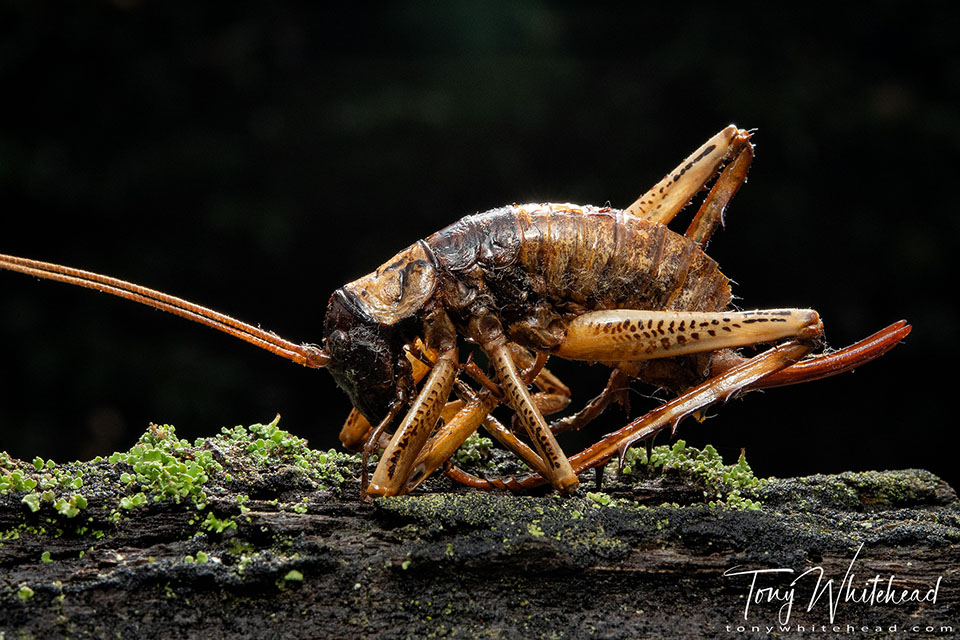
The weekend gave me a bit more time to test this setup using a dry and slightly dusty Tree Weta. I must confess that I didn’t do any measuring or dimension planning with this prototype. Dimensions were based simply on the 45.5cm size of foamcore I had available. Fortuitously this was almost perfect for the Nikon 60mm macro lens on either the D500 or D850.
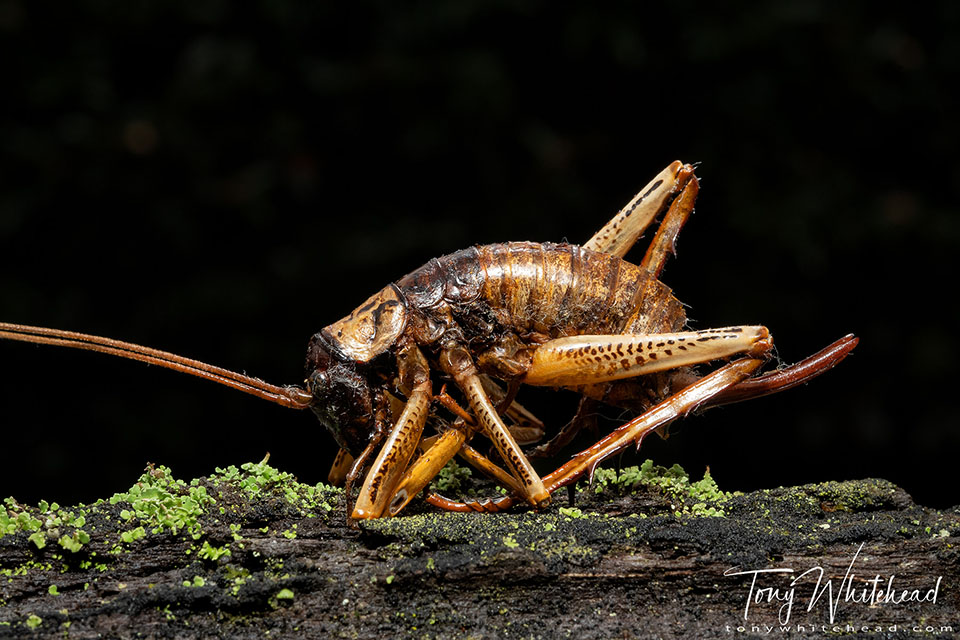
It is fine when using the 105mm macro lens for close work but less suited to longer focussing distances.
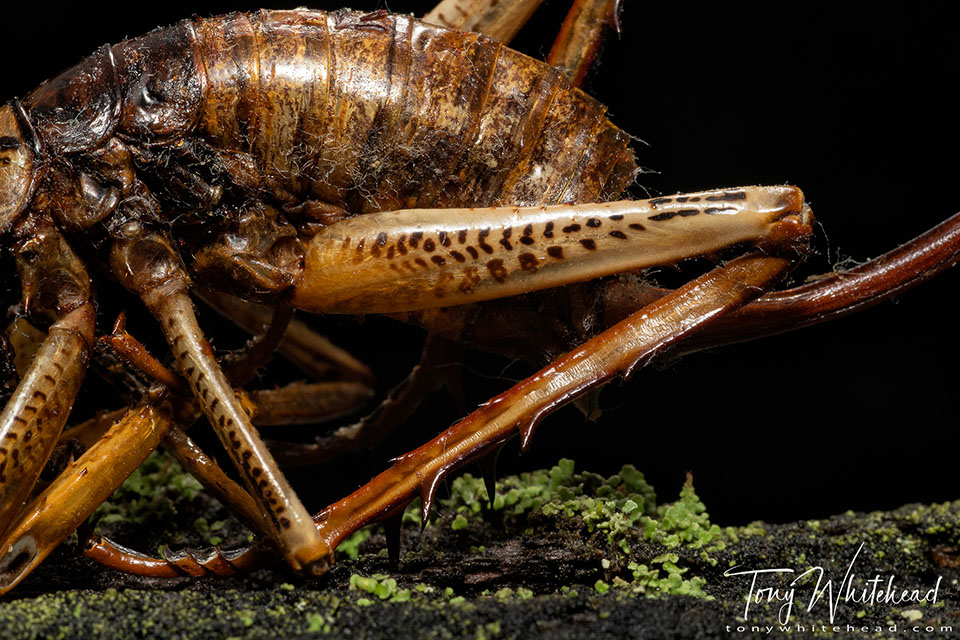
The backlighting reflector is good for highlighting the edges of the subject but can contribute to lens flare and loss of contrast. I do not use lens hoods with my macro lenses but found it useful to use my hand to shade the lens with this setup.
On balance I found the 60mm lens on the D850 to be the best and most versatile. It allowed a wider view and still enabled closer approach while gaining the benefits of the lighting modifier.

Obviously this attachment is only viable with an fairly static subject in an uncluttered environment so not suited to bushy habitats or flighty subjects.
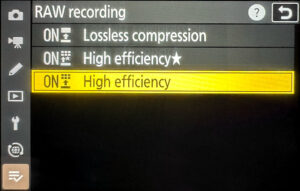
Flash Settings
I prefer using fully manual flash as it gives complete control. With a sync speed of 1/250s, aperture controls depth of field and then exposure can be controlled by changing ISO and flash intensity. These images used apertures between f22 and f45 with ISO 400-1600 and flash intensity of 1/16 to 1/64. All images were taken outdoors in overcast conditions. Ambient light was well below the exposure value required resulting in the dark backgrounds.
More options to explore
There is the possibility of enlarging the end reflector. This would easily be achieved by using adhesive velcro dots to attach another piece of foam-core or card to act as a larger reflector or a background. This would make white, black or coloured backgrounds a simple option.
The other thought I have had is to flag the centre of the overhead reflector by attaching a strip of black card or tape. This would reduce the intensity of the overhead light and give 2 smaller light sources from the edges which may give a more contoured profile to the subject.