Star trails are a beautiful and unique way to capture the beauty of the night sky. They are unique because most night sky images you see tend to focus on capturing the Milky Way core or part of it, so star trails are a way to shoot something entirely different with stunning results. In this post, we'll go over what star trails are, how to capture them, and some tips for getting the best results.
Star trails are a phenomenon that occur when you take a long exposure of the night sky. As the earth rotates, the stars appear to move across the sky, leaving a trail of light behind them. Capturing star trails requires a long exposure, typically at least an hour's worth of shooting, to create the effect.
Capturing star trails is easier than you might think. Here's a step-by-step guide to help you get started:
Find a dark location away from light pollution. The darker the location, the better the results will be. If you aren't sure how dark your location is, you can check out the online light pollution map for your area. We are lucky here in New Zealand to have a lot of places with very dark skies (Bortle Class 1) like the Central Plateau in the North Island or a good chunk of the South Island as soon as you get away from a town. That being said, you can still capture the night skies pretty well in Bortle Class 2 locations (and I'm often shooting in these areas). I just wouldn't bother trying once you get to a Class 3 location (in or near small towns). The other thing to consider is the direction you are facing, i.e. you may be shooting in a location that still has a little light pollution but the field of view you are shooting towards looks towards a darker area, this also helps.
The other thing to consider is what phase the moon will be in. The best time to shoot star trails is when the moon is still below the horizon as your stars will appear much brighter, a little moon is OK and can help brighten your foreground, but I generally wouldn't recommend shooting when the moon is more than 20%. To easily find this out, check out the info on PhotoPills below.
You'll need at a minimum:
Experiment with different exposure times, the longer the exposure, the longer the star trails will be. There are different schools of thought with star trails. Some photographers will tell you to take shorter exposures of say 30 seconds and over 90 minutes this would equal 180 shots to process/edit, and if you have large full-frame camera files this is a lot of storage space. I prefer to shoot longer exposures of around 8-10 minutes long with around 10-14 shots in total.
The advantages of shooting longer exposures are letting more light in so you can use one single frame or the blended frames for a nicely exposed foreground AND the files don't take up as much space OR take as long to process. Shooting longer also allows you to use a lower ISO reducing the noise/grain gathered in the image. The downside is that if something happens to one of the exposures in the middle of your sequence you risk a big gap in your star trails. Longer exposures can also generate more thermal noise (which is different to the noise mentioned above) which may appear as hot pixels (tiny coloured spots) in your images, especially if you are shooting on warmer nights. Personally I have never found my Sony full frame cameras suffer too badly from this issue but it is something to be aware of, and it may require you adjusting your approach to a shorter length of time and shooting more frames.
The total length of time you shoot for is entirely up to you (and your stamina if you are outside the whole time!), but I usually find 90 minutes a good amount of time to obtain a decent effect. You can shoot for the entire night if you want to and you have enough battery power to do so, this may be the limiting factor if you are running off a single battery in the camera.
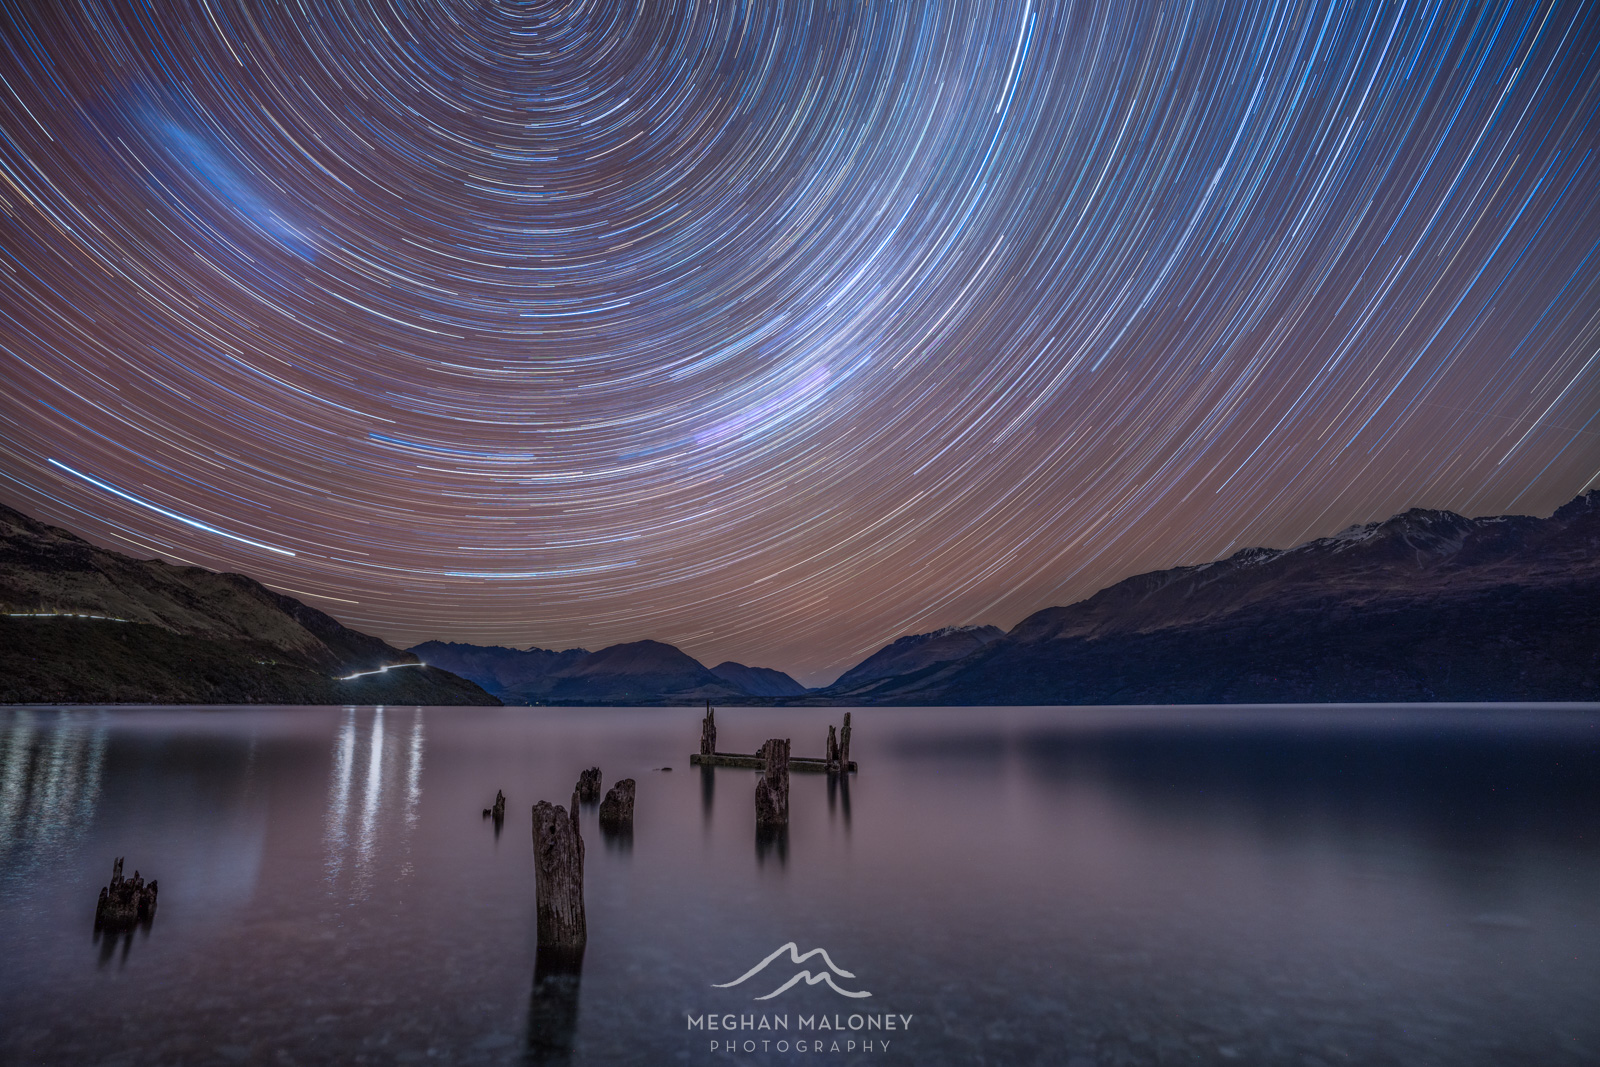
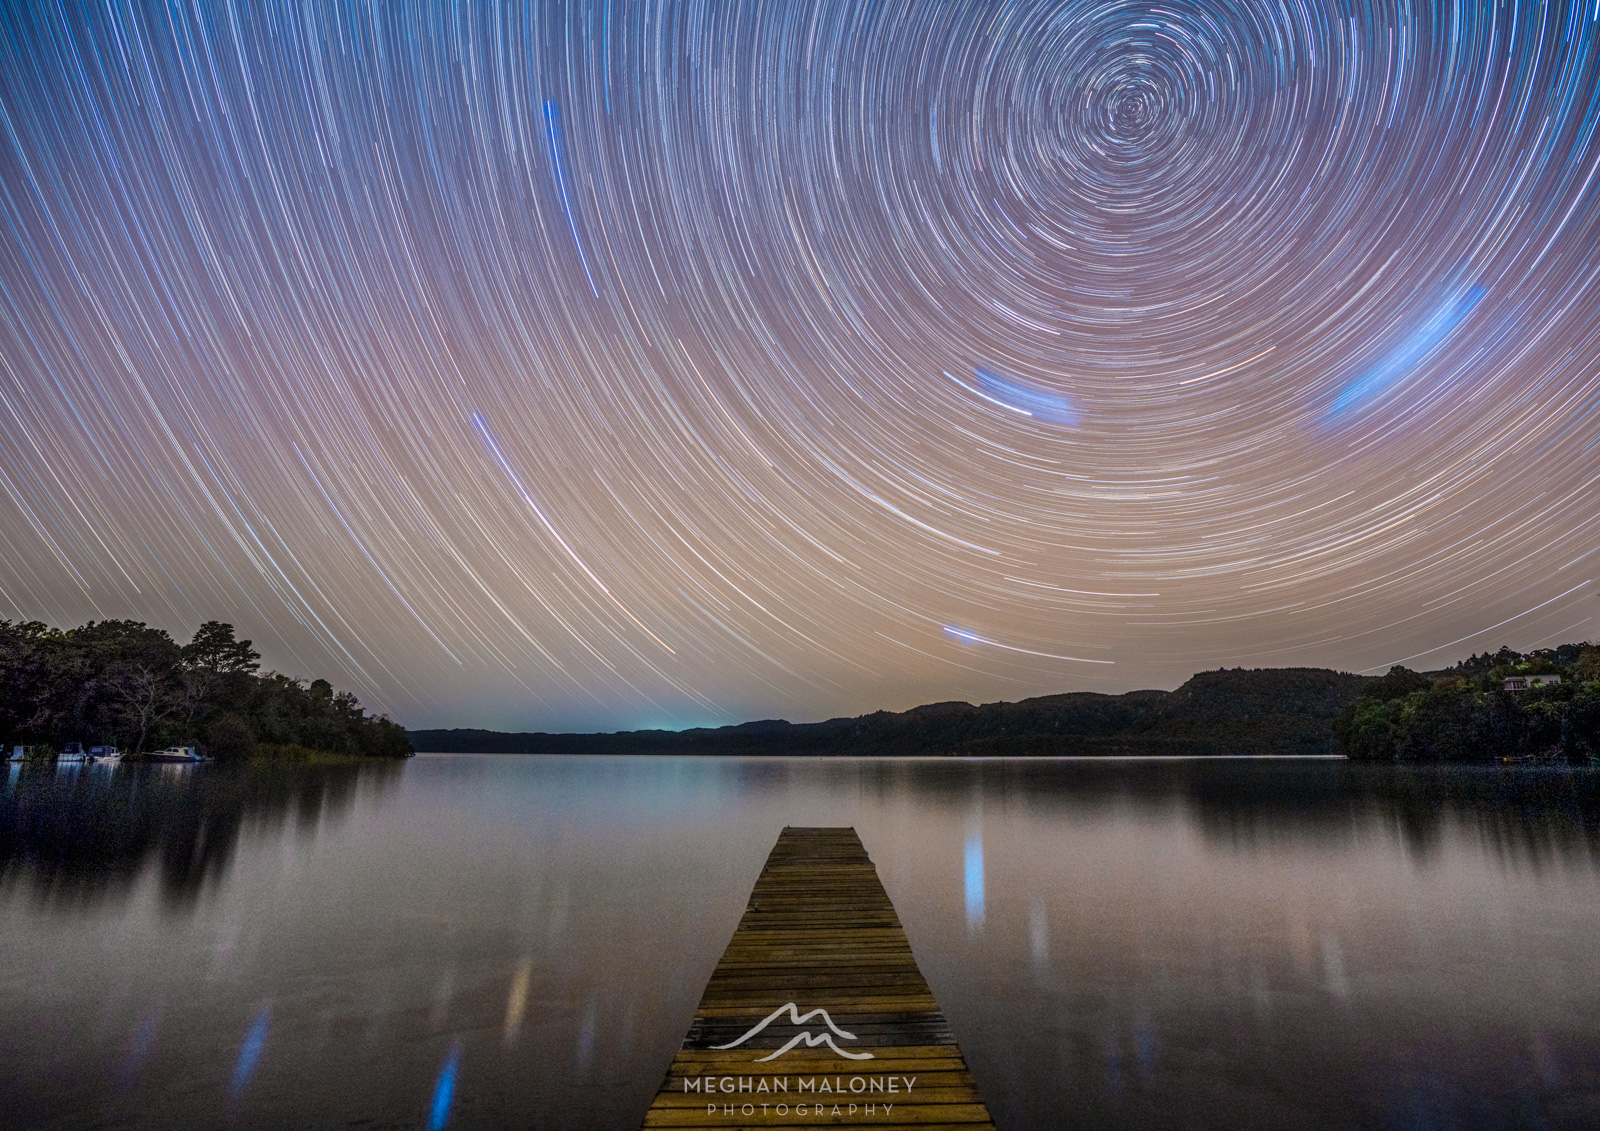
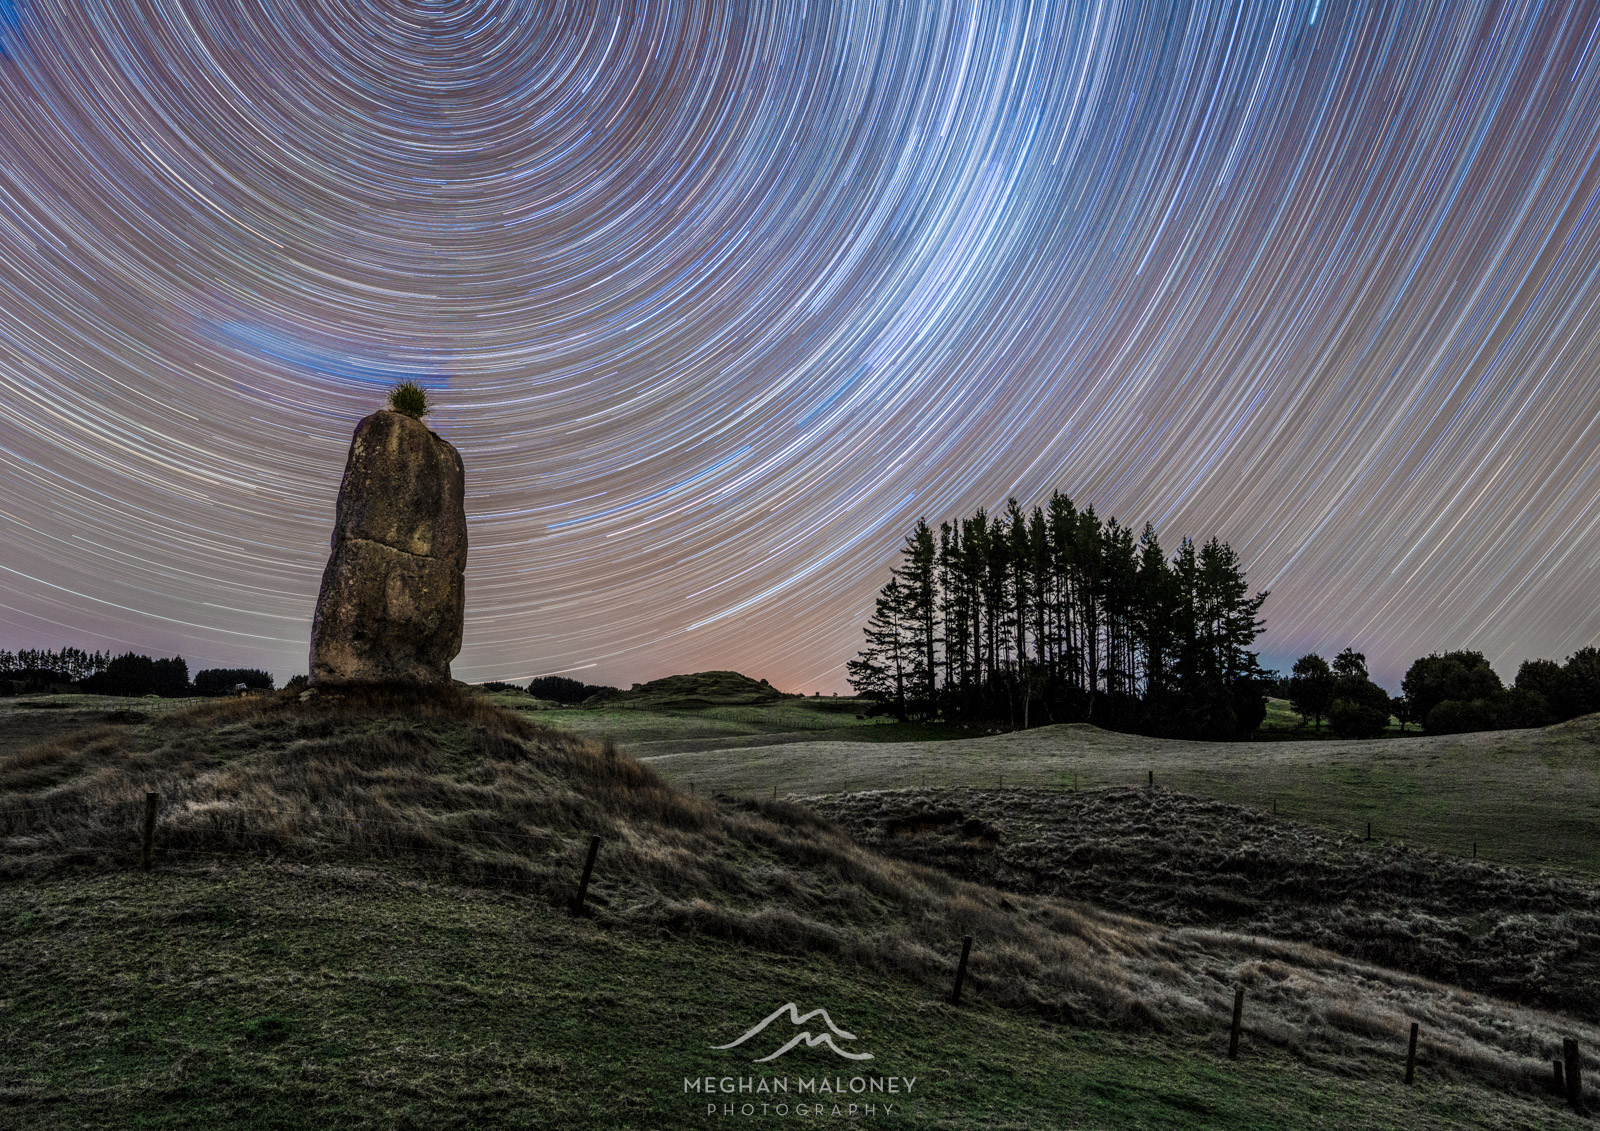
A good foreground composition will make or break your shot. In the Southern Hemisphere, if you want a classic star trail image you'll need to be pointing directly south - by classic I mean a small circle in the middle with rotating circles getting larger and larger around the outside - these are called circumpolar star trails. And of course, it's the opposite in the Northern Hemisphere, you need to be pointing north. I like the circular effect in my images so I generally try to find south facing locations that also have good compositions.
However, you can actually shoot star trails in any compass direction, they will just look different - if you shoot west or east they will look more like a star path travelling across the frame without the full circular effect. The example below is a stunning star trail image taken by my friend and NZ photographer Andrew Francombe looking west at Cathedral Cove, Coromandel in NZ. This is a 3 hour long sequence of 10 minute exposures, and I was so thrilled for Andrew that this image was selected as a finalist in the Landscape Category of the NZ Geo Photography Competition in 2021.

Using the PhotoPills App to Plan
I can't stress enough how important the PhotoPills app is in my landscape photography planning - not only for night photography but also for daytime planning as well. If I am trying to decide whether a location will work, I'll look at the location on the PhotoPills map for the day/time I intend to visit. These images below show me the location with the moon phase which is important for a dark sky and the angle of the Milky Way at 3am in the morning when I took my shots.

This not only enables me to establish the direction the location is facing but it also gives me an idea whether or not the Milky Way will be in the frame at the time I want to shoot. The cleanest results will be without the Milky Way as the volume of stars in the galaxy tend to create a blurred effect in part of the trails otherwise.
.jpg)
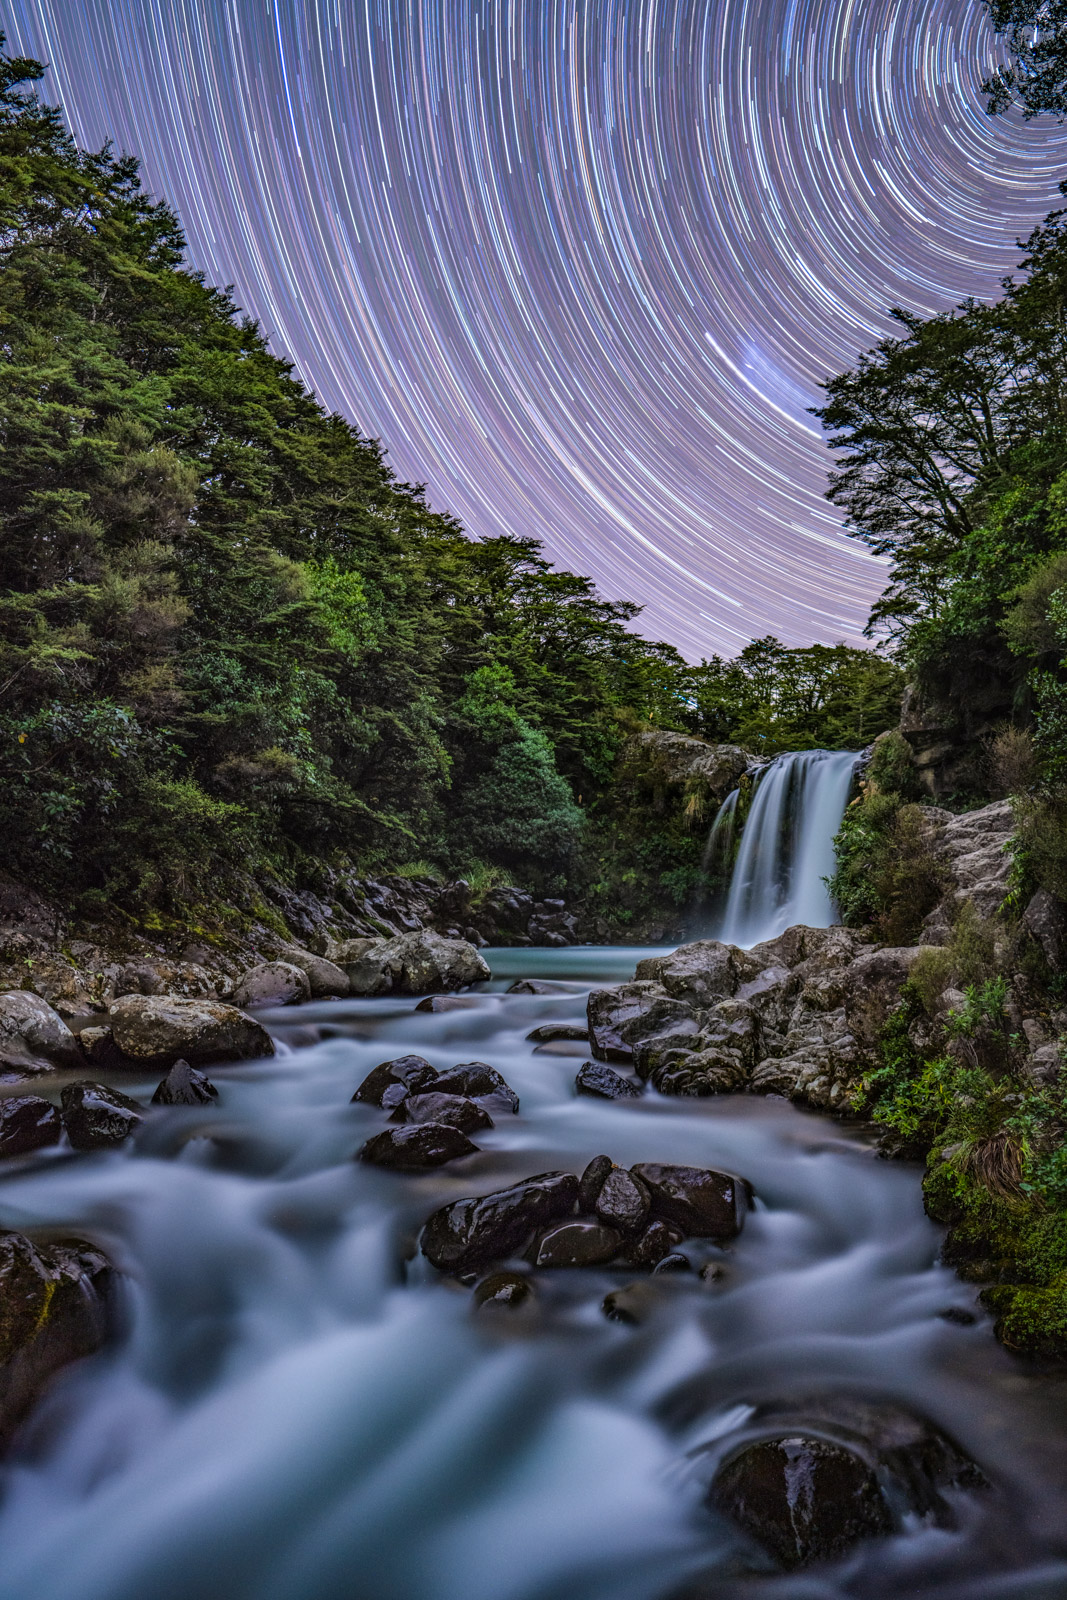
When you are at the location, I recommend using the PhotoPills Night AR function during the day to double check the best time to shoot and whether the composition lines up as you had intended. This is how I discovered when I arrived to scout beforehand that the waterfall shot needed to be from 3am onwards to avoid the Milky Way in the scene, 10pm would have meant a whole corner of the Milky Way was visible in the results as you can see from this single astro image taken at exactly that time.

In the two jetty/rock images further above in this post which were shot on a single night, you can also see that the earlier jetty shot (captured 10pm-midnight) there is no Milky Way in the sky, but by the time I shot the rock image (1am-3am) the Milky Way angle was low enough that it appeared in the image.
You can also use the PhotoPills App to calculate what the effect will look like for how long you plan to shoot under the Star Trails section.

There are a number of different software programmes that will help blend your sequence of shots together to create the star trails. I have used both StarStax in the past (it's free and works for both Windows and Mac) and PhotoShop.
While I'm not going to go into the editing process in depth (that's a whole other post on its own!), the basic premise is that these programmes will join up the individual images to create a longer trail. StarStax is free software, but I prefer to use Photoshop since it's integrated with Lightroom and the process is just as straightforward.
StarStax is simple to use with step by step instructions and offers a number of different blending options which can be handy for different effects (i.e. comet mode) but you need to use JPEGs with it and the end result is a full-size JPEG, whereas with Photoshop you can use your RAW files as layers and end up with a larger TIFF file which may be easier to do final edits on in Lightroom as the image is not as compressed.
.jpg)
To use Photoshop you just need to select all the layers in Lightroom, right-click to Open as Layers in Photoshop, make sure all Layers are selected and then choose the Lighten mode from the dropdown above the Layers. You can then save this file which will put it back into Lightroom automatically for final editing. My final image is below. You could argue that you would need to pixel peep to see the difference between StarStax and Photoshop, however I do think Photoshop's result ends up with more visible star trails which I prefer.
A star trail image with a strong foreground composition that adds to the scene is a beautiful way to capture the stunning night sky. With a little bit of patience and practice, you can do it too. Just remember to find a dark location, use a wide-angle lens with a fairly wide aperture, and experiment with different exposure times to suit your personal equipment and processing preferences. And finally, happy shooting!

Sign up to my newsletter to get all the good stuff!