
How to Use the Border Brush in The Fantasy Map Builder
Procreate & Photoshop Tutorial
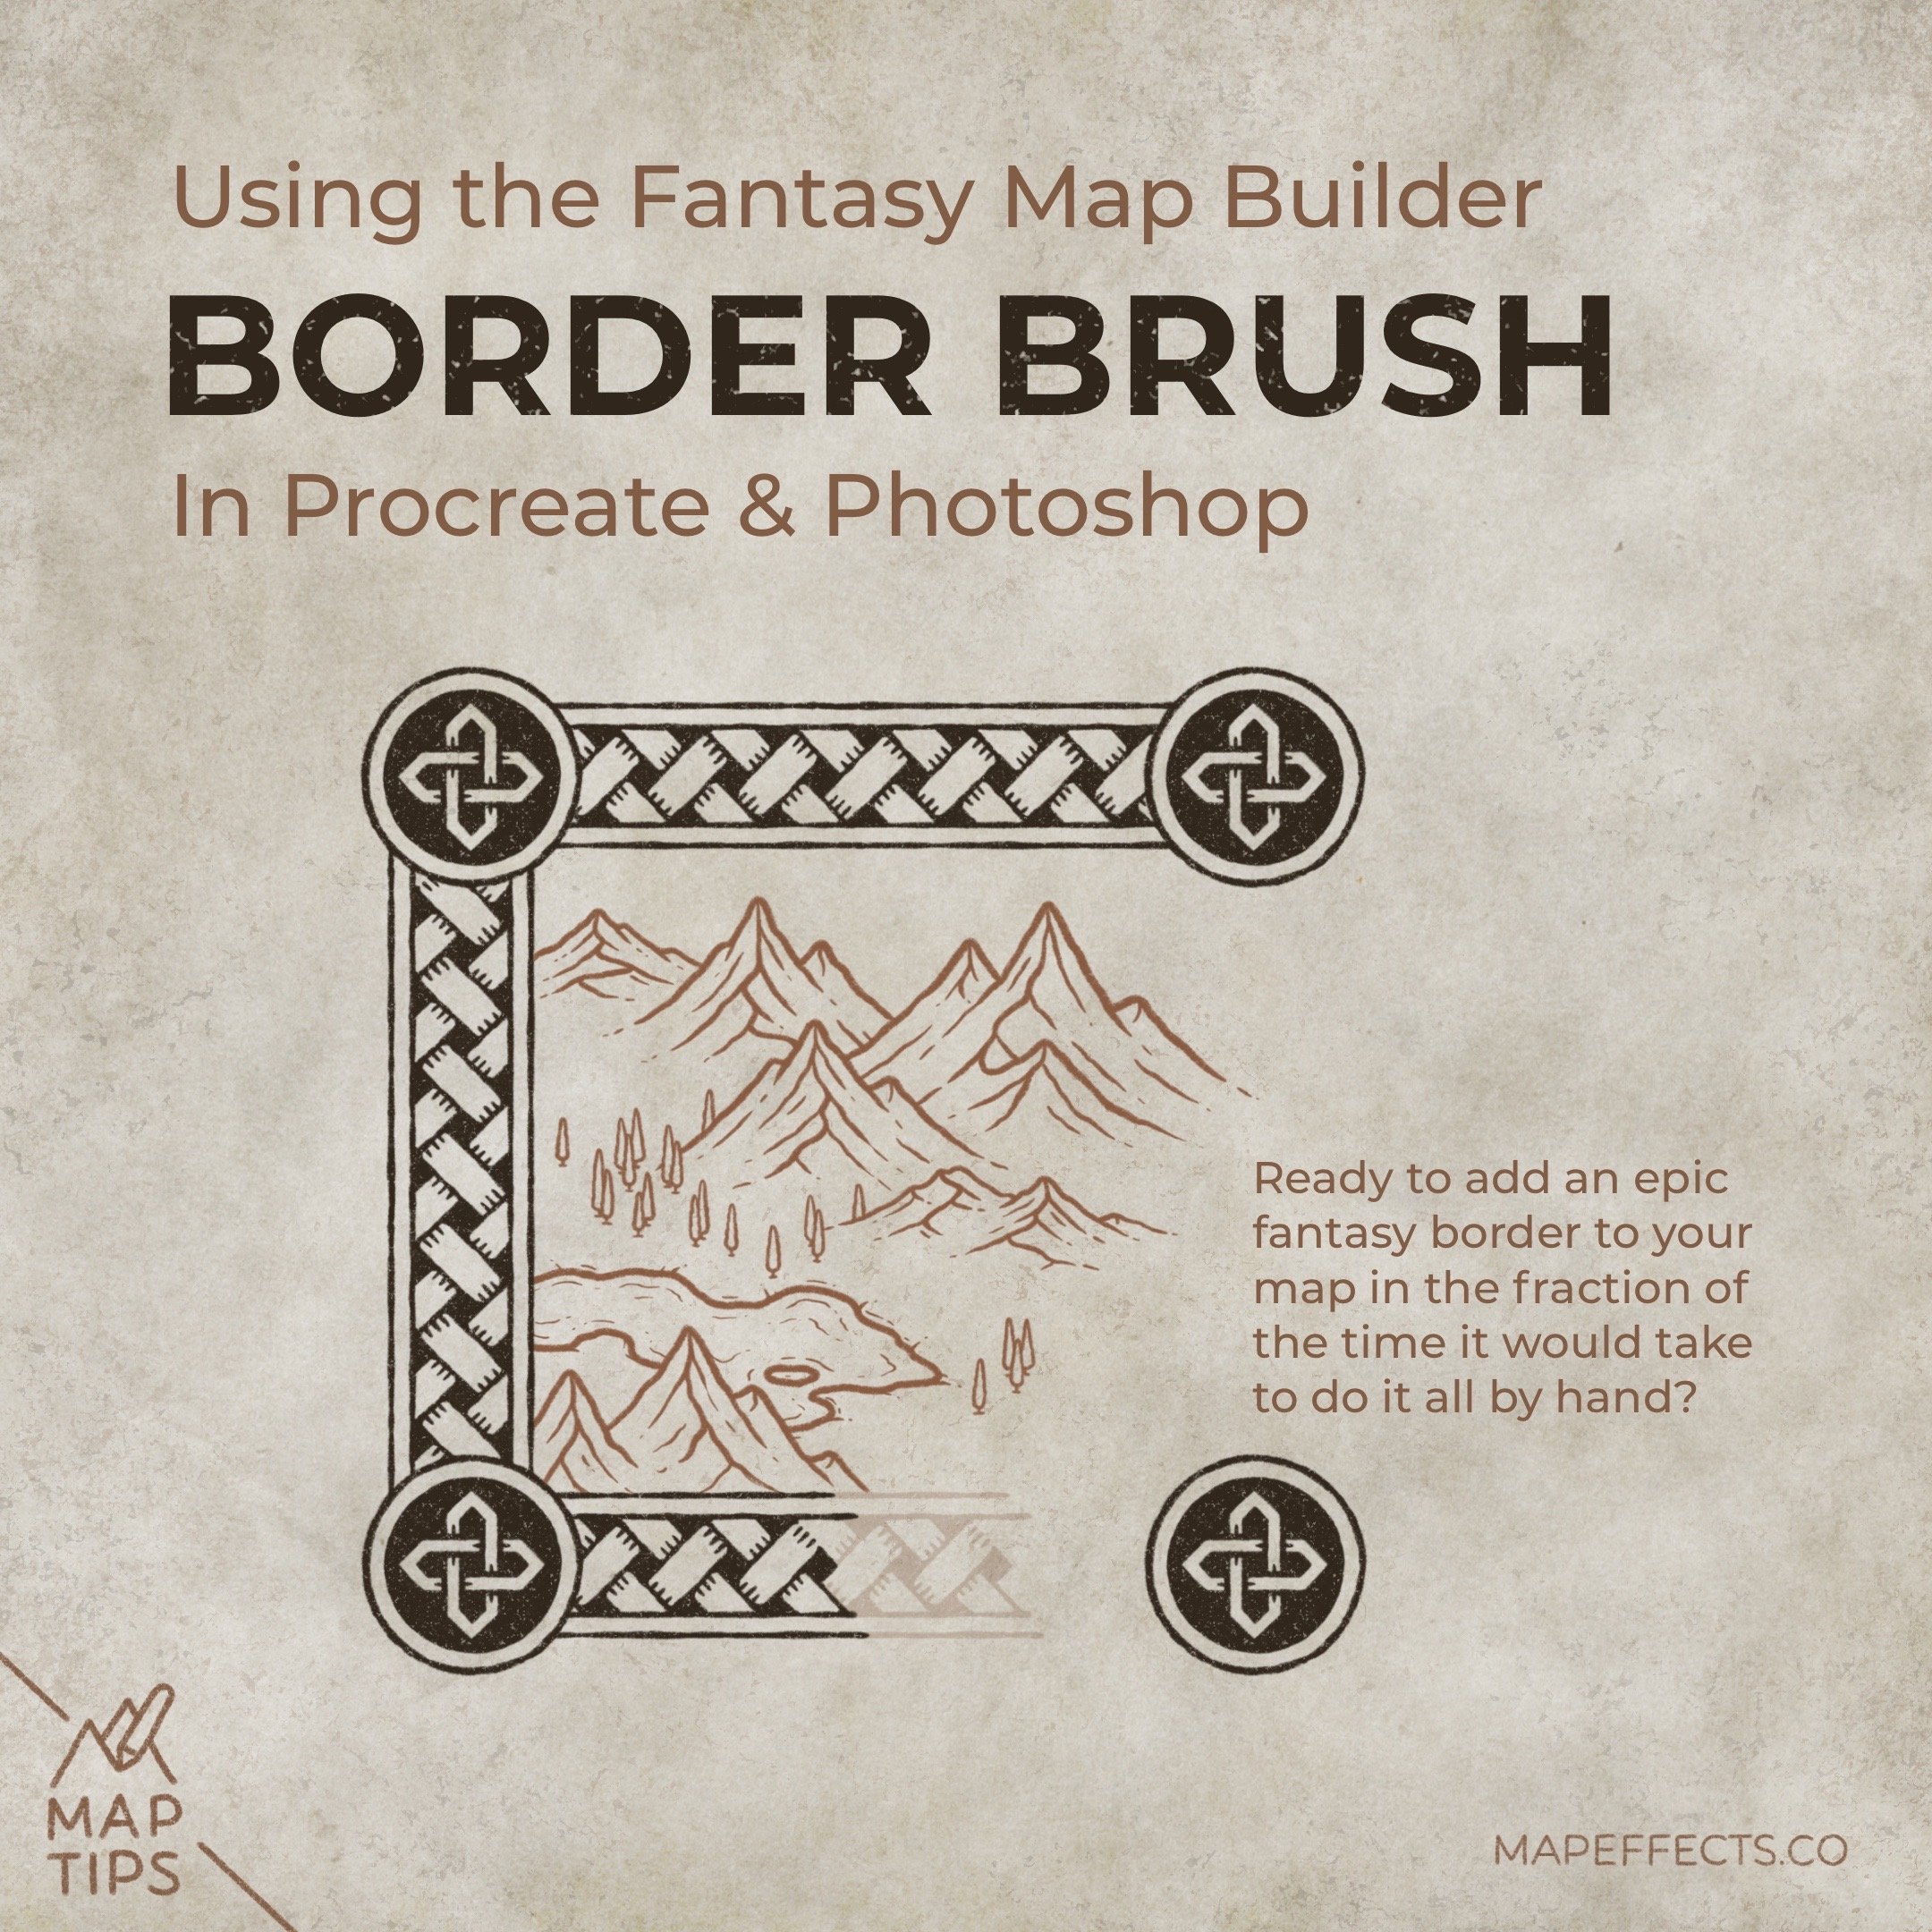
Do you want to add an epic fantasy border to your map, but you don’t know where to begin? Or perhaps you do know, and that’s the problem because you know how long it takes to do one by hand. This is why I added a new border brush in the latest update of The Fantasy Map Builder, to make the process of putting the finishing touches of your map that much easier!
All the brushes and the building in this tutorial are available in The Fantasy Map Builder by Map Effects

Add A Temporary Border
You can add your final border at the end of the project, or at the beginning, the choice is really up to you. But, I prefer to add my final border at the end and use a temporary border while I work on the map.
The reason is if I make major changes to the composition of the map I don’t have to keep modifying the border at the same time.
Plus, the temporary border will act as a guide in the following steps. So let's get into it!
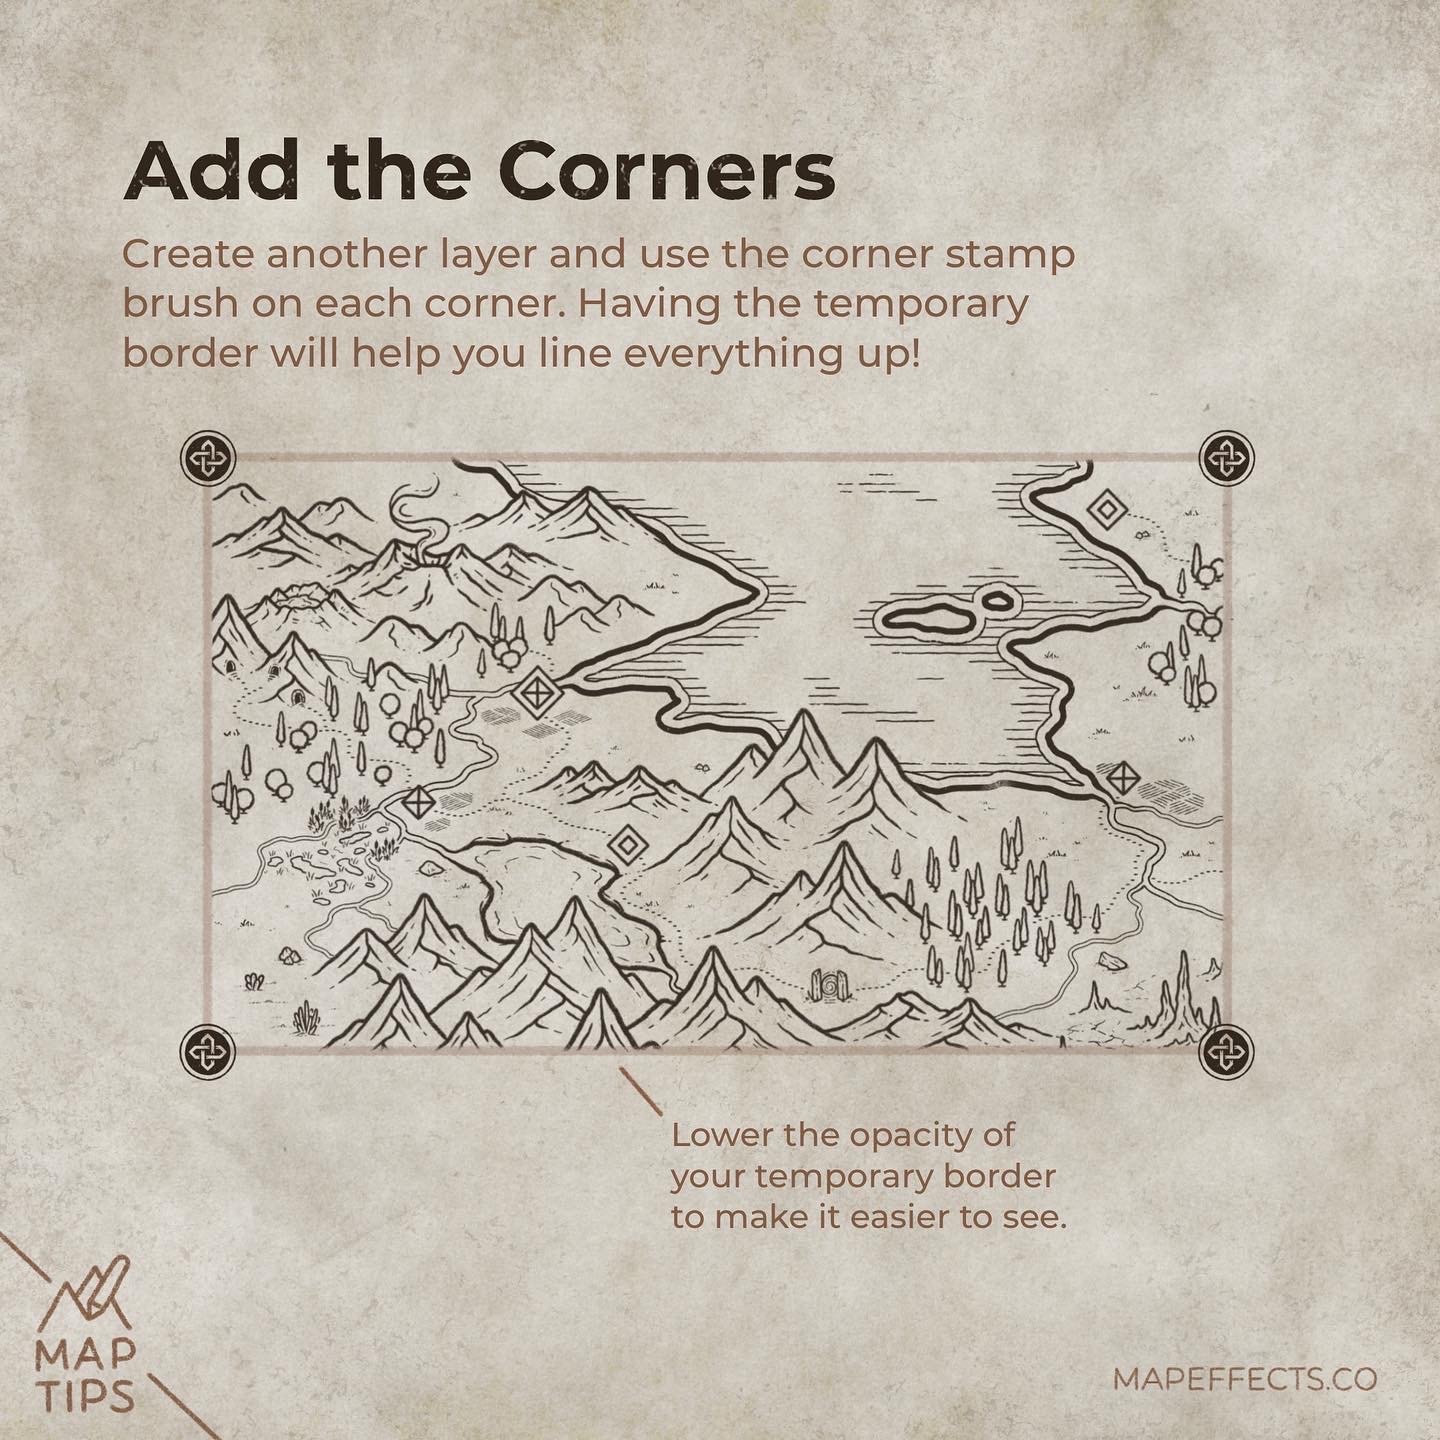
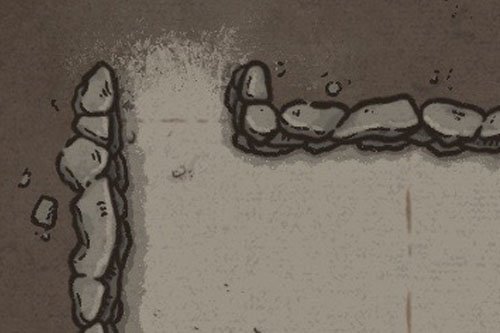
Add the Corners
First, you want to create a new layer above the layer with your temp border. Then lower the opacity of the temp border layer and add the corners for your final border with the stamp brush.
There are two versions of this border included in The Fantasy Map Builder, a simple and a detailed version. For this tutorial, I will be using the detailed version.

Add the Border - Procreate
For now, you want to keep your corners and your border on different layers. So, create another layer, tap on it, and select the option to turn on “Drawing Assist”. Now use your border brush to draw between the corners
By having drawing assist on, it will only allow you to draw perfectly straight horizontal or vertical lines so the border remains properly lined up.
I am pushing my perfectionism to the side and keeping things messy so you know what you should be seeing at this point. We will clean this up in a moment!
More Tutorials You May Enjoy

Add the Border - Photoshop
In Photoshop you can do this a little bit differently. Create another layer separate from your corners. Now click on one of those corners, hold down Shift on your keyboard, and drag your mouse horizontally or vertically to draw a straight line.
Make sure when you click initially with your mouse you hold down the button, then hold down shift and drag the mouse. The sequence is important.
Now let’s clean this up!

Clean Things Up
Since everything is on its own layer, you can now easily erase the border anywhere it overlaps with the corners. If you’re in Procreate it is worth noting you will want to turn off “Drawing Assist” or it will make erasing a challenge.
Be sure to erase where the map is crossing into the border as well to keep things looking clean and professional!
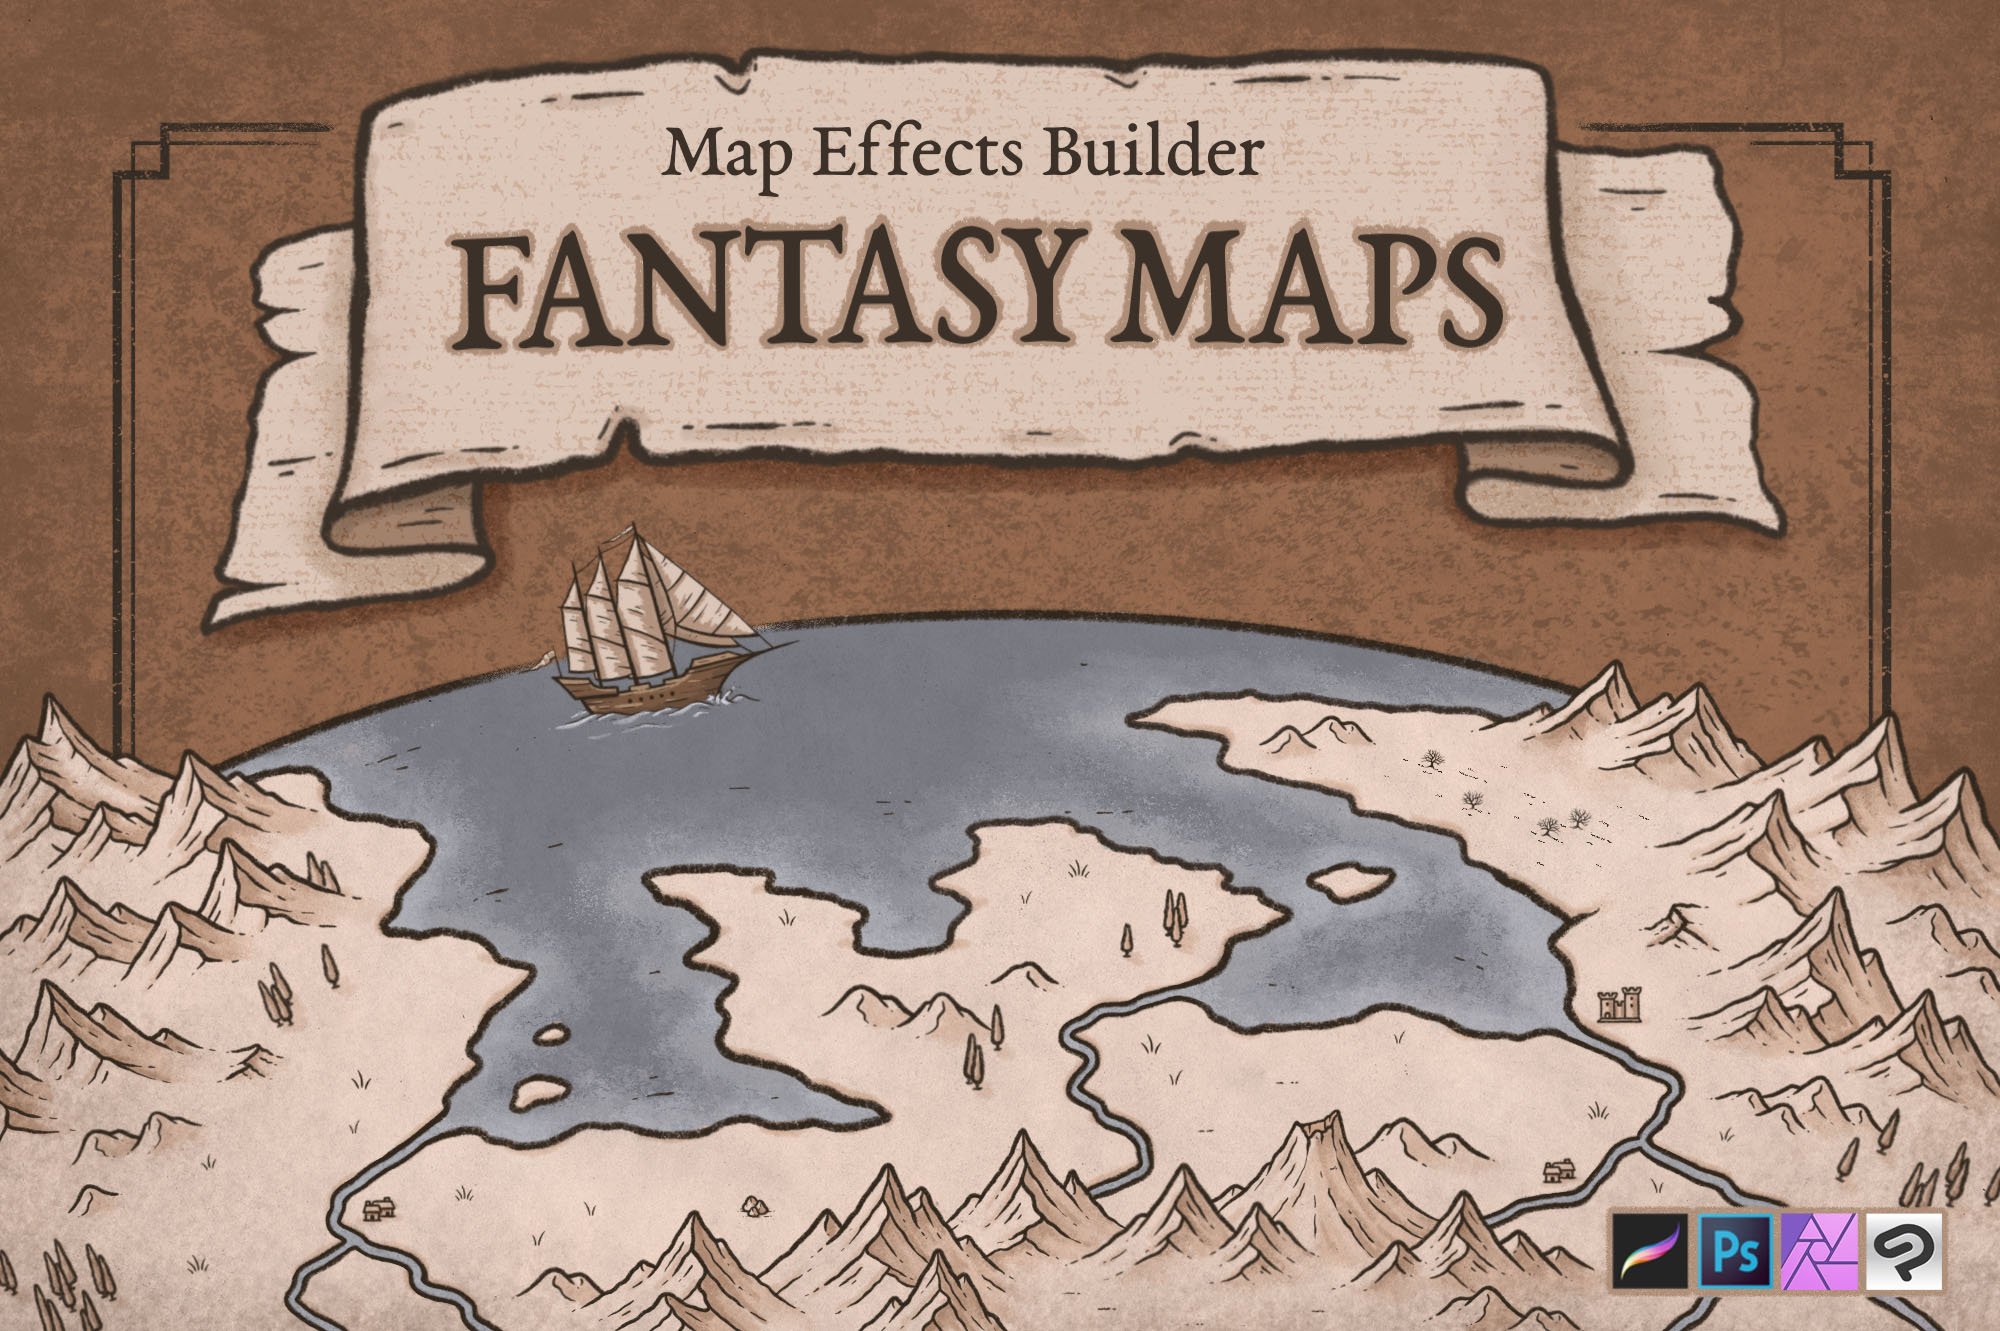
The Fantasy Map Builder
$34 | Now Compatible with Procreate, Photoshop, Affinity, & Clip Studio Paint
Easily create hand-drawn fantasy maps for your upcoming fantasy novel or next role playing campaign without learning how to draw! Whether you want a map for the fantasy book you’re writing or want to make your role playing campaign more immersive, this has you covered. Includes 300+ hand-drawn features to help you map your story!
If you found this tutorial helpful be sure to follow MapEffects on Instagram and tag me with the map you create following this tutorial and I may feature your work! Thank you, and I look forward to seeing you map your story!
Happy Mapping!
- Josh
