Introduction: Godox MF-12 Flash Diffuser
I’m a big fan of Youtube videos for learning, and I kept seeing macro photographers using the Godox MF-12 lighting setup and liked what I saw. So I bought myself a Godox MF-12 Speedlight set up.
I started testing it and found that the included dome diffusers were of little or no value, so once again, I went to Youtube and looked for MF-12 diffusers. Allen Wall, https://www.youtube.com/watch?v=YNS0atyD910 , uses a piece of velum taped to the flash heads to create a diffuser dome. That was cool and cheap, but it also flapped around in the wind too much.
Then I found a video by Stewart Wood, https://www.youtube.com/watch?v=KQYzgtA9Ufw&t=300s , building a diffuser attached to the flash holder on the front of the lens. I liked that but didn’t care for the use of 400, alright, maybe just 6 or 7 adapter rings to attach the diffuser itself. I also wasn’t fond of the cloth device he used for the actual diffuser. Once again, this seemed too floppy. So I took what I had learned and set out to develop what I consider a better system.
Supplies
3D Printer
Hot-Glue
Yexpress Plastic Cutting Board Mats, Frosted 11”x 17” on Amazon https://www.amazon.com/dp/B09DKJBNG4?psc=1&ref=ppx_yo2_dt_b_product_details
1/8” bungee cord about 5” long
“Packing Foam” from Walmart
Step 1: Print Diffuser Adapter
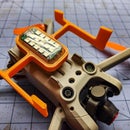
The first thing was to design a 3D-printed Diffuser Adapter for mounting the diffuser in front of the flash units. Use the accompanying .stl file to 3D-print your Diffuser Adapter.
Update- After I took these photos I moved the diffuser further from the strobes with a longer extension on the mounting ring. So folks wanted the shorter mount so I have uploaded the .stl for it below.
Step 2: Attach Adapter to MF-12
Then you will find that the tapered portion of the adapter fits snugly inside the MF-12 “Adapter Ring.” Next, I use Hot-Glue to hold the Diffuser Adapter in place. I only apply the Hot-Glue to the exterior of the two parts to be easily removed if need be. Also, be very careful applying the glue as the flash units need to slide around the “Adapter Ring,” and the adhesive can interfere with that movement.
Step 3: Cut Out Diffuser
Next, I designed the diffuser itself using card stock to determine the correct shape. I then transferred the design to CAD then to a .pdf file. The MF-12 Diffuser.pdf can be printed full size onto a Legal (11”x14”) sheet of paper. You then need to acquire a sheet of “Natural Polyproylene stress relieved sheet .03” thick a min. of 12”W x 14L” with one side smooth and the other side matte.” You can find this material online. I then apply a light coating of spray glue to the printed layout and stick it to the Polypropylene sheet. I then used a pair of large scissors or tin snips to cut out her diffuser. I then drill the holes, either 1/8” to use without a gromet or 5/16” to use with a gromet. Finally, remove the pattern and clean the diffuser with acetone as required.
Attachments
Step 4: Cut Bungee Cord
Take a piece of 1/8” bungee cord about 5” long and fold over one end and wrap with a stiff wire or tie a knot in it. Measure from the knot 2 ½” and mark with a Sharpie.
Step 5:
Feed the bungee through the holes in the diffuser, pulling it tight and folding over and wrapping with wire or tying a knot to leave 2 ½” of bungee to stretch. Trim off the excess bungee.
Fit the diffuser into the groove in the 3D-printed Diffuser Adapter and work it around finally placing the bungee in the bottom of the Diffuser Adapter groove.
Adjust as required and go out and shoot some great photos!
If you feel you need more diffusion spray glue thin sheets of “Packing Foam” from Walmart to the diffuser, one side should be enough.

Runner Up in the
Photography Challenge


