For photographers, the camera’s lens is crucial in capturing stunning moments and producing quality images. However, getting sensor dust spots in your pictures is common when switching the lenses during photo shooting. If not removed, these spots will continue appearing on all your images in the same area.
The modern Electronic in-camera has self-cleaning modes but is insufficient for attached sticky particles. Also, the camera is frequently exposed with interchangeable lenses, and sensor dust is present daily. Cleaning the camera seems difficult and daunting, but the risks attached can be removed with the utmost care.
Table of Contents
What is sensor dust, and why cleaning it is essential?
During the lens changing, the sensors are exposed, and sticky dust particles attach to its surface, deteriorating the image quality. Dust appears as diffused because the particles are present above the sensor, the outer surface of the sensor’s filters.
Because of the diffused particles, dust casts a shadow on images and can be visible with higher apertures. Also, depending upon the dust nature, some particles become fainter, and appropriate apertures produce them.
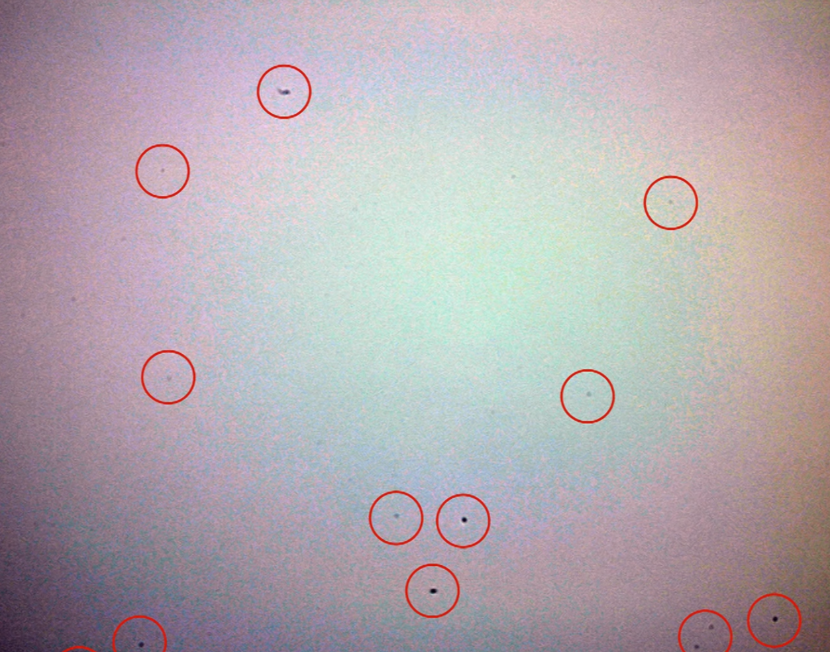
So, when sensor dust appears, the images show blurry spots as in the hereunder image:
How do you check your camera sensor for dust?
Getting camera spots in your images does not necessarily mean that you have to clean your sensors. The Mirrorless cameras have a built-in mechanism to preview if debris or dust particles are present.
Method 1- changing the aperture
- Inspect the sensor by removing the lenses or using the sensor inspection devices.
- Also, keep your camera’s ISO to the lowest, usually 100 for Canon and 200 for Nikon cameras.
- After setting the mode dial to “Aperture Priority,” set the aperture between f11-f22 because the spots may not be visible at more minor, and a larger aperture provides too many details.
- Take photos on different paper or white walls, one image at the brightest aperture of (f/1.8-f/3.5) and another at a much smaller lens gap (f/13-22).
- Then, compare these two photos on the camera’s LCD screen and check if the dots appear in the same place.
Method 2- Using the Photoshop
- Open the image in Photoshop and select the level of adjustments by going to “Layer.”
- Tap “New Adjustment Layer” and click on “Levels.” The narrowness of the histogram peak indicates the tonal gradient, and contrasting the end sliders shows the sensors’ dust.
- Also, Photoshop Lightroom can preview the dots or spots by inverting the image and raising contrast levels to view the image.
The lens spots and sensor spots are different because lens spots appear larger and more diffused, quickly affecting the quality. These spots can be removed by changing the lenses and using a wide-angle aperture.
However, sensor spots can be analyzed by taking photos at different apertures and zooming in the camera to see the dust spots at the same point.
How to clean a camera sensor?
After ensuring that the camera sensor has dust spots, seeking a professional for your camera sensors is the best thing. However, it costs time, and professional services are expensive so that it could be more viable. Also, cleaning sensors will be easy with care and following the abovementioned methods.
Method 1- Camera’s Self-cleaning
Most DSLRs and high-end cameras have built-in sensor cleaning options, which can be activated whenever required. Self-cleaning is the safest and simplest way of cleaning the camera sensors by shaking to lose the dust. Follow the steps to remove the sensor’s dust:
Step 1- Select the Menu Bar

- Turn on the camera and select the “Setup” icon from the menu bar.
Step 2- Cleaning Mode
From the popup window, navigate and click on the “Cleaning Mode.”
This method is perfect but the least effective because sticky dust particles are hard to remove; therefore, manual cleaning is best. Cleaning mode requires a minimum of 75% battery percentage, or otherwise, it will not clean.
Method 2- Dry Cleaning
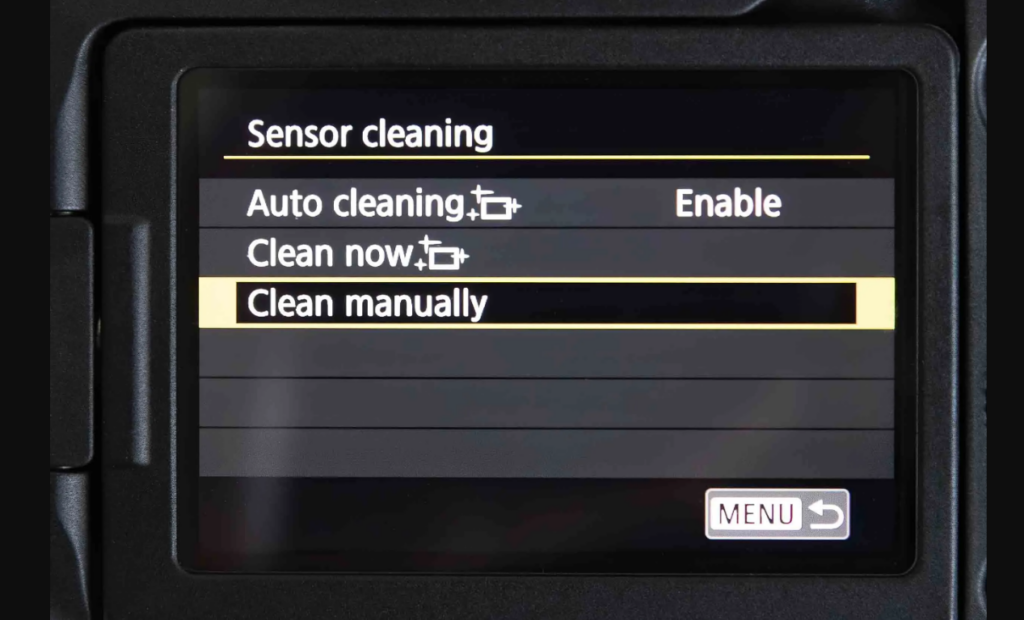
Before cleaning the camera sensors, click the menu bar and select “clean camera manually.” It will flip the mirror and give access to the sensor, but some cameras power off to ensure the mirror is back down. For Mirrorless cameras, the sensors will be exposed after taking off the lens or camera lid.
Step 1- Clean the outskirts of the camera
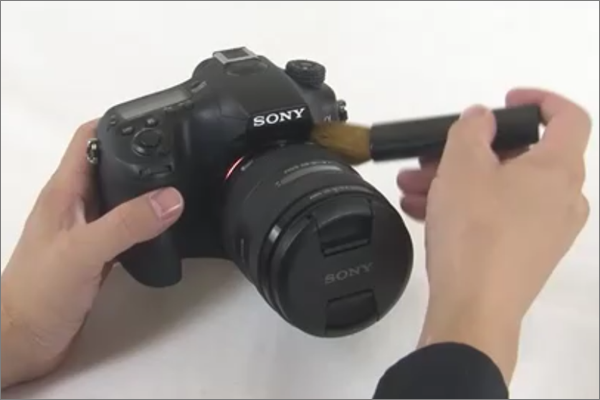
- Gently brush the outer surfaces of the camera to remove any dust.
- Then, blow off the dust from sensitive camera parts with a blower.
- Remove the camera lid and blow the dust off.
Step 2- Preparing the Camera

- After cleaning the outskirts, turn off the camera and detach the lens.
- Carefully hold the camera upside down and avoid touching the sensors because of its sensitivity.
Step 3- Using the Blower
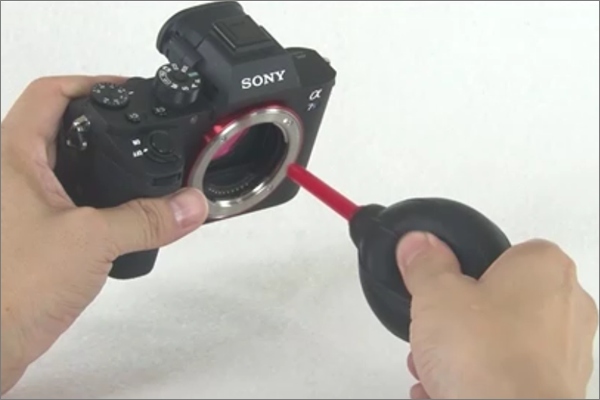
- Use the blower, specifically the rocket blowers, to remove the dust from the internal sensor surface and the surroundings.
- The dust will fall from the sensors with a few gentle air bursts.
Step 4- Ensure the dust removed
- Attach the lens again and check for any dust spots by performing the abovementioned methods.
Things to avoid
- Ensure you have complete control of the amount and pressure of the air you are blowing into the camera’s sensor.
- Be careful with the blower, and do not enter the tip inside the sensor surface. So, to avoid sensor damage, the air blower must be at the lens mount area.
- And, never use canned or compressed air because their propellant can cause residue on the sensor, so rocket blowers are the best option.
Method 3- Wet Cleaning
When there is a smudge on your camera sensor, such as an oil stain or liquid, brushing the sensors will not clean the surface. Therefore, swabs and solvents are excellent for removing the liquid spots by following the simple steps:
Step 1- Preparing the Camera

- Selecting the manual cleaning options on the camera will lock the mirror and ensure the sensors are safe.
- Take the excellent quality camera swabs and, using the blower, blow air to remove any attached lint pieces that get stuck.
Step 2- Cleaning the Sensors
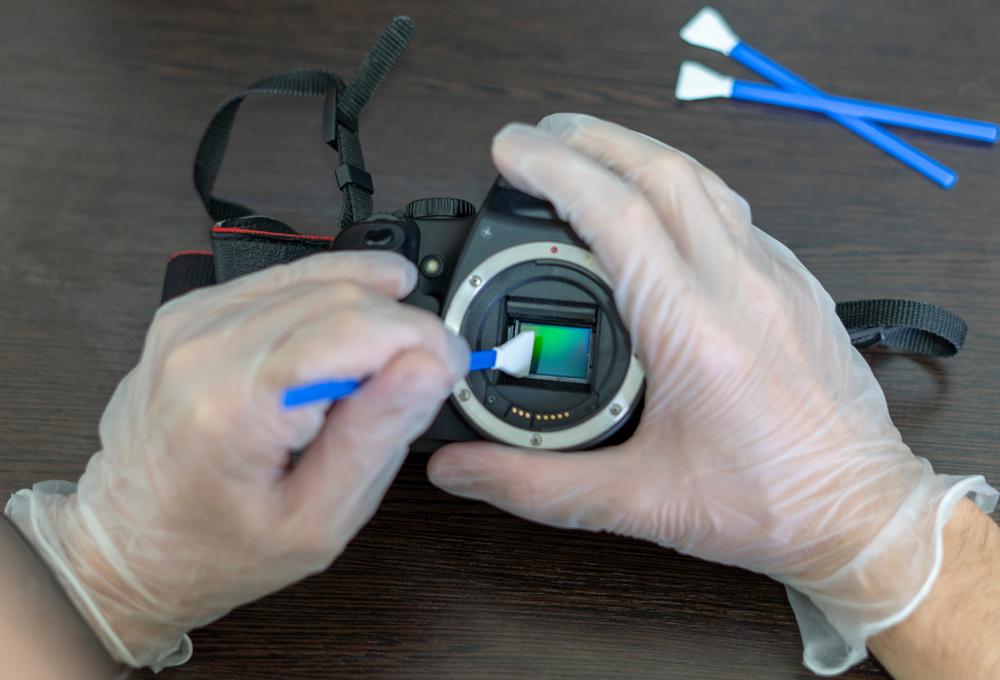
- Use two drops of the standard solvent solutions to moisten the swab carefully.
- With great care, place the swab onto one side of the sensor surface and gently move the swab to the other side with a single smooth motion.
- Repeat the process smoothly to cover all sides.
Step 3- Inspecting the dust
- Inspect the sensor’s surface with a loupe to ensure all the dust particles are removed.
- In addition, turn off the camera, attach another lens, and then click a shot to analyze the image clarity by the abovementioned methods.
Things to consider
- The versatility of swabs ensures that you pick them according to your camera’s sensor surface.
- Extreme care is mandatory with no force because it will damage the sensitive surface of sensors.
- The swab may leave a lint, so use the blower to remove any swab residues from the surface.
- Avoid using too much liquid because it will result in streaks, so the lesser fluid provides better results.
- If streaks appear after adding too much solution, wait a few minutes and add less. Then, repeat the process with extreme care and minimum fluid to remove the issue.
Method 4- Clean Gel Cleaning
Gel cleaning provides incredible camera sensor cleaning options by precisely picking up dust or liquids. So, follow the steps to remove the dust spots from your images,
Steps 1- Getting the Camera ready
- Keep your camera upside down and give a few gentle air bursts from the rocket blower.
- The controlled air will remove loose dirt and ensure smooth dust pick-up with gel.
- Before cleaning, clean the gel surface by placing it on sticky paper.
Step 2- Camera cleaning mode
- Then, select the “camera cleaning mode from the camera setup.”
- On the DSLRs, it will flip the mirror up and expose the sensor surface
- For Mirrorless cameras, it’s required for in-camera stabilizations.
Step 3- Gel cleaning the surface
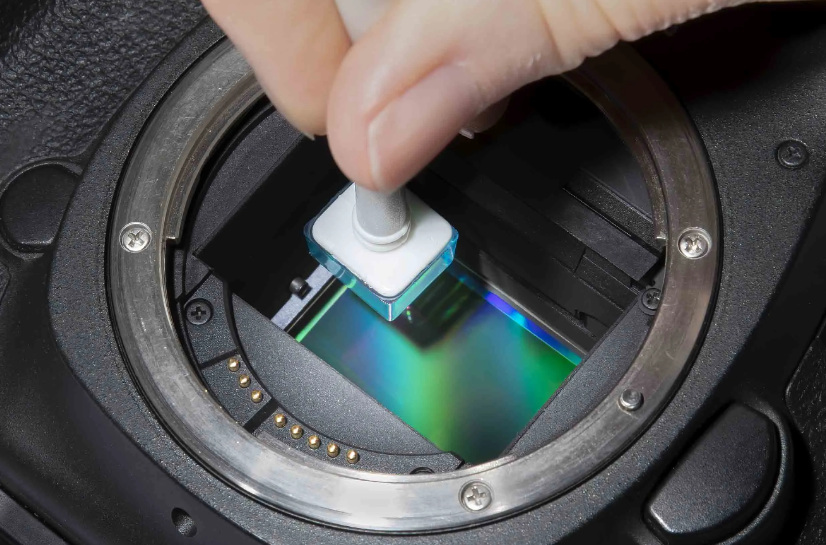
- Place the flat surface of the gel parallel to the sensor surface and gently press it to pick up any particles.
- After a gentle press, lift it straight up and repeat the process to cover the entire surface.
Step 4- Cleaning the Gel
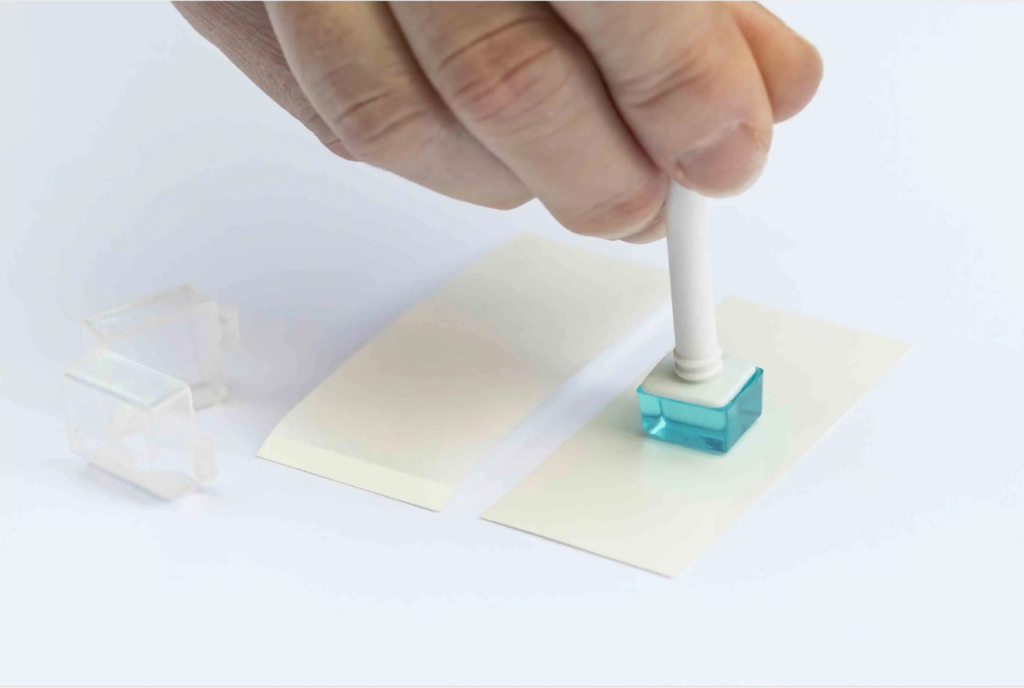
- After cleaning the sensor’s surface, place the gel onto the sticky papers.
- The paper is more adhesive than gel; any particles will be transferred, making the gel clean.
Things to consider
- Carefully cover the silicon tip of the gel stick to avoid any contamination, and never touch the tip surface to protect it from dust surfaces.
- Do not use canned air for blasting and removing the loose dirt.
- Apply a gentle press during the cleaning and ensure the gel does not touch the surroundings.
- Turn off the sensor cleaning mode when you are done cleaning to avoid any new contamination.
Tips for cleaning your camera sensor
- The cleaning of the camera sensor needs careful attention because a slight issue can damage the sensors permanently. Therefore, a few things must be considered for an effective cleaning process.
- Fully charge your camera battery before cleaning; the camera will not start the cleaning mode if there isn’t enough battery.
- To avoid recontamination issues, clean in a closed, dust dust-free environment.
- Never use compressed or canned air because it will damage the sensor and other internal parts of the camera.
- Keep your camera sensor closed from unnecessary exposure because it will pick up more dust particles.
- Never use water other than standard solutions to avoid damage to internal parts.
- Avoid unnecessary lens changes, and it will prevent additional dust accumulation on your sensors.
Conclusion
A clean camera sensor broadens the horizon by producing crystal-clear images free from dust spots. However, the sensors are more prone to dust particles when using cameras with interchangeable lenses. So, despite their delicate sensitivity, cleaning the camera sensors with great attention and precision is possible.
By precisely applying the abovementioned methods, you can save time and bring quality to your shootings. Patience and precision is the key, but if you are unsure, then it’s better to seek a professional.
Frequently Asked Questions
Does alcohol damage the camera sensor?
It depends on the combination of “alcohol” that specific solvent contains. The commonly used isopropyl alcohol is inefficient for camera sensor cleaning. The isopropyl will leave residues on the sensor and are difficult to remove.
The “eclipse fluid and gamma fluid” are preferred because they are perfect for removing greasy spots.
Can you clean a camera sensor with lens wipes?
No, because camera sensors are susceptible and more prone to damage. The lens wipes are for glass elements and permanently damage the sensor’s delicate surface with scratches. Instead, sensory cleaning swabs are the perfect alternative to wipes and are harmless to sensors.
Can I use a cloth to clean my camera sensors?
Using the cloth brings more damage to camera sensors because it sheds off small pieces that can trap inside the surface. For this, using standard sensor pads is advisable but with gentle pressure. Also, avoid using cotton buds, and after cleaning, always blow controlled air to remove any trapped particles.


![How to Record Audio on Screen Recording [Step by Step]](https://www.hollyland.com/wp-content/uploads/2024/05/how-to-record-audio-on-screen-recording-step-by-step.jpg)
![How to Screen Record with Audio [Step by Step]](https://www.hollyland.com/wp-content/uploads/2024/05/how-to-screen-record-with-audio-step-by-step.jpg)
![How to Record Audio on PC [Step by Step]](https://www.hollyland.com/wp-content/uploads/2024/05/how-to-record-audio-on-pc-step-by-step.jpg)
![How to Add Audio to PowerPoint [Step by Step]](https://www.hollyland.com/wp-content/uploads/2024/05/how-to-add-audio-to-powerpoint-step-by-step.jpg)