
Introduction
[Border Effect] is a very handy Layer Property feature that creates a customizable border around the contents of a layer or folder. This guide will show you five different scenarios in which you can use the border effect to enhance your work and streamline your workflow.
Accessing the Border Effect Tool
To apply the Border Effect to a layer, go to [Window] and click [Layer property]. Then, in the [Layer property] palette, select the border effect icon, which is the first icon in the first row. This will apply the border effect to your layer.
We can further choose between two effect sub-options.
First is the [Edge] effect, which is uniformly opaque. We can adjust the color and thickness of the edge as desired.
We can also choose whether the edges of the effect will be sharp or not with the [Anti-aliasing] option.
The second is the [Watercolor edge] effect, which is soft and faded and uses the original colors of the edges. We can adjust the effect’s area, opacity, darkness, and blurring width according to our needs.
Use 1: Silhouette Sketching and Then Extracting the Line Art
When silhouette sketching for a new character or object or when painting things like hair, try activating the border effect. This will give you the silhouette’s line art and save you from needing to trace over the silhouette yourself.
While doing so, use a white brush with a black border effect.
And to create overlapping, use multiple layers with the border effect active. You can later merge the layers to keep a single sketch layer without losing the overlapping.
Note: To merge different layers, select them, then right-click and choose [Merge selected layers].
When you are done with the sketch, go to [Layer] and then [Rasterize].
Next, click on [Edit] and select [Convert brightness to opacity].
With this, the white strokes will turn transparent and any grays at the edges of the effect will become semi-transparent.
You can further go over the line art with a brush to adjust its line weight and add details.
Use 2: Creating Dress Designs, Accessories and Lace
Dress designs and accessories are a standard part of a character design process and can be made more efficient for more elaborate dresses using the border effect. You can quickly add elements like ribbons, clasps, belts, bangles, etc., without needing to draw the outlines by hand.
By adding the border effect to pattern brushes, you can use them as lace or dress patterns.
For comic-style dresses, you can also apply the border effect to different jewelry, flowers, and other materials to give them a comic-style line art look. The same can be done for a variety of brushes like tassel brushes, ribbon brushes, hair brushes, jewelry brushes, etc.
Use 3: SFX and Text Legibility
Sound effects (SFX) used in comics often require a border that keeps them from merging with the details behind them. The border effect works on both normal layers and type layers, so it will help retain the SFX’s legibility whether you type it or write freehand.
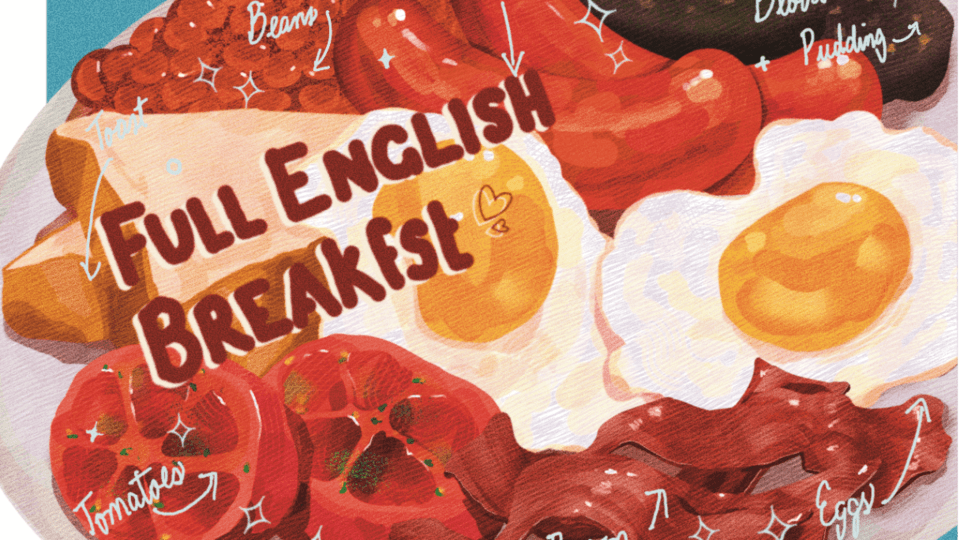
Similarly, you can also use the border effect for other texts that need to stand out from the background. Here I have used it in a poster to keep the text crisp and visible:
Use 4: Creating Sticker Borders and Maps
With the border effect, you can create stickers very easily. Just select the sticker layer and apply the border effect. If the sticker has multiple layers, put them in a folder and enable the border effect in the folder’s [Layer property]. Adjust the thickness as desired.
If you want an edge for the sticker, put the sticker layer or folder in another folder and apply the border effect again. Change the border color to black or any other color and adjust the thickness.
Maps:
If you want to create a world map for your fictional setting, combine the border effect with a textured brush.
Here I have used the rough wash watercolor brush.
Once you are done with the general shape of the map, duplicate the layer and turn off the border effect in the duplicated layer. Then create another layer on top and clip it to the duplicated layer.
Now, using different colors or saturations, map out the different regions and borders inside the map.
You can name the regions in a text layer. Using the border effect on the text layer will help the names stand out from the different backgrounds while staying consistent.
Use 5: Softer Line Art
To make the lines of our line art softer, we can use the watercolor edge. Go to your line art and turn on the watercolor edge option from the border effect sub-options.
I want a very subtle effect so I am using very low opacity.
You can adjust the intensity of the effect to your liking.
Final Thoughts
Thank you for reading! I hope this article helps you make the most out of the Border Effect feature in the Layer property palette.
Feel free to let me know if you have any questions!
Users who liked this post


Comment