
A copy stand is a tool used to capture images of photos, artwork, books, and things of a similar nature. It holds a camera perpendicular to a large and flat surface, upon which the subject rests.
They are handy, but there’s no need to spend a lot when [BlandPasta]’s DIY copy stand based on a cheap IKEA LACK table can be turned into an economical afternoon project with the help of simple hardware and a few 3D printed parts.
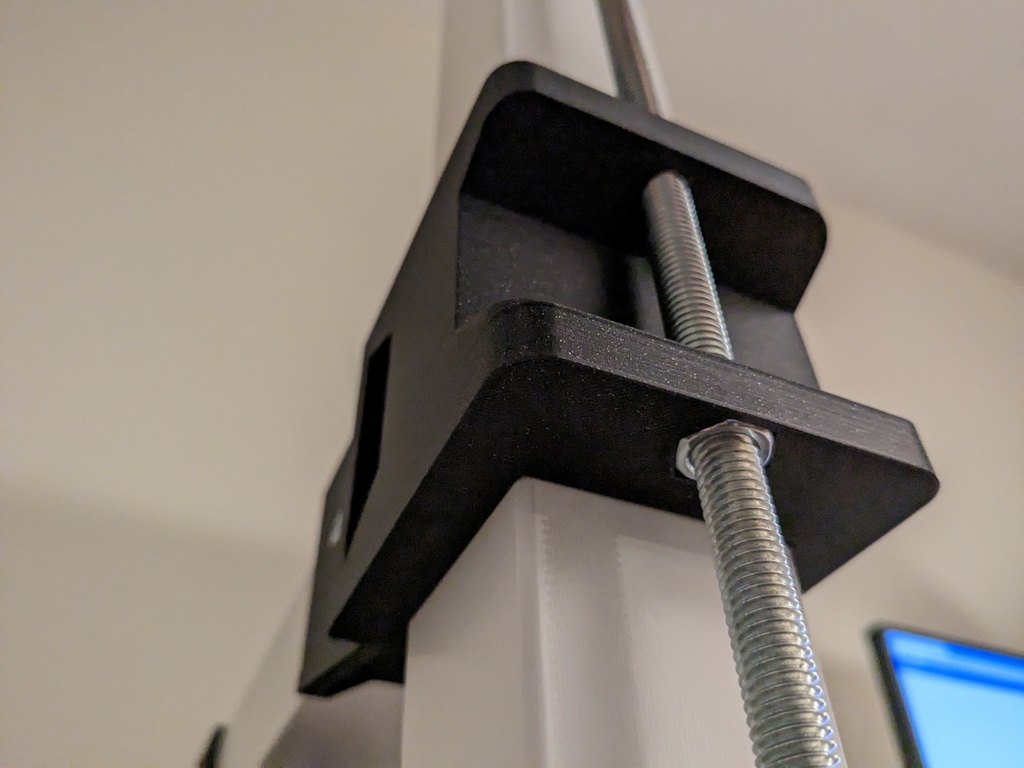
The main structure comes from a mixture of parts from two LACK tables: one small and one normal-sized. A tabletop is used as the bed, and the square legs make up the structural parts with the help of some printed pieces. A threaded rod combined with some captive hardware provides a way to adjust the camera up and down with a crank, while one can manually slide the horizontal camera mount as needed to frame the subject appropriately.
This is a clever remix of IKEA parts, and the somewhat matte white finish of the LACK complements photography well. Adding some DIY LED lighting is about all it takes to get a perfectly serviceable copy stand that won’t break the bank.


Making your own copy stand is cool, but making one out of a generally accessible table and some 3-D printed parts as well as making the instructions and files available is awesome!
I was using one of those tables between the couch and the TV. Sometimes holding a can of beer on it. Sometimes resting legs with feet (without shoes, i swear) on it. A few times the beer spilled. A few weeks after the table started crumbling. It is cardboard inside.
With as cheap and lightweight as they are, would you expect anything else?
I used the base, pole and parallelogram arm of my old B&W enlarger. I just removed the light head and bolted a short focus rail/camera mount in its place. I didn’t even have to drill any holes.
This is clever, and I may make a variant, but when looking at the two cantilevered parts h depending on three plastic brackets (the arm and the camera) I can’t help but imagine it all being really wobbly, and the camera angle deviating from perpendicular. I would want all the brackets to be much beefier, unless the camera is very light.
Those tables have more than doubled in price since I first saw them mentioned on HaD…
Imagine paying 12+ U$D for yay particleboard!
It should be possible to drill holes into the bottom of the legs to fill them with sand.
So, how much sand do you think you can put in a leg in this way? E.g. what kind of drill (diameter) and depth – and what kind of sand – would you suggest for that?
? As mentioned above the legs are pretty much empty. You would just drill a few holes into the thin sheet of MDF that caps off the legs and pour sand in to fill the empty space in between the cardboard scaffolding.
Here is how Ikea’s internal construction looks:
https://www.ikea.com/us/en/images/products/lack-side-table-white__1083778_pe859098_s5.jpg
That is the structure of the tabletop – mathman is referring to the legs, which are mostly air inside with a block of particleboard at the top for the screw in stud to be anchored in, and a thinner piece at the bottom to form the foot of the leg. I don’t know for sure that there isn’t anything inside strengthening the leg, but from tapping the leg of the Lack table forming the printer enclosure next to me it sounds consistently hollow from a little way from the top to almost the very bottom of the leg. A 12mm / 1/2″ auger bit through the bottom of the leg and a funnel to fill with dry sand then cap off with a plug would probably work pretty well here.
Oh. Maybe I have an older version of that table. The legs of mine are massive.
Lets not forget that its also a perfect table for 19” rack equipment. ”LACK RACK”.
Those LACK tables also form the basis of many, many 3D printer enclosures…. The table is cheap, but adding acrylic windows, LEDs etc can add up fast :-)