Thank you so much for your insight! I’ve been really worried as to how sturdy/durable the components of my setup would be; in particular, the attachment points of the 1/4-20 and 3/8-16 screws. I’ve read of the brass studs (Manfrotto Super Clamp) breaking off at the base of the threaded portion, but I managed to find a steel stud (Flashpoint Super Clamp).
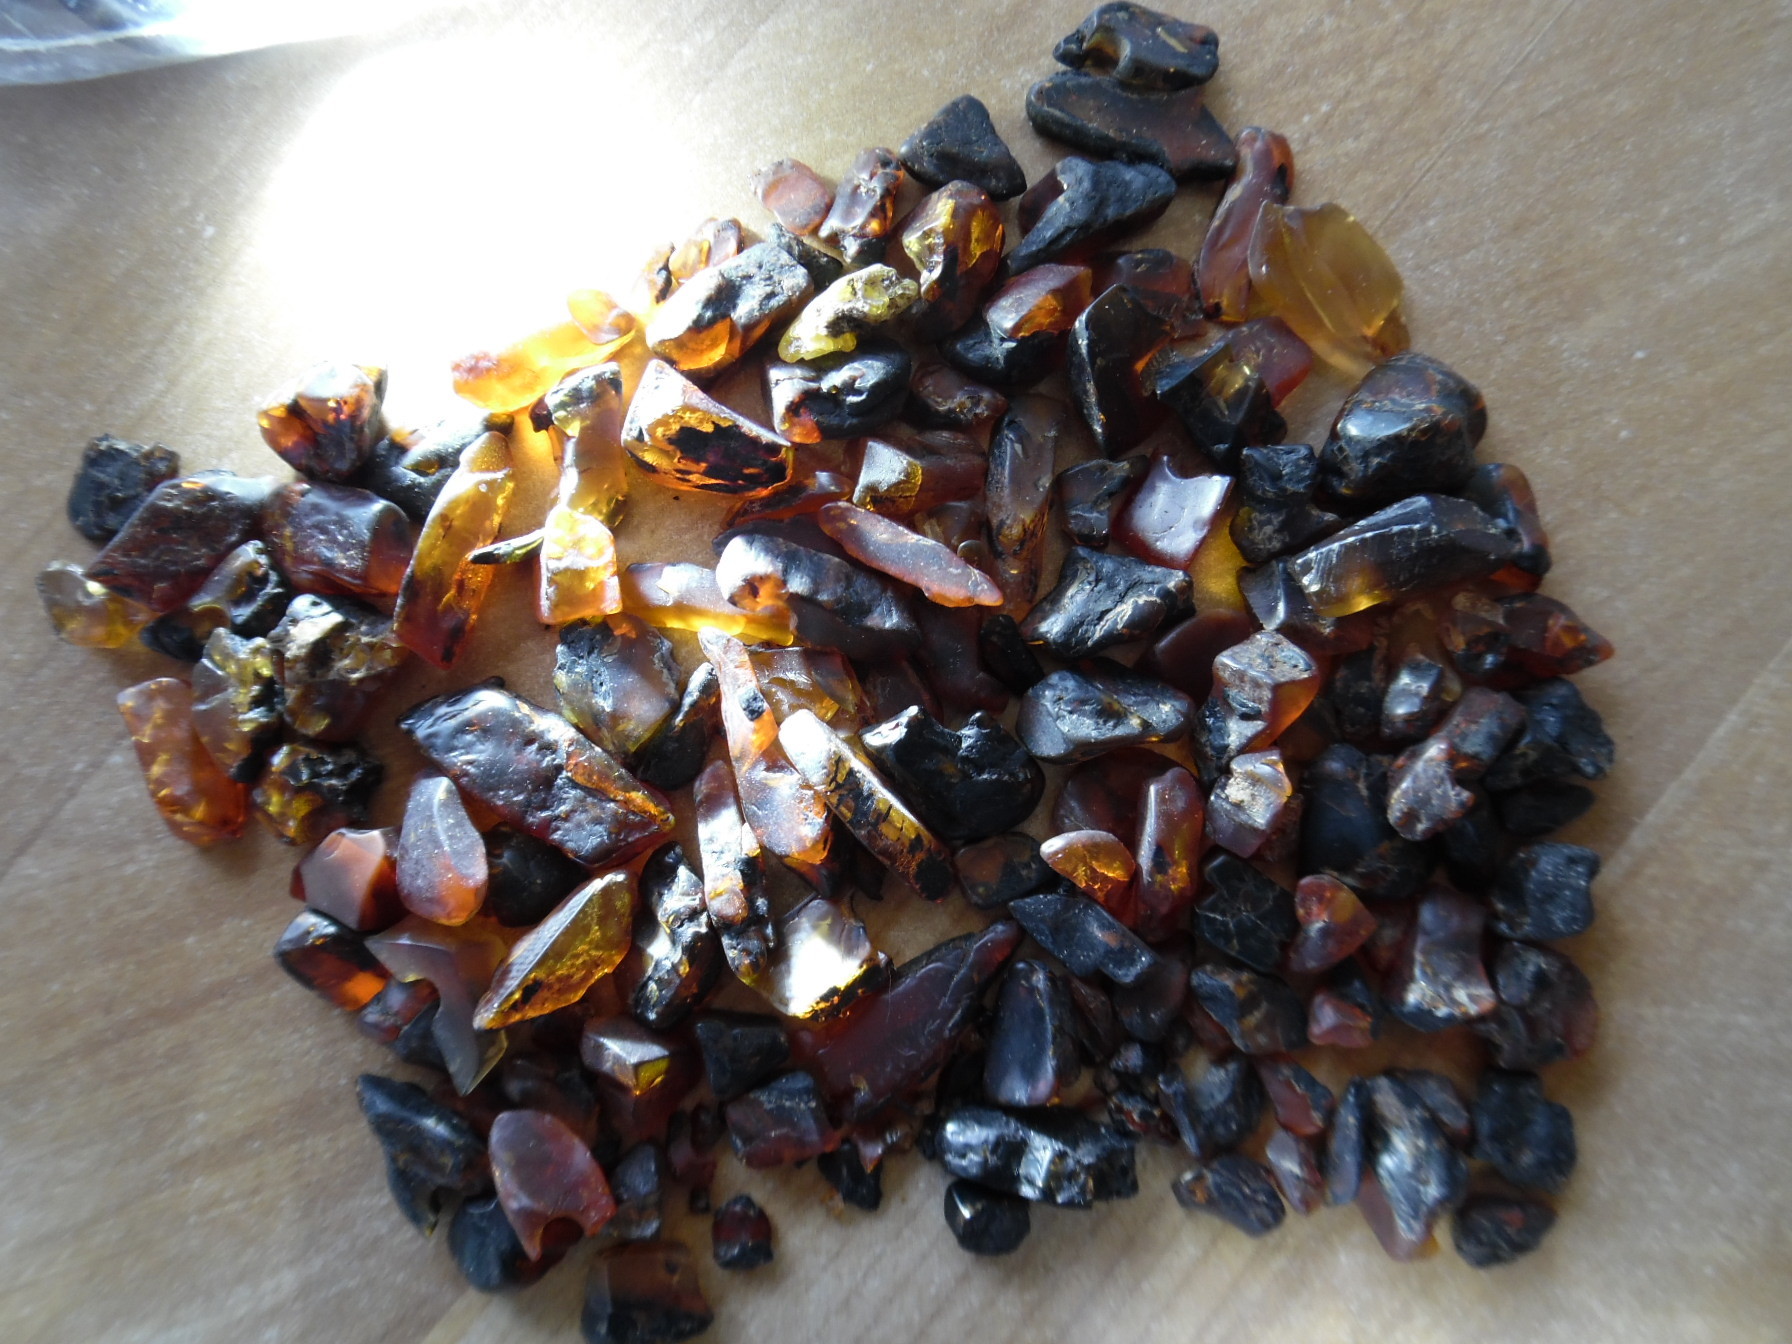
That’s incredible that you’ve discovered and collected so many amazing vertebrate fossils and amber! I recently obtained about 40 grams of raw clear amber from the Blakeburn, Coalmont area in B.C., but I haven’t gotten around to prepping any of them for inspection. I wish we had amber here in Wisconsin, but there are very few sources of good minerals to collect here (thank you, glaciers). I’m always looking to obtain amber from as many unique localities as possible; it would be awesome to have some from Alberta!
I hope to use the focus rail to take incremental shots for use with stacking software (Zerene Stacker). I was inspired to try this approach by a fellow member (holdinghistory) on The Fossil Forum, and he has some amazing shots that he posted on his thread (New Amber Photography Setup) using Zerene.
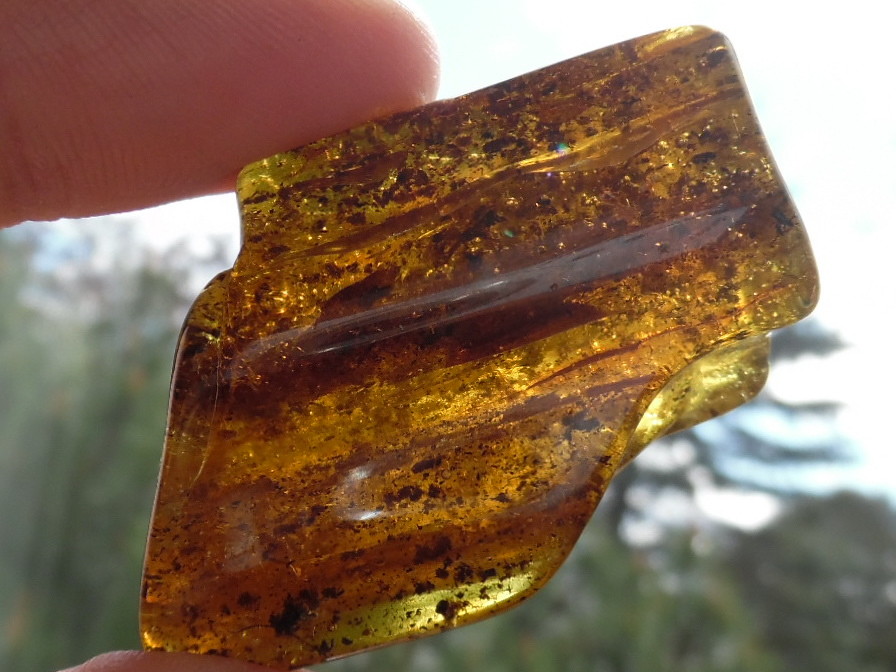
I don’t have any setup ready for photographing amber inclusions, and I haven’t really taken a lot of pictures of my amber (mostly just working/polishing the amber itself), but I do have a few pictures, mostly on my Instagram account. Here’s a neat image of some raw blue amber I have from West Sumatra (the blue coloration is surface fluorescence), but a comprehensive description of its origin is on my Facebook page (Kaegen Lau). I’m just using a Quantum 140 lumen LED penlight in the picture, but with my future setup, I plan on using three NextLED flexible LED lights to illuminate the inclusions (as well as a circular microscope lighting base). Some other photos of Rovno amber (Ukraine); some insect inclusions here and there, but I haven’t made any ID’s yet.
I hope it’s okay to post these several images here; they’re a little off-topic, so I apologize in advance.
Amber is beautiful. We do have some here, but I haven’t yet found a piece with a mosquito gorged with tyrannosaur blood…
The glaciers came through Alberta as well, of course, removing a few thousand feet of sediment. It leaves us in many places with a couple hundred feet of ice age debris left when the glaciers receded, with the late Cretaceous sandstone and bentonite right below that, dating back 70 to 80 million years. Usually we just walk fast over the ice age debris, but I did find a great chunk of a woolly mammoth tooth in the debris.
I haven’t photographed amber before, but wonder if there would be a benefit to using cross polarization to eliminate unwanted reflections and see better into the amber. I use cross polarization a lot with photographing paintings for clients.
I haven’t heard of the Manfrotto brass stud failing, but it can’t hurt to get a steel one. I use a stainless steel 3/8" eye bolt for my makeshift plywood clamp and that setup is pretty bombproof.
Awesome! I have a rockhounding buddy that had found a partial mastodon tooth in a gravel pit years ago near the St. Croix river in Wabasha, Minnesota; I’ve been collecting with him at that pit a couple times for Lake Superior agates, as well as agatized wood (the few pieces I found actually have some visible grain to them, and a perfect woody exterior texture/pattern). I haven’t been out field collecting for years, sadly.
I think my nearest amber locality in the States, that I’ve read of, is in southern Illinois; as it happens, this is the oldest amber on earth (320 Ma). Here’s a fascinating article on it from October '09: https://www2.illinois.gov/dnr/OI/Documents/March10Amber.pdf. Unfortunately, this specific occurrence is not open to the public.
Definitely, cross-polarization would be excellent for extreme macro photography; especially so with having to use bright light sources on highly polished pieces of amber. Unfortunately, the only thing close to that that I can afford is my Hoya 52 mm Linear Polarizer Filter for my Canon 60 mm f/2.8 USM lens. I think I could include such a filter in my setup, but my current lens > microscope objective adapter wouldn’t allow it (using a Pentax-A 645 200mm f/4 lens). It would be very helpful though!
Hopefully I’ll be able to get my setup complete soon; I have the materials to make the copy stand, but still need to get the clamp, focus rail, microscope objectives (4x and 10x infinity plan), and the lights. It’ll be a while, but I can’t wait to get it done!
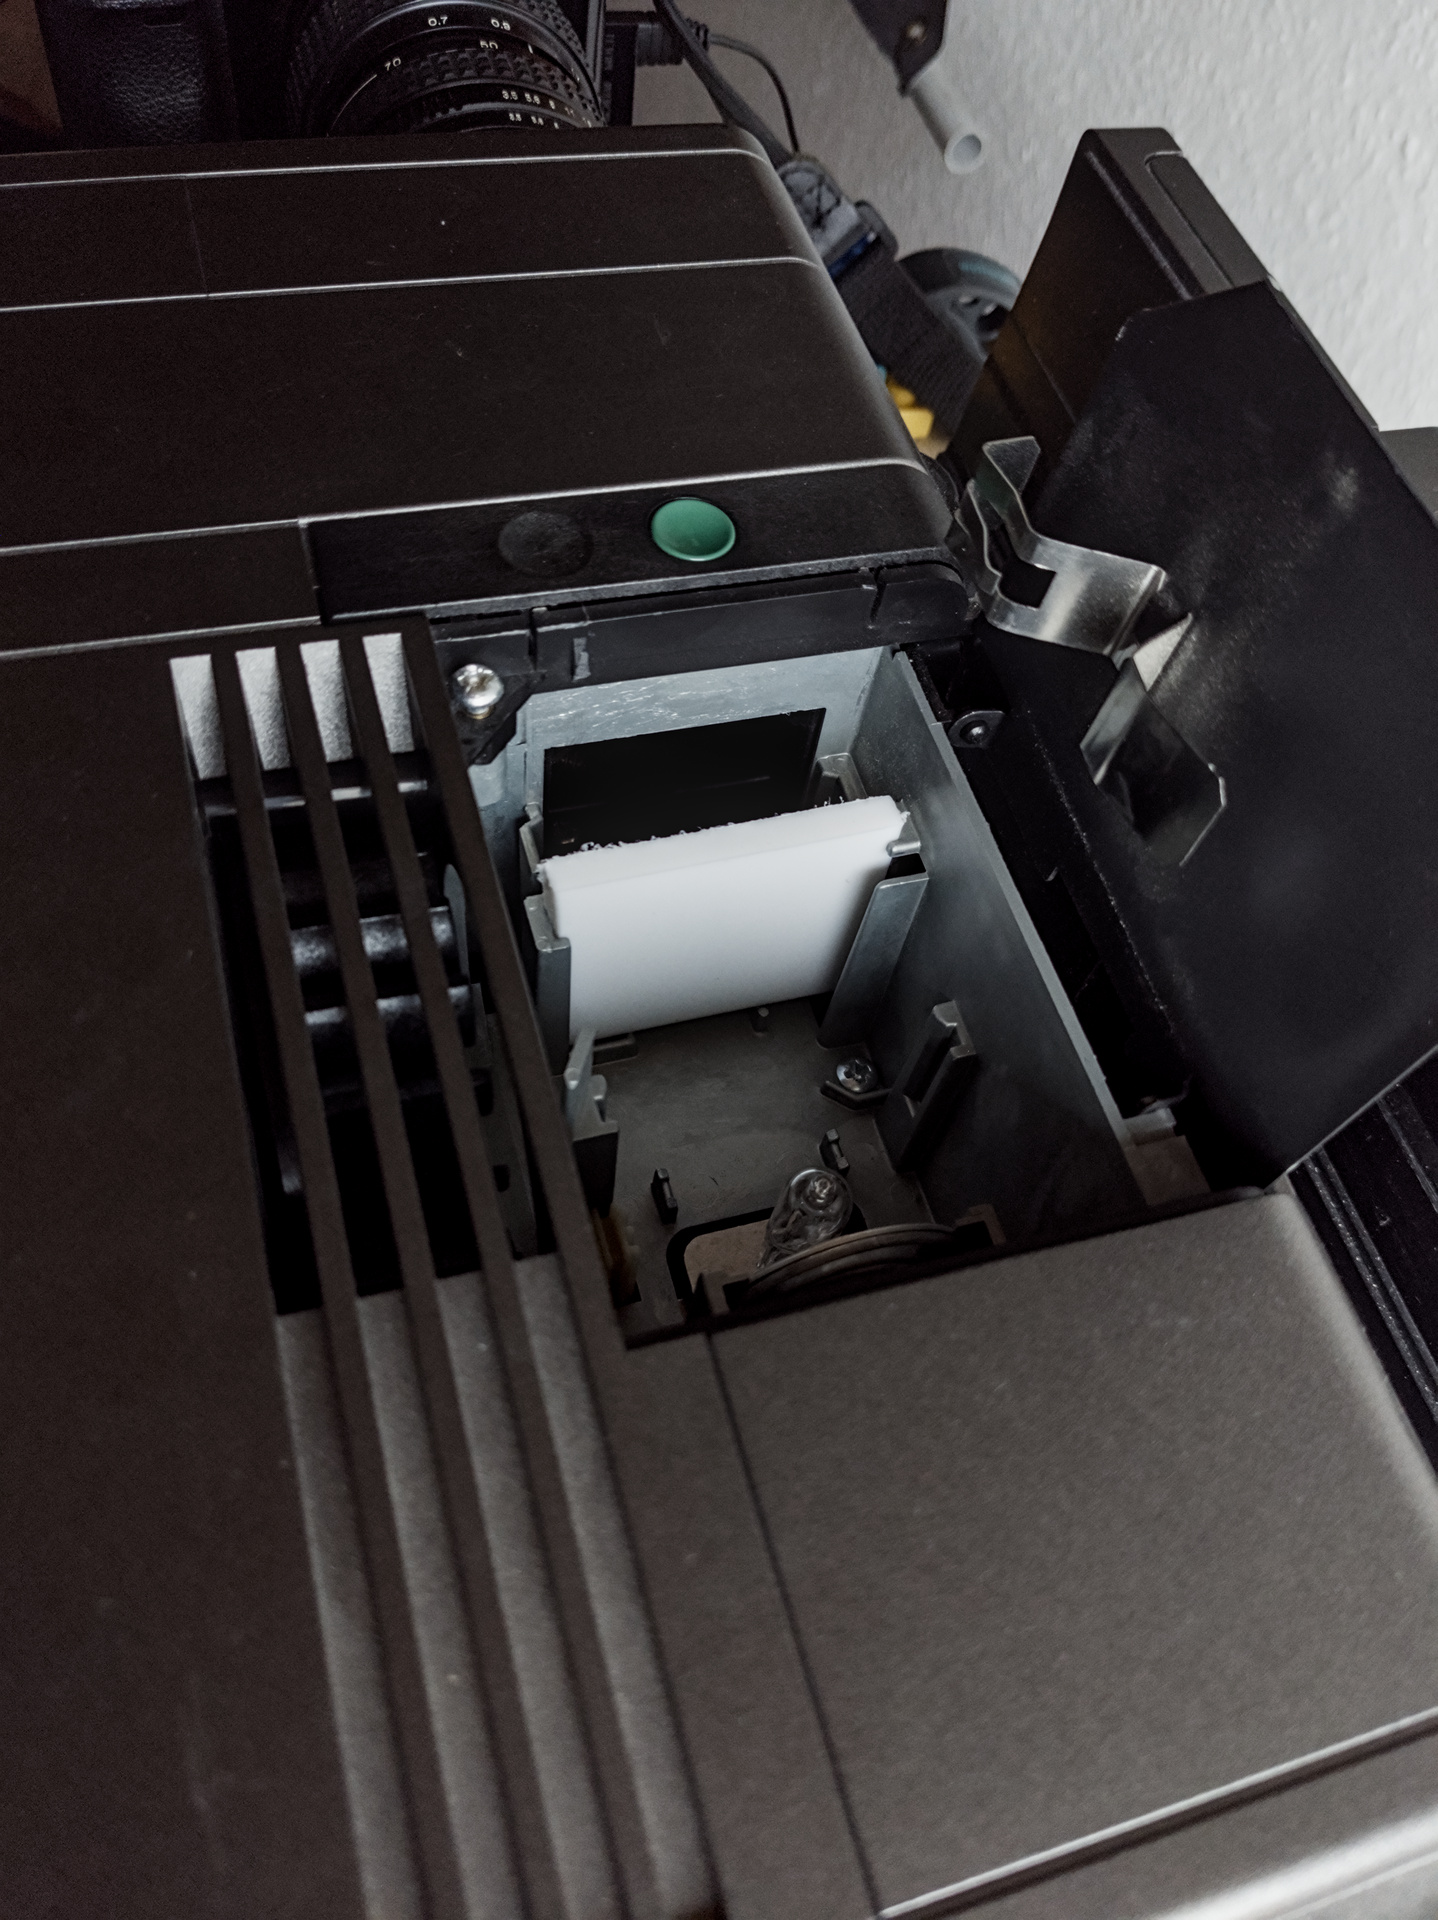
My original DIY copy stand using plumbing pipe, a Manfrotto Super Clamp and a good ball head does a decent job, but was awkward to make fine adjustments to height and alignment.
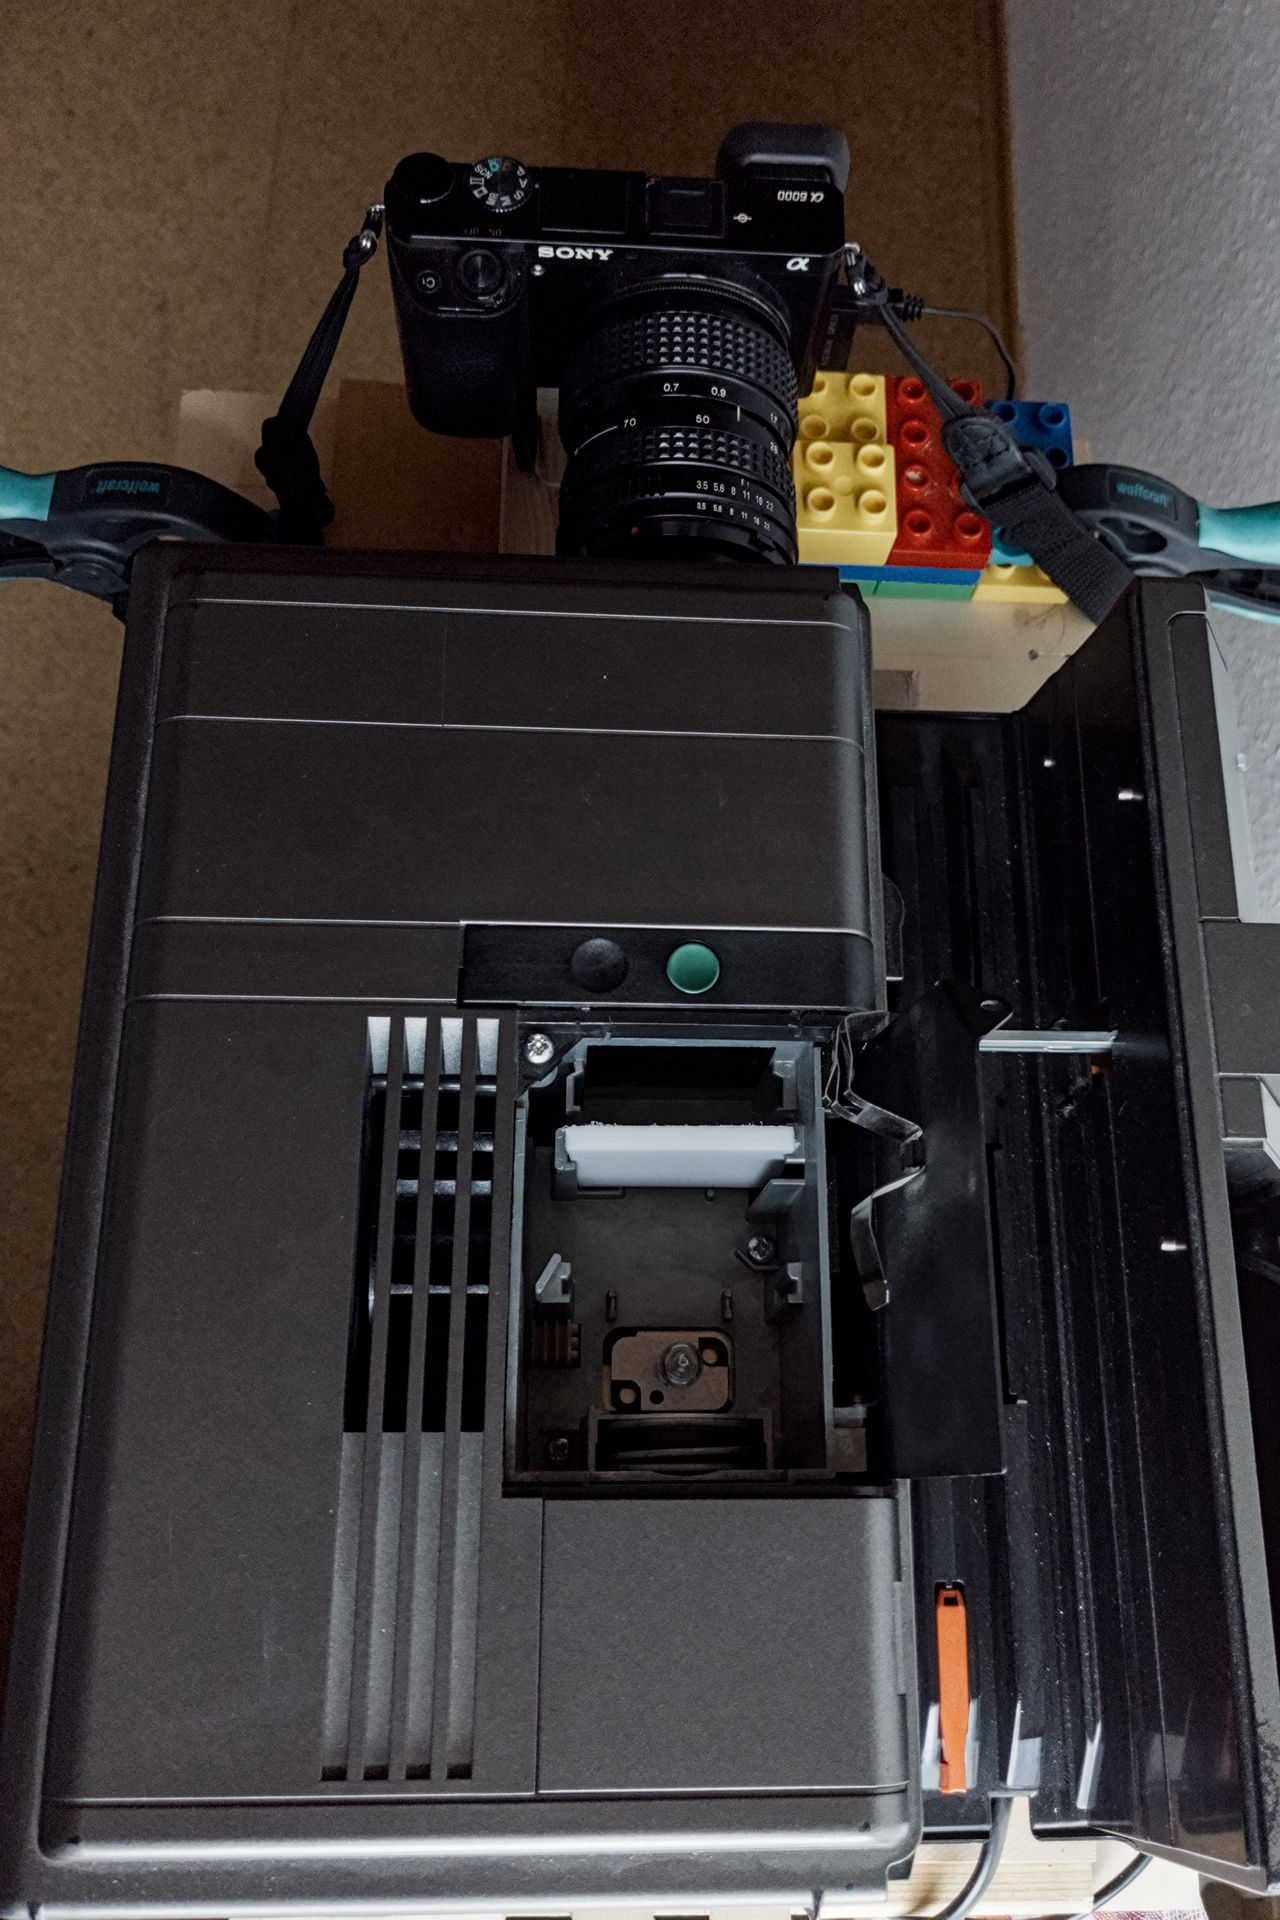
No change to using the plumbing pipe and floor flange. This is sturdy, collapses easily for storage and works well.
It’s difficult, however, to move the Super Clamp up and down the pipe to precisely crop the film, where you want to be within 1-2 mm.
The other problem is that a ball head is not ideal for alignment because when you loosen it, all the axes change and it requires fiddling to get the alignment right.
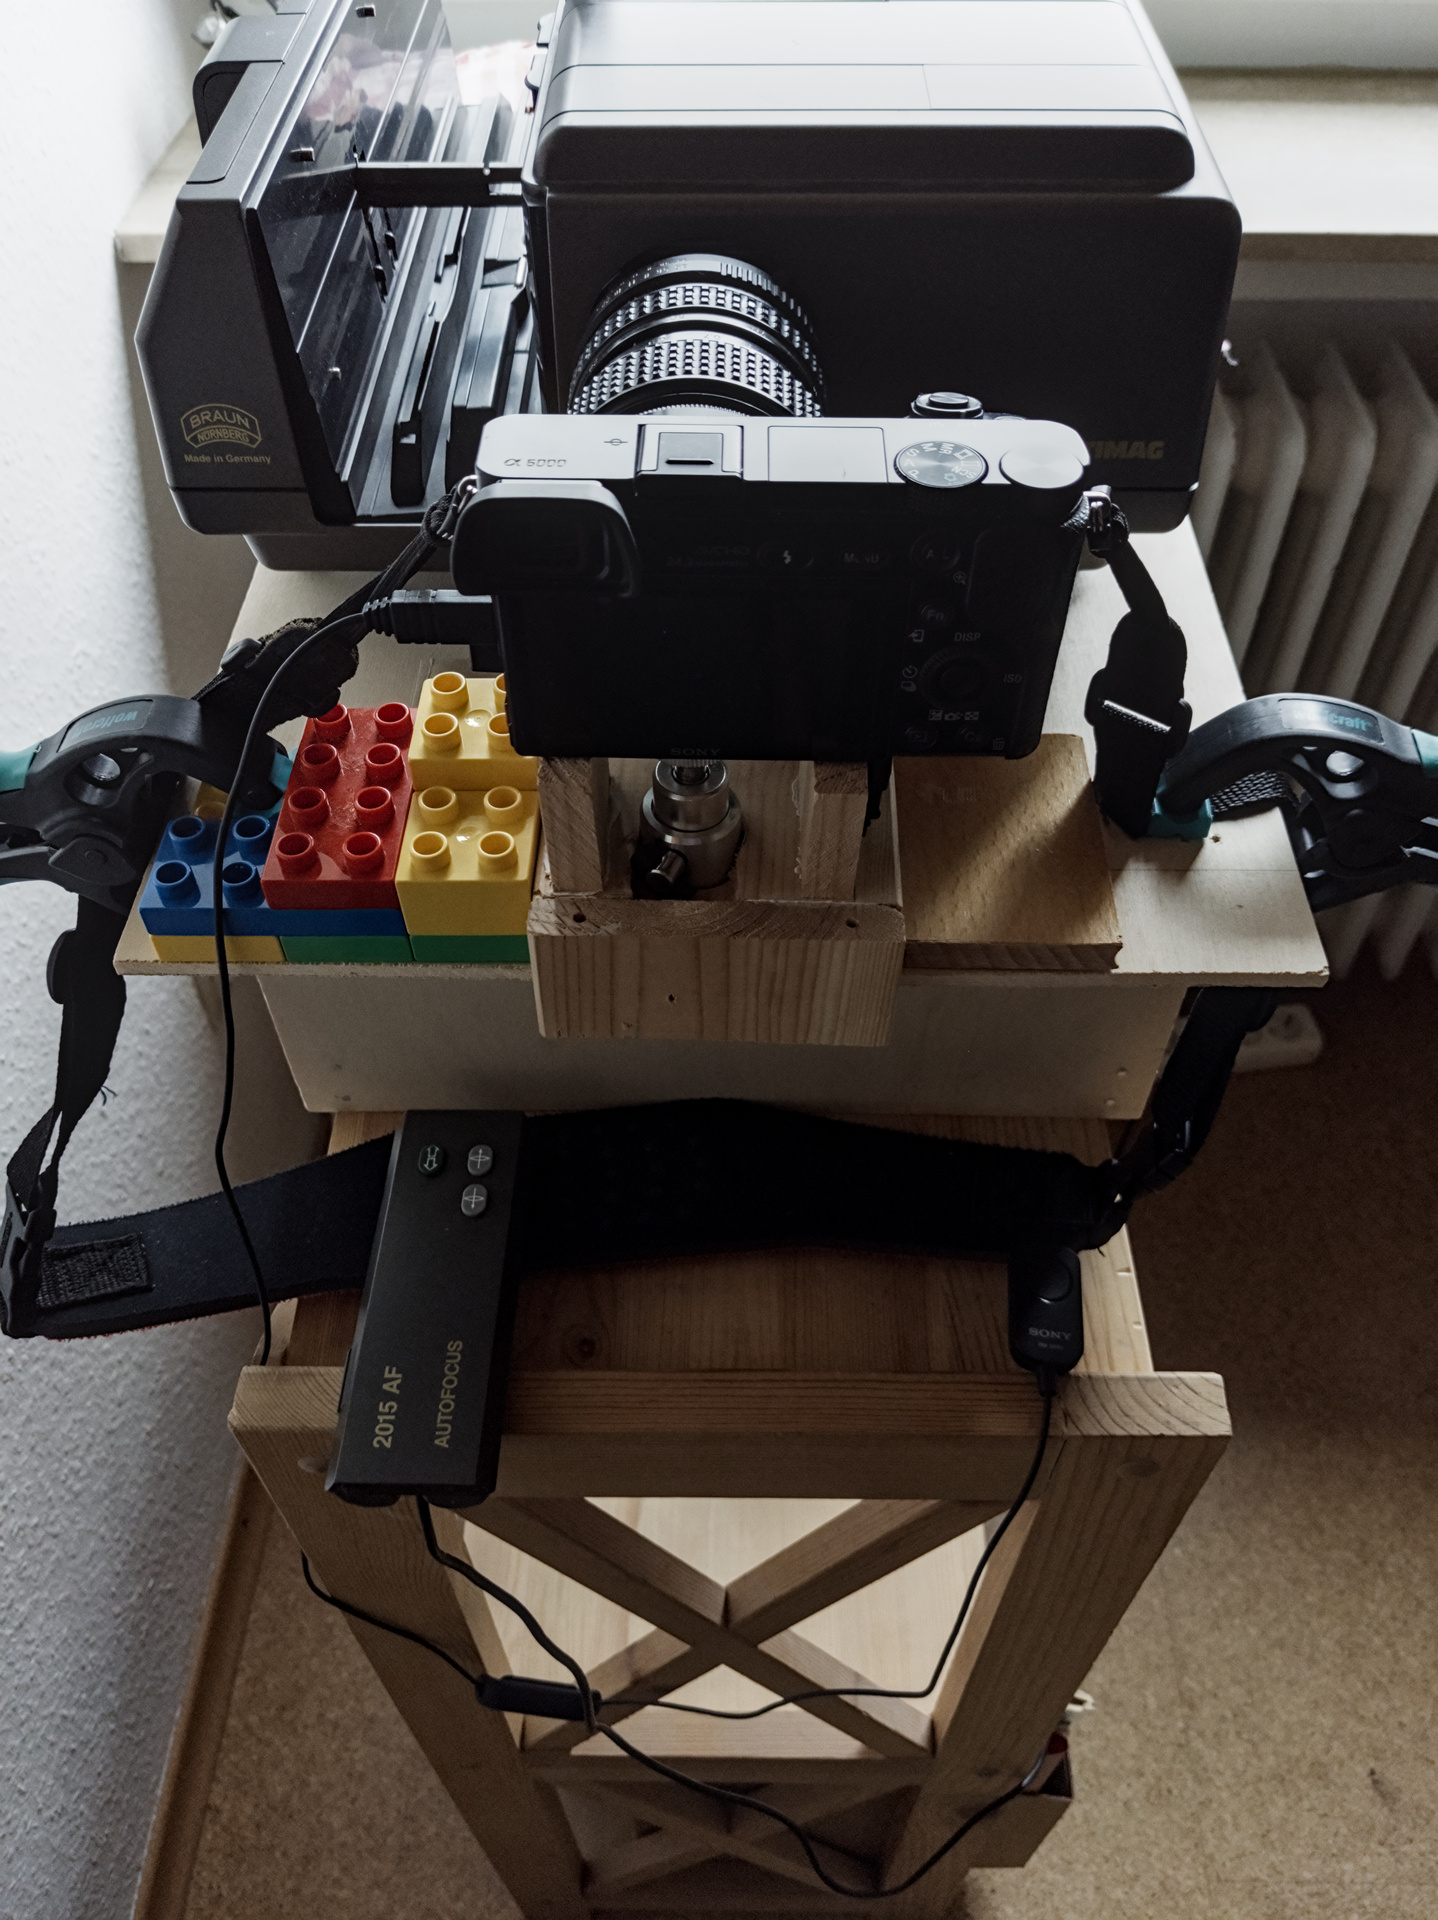
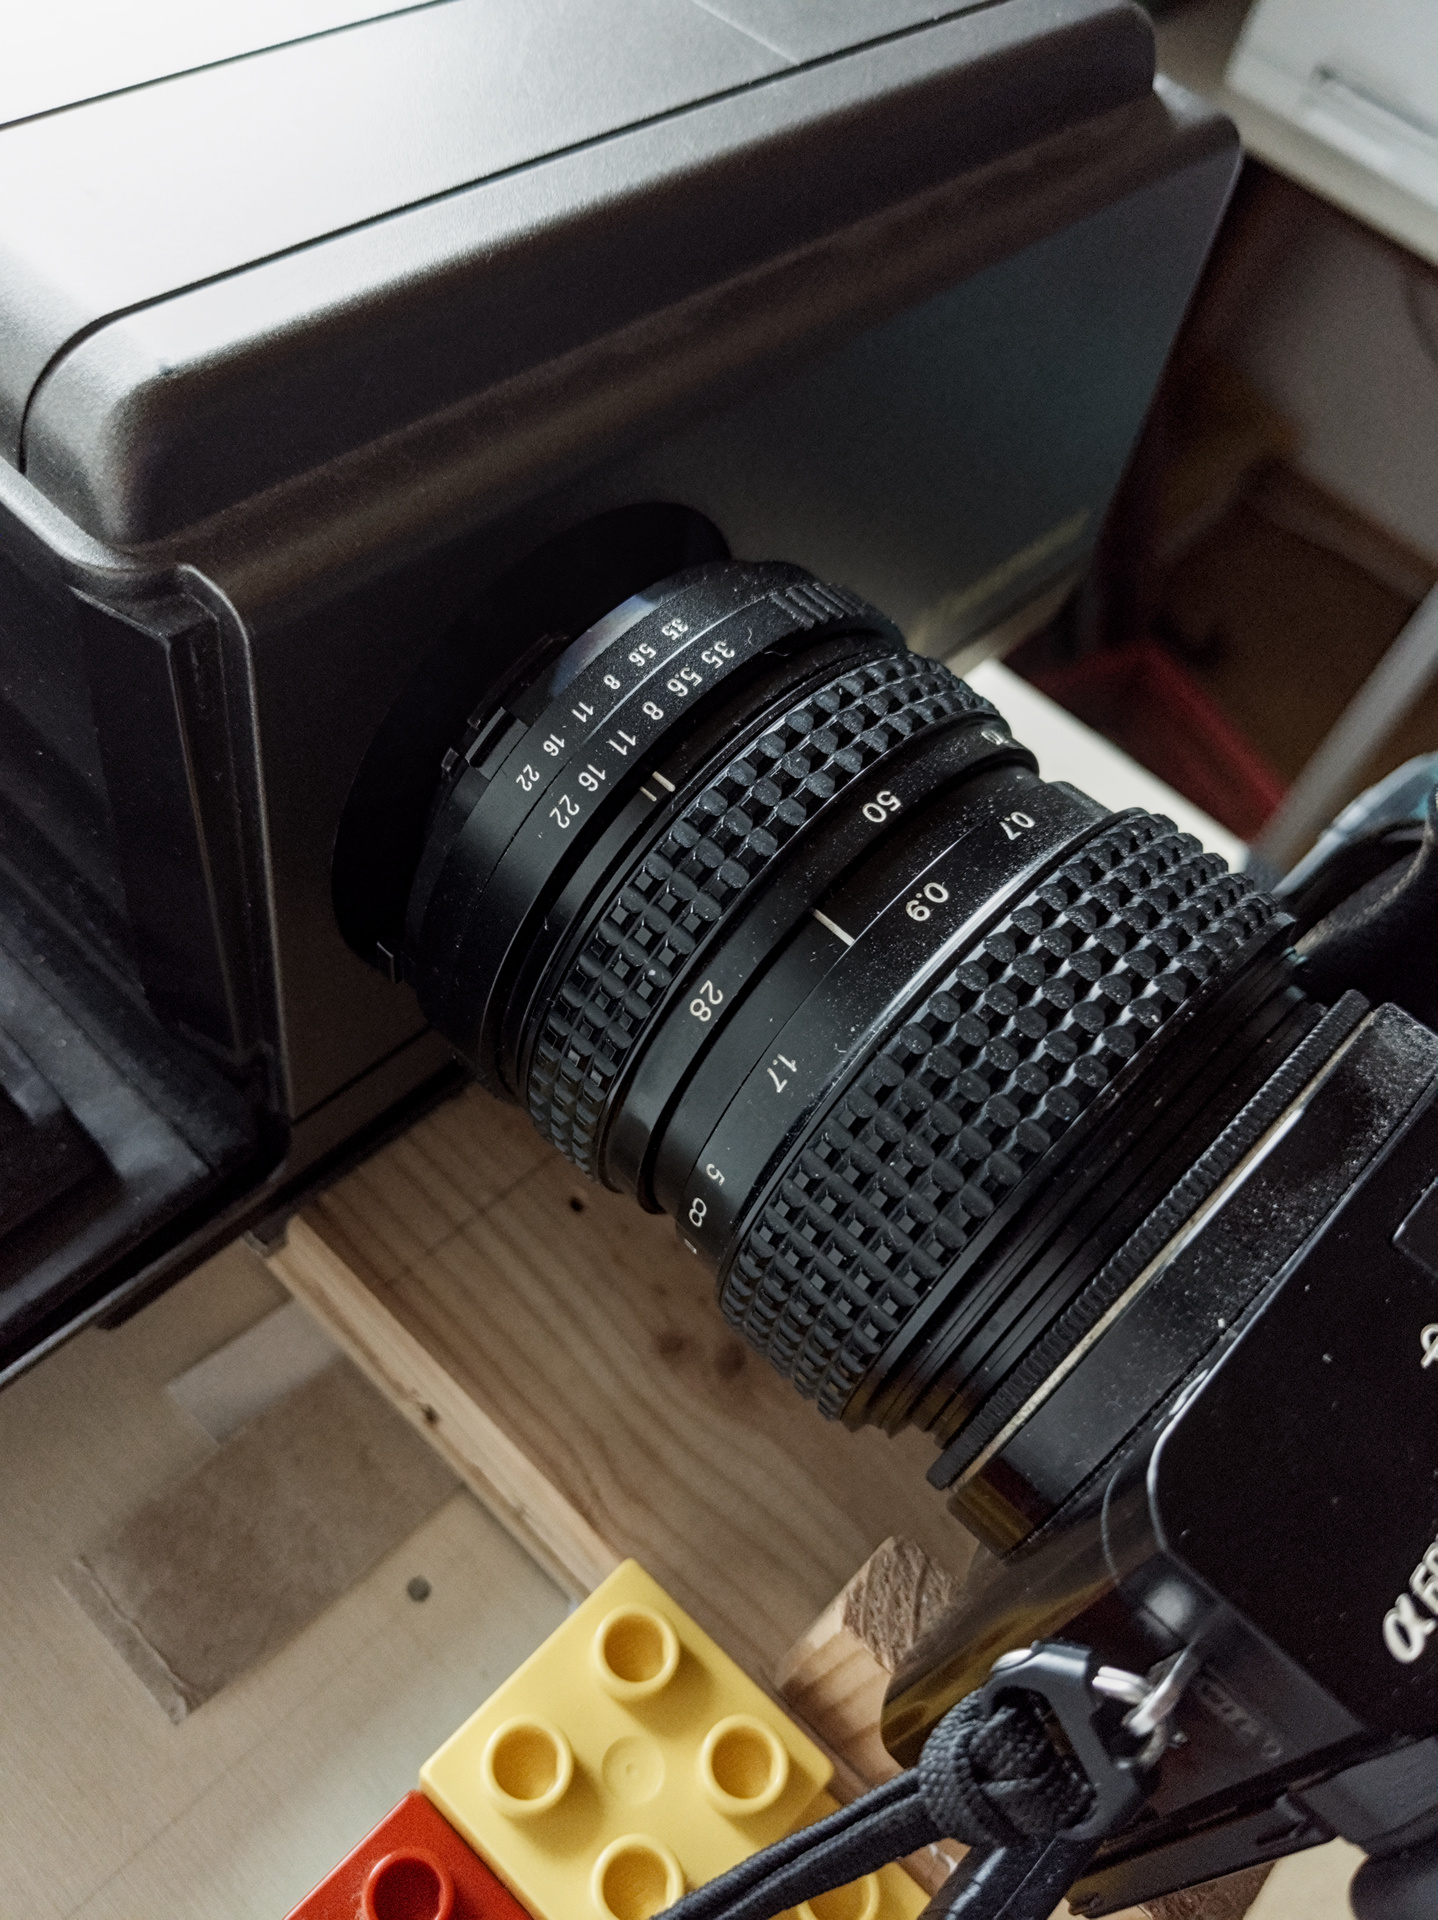
My new design eliminates both the Super Clamp and ball head, instead using a small piece of plywood and some readily available hardware parts. The Novaflex Castel-L is wonderful to have, but there are much cheaper options available that would work fine. In a simple setup you can slide an Arca-Swiss plate vertically in its clamp to easily get the exact cropping needed.
Rather than using a leveling base for aligning the camera pitch to the film I opted to use a 5/16" bolt, with a T-nut hammered into the plywood. This way I can loosen the top 1/4" wing nuts on the upper U-bolt, screw in the 5/16" bolt until the alignment is correct, then tighten the 1/4" wing nuts.
The camera yaw is easily adjusted by loosening up the 3/8" eye bolt and rotating the wood spacer and Novaflex.
Is that an Olympus E-M1 II? And is that an adapted 4/3 lens? My setup is: E-M1 + 35mm f3.5. Hi-res mode should be perfect for digitizing. Still researching DIY copy stands to replace my V700.
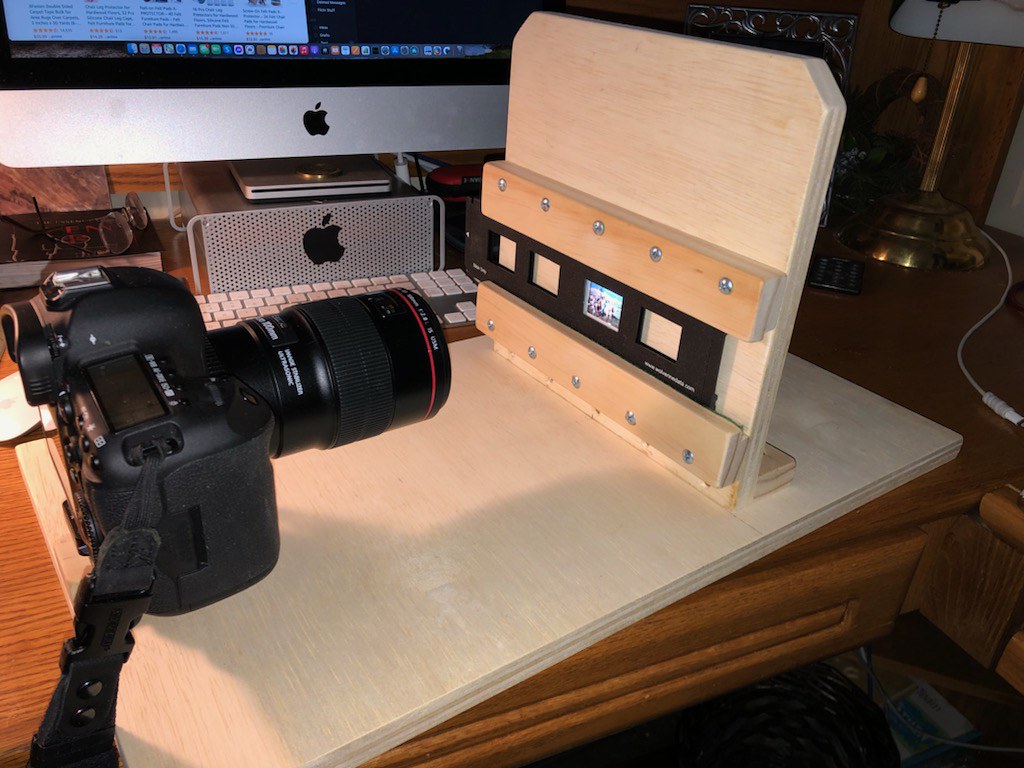
Personally, I like the MFT 30mm macro with my E-M1 MkII on a DIY stand copied almost whole from the OP’s. I already had the Super Clamp, a ballhead, a ‘retired’ 1-in thick squarish hardwood cutting board, a drill and spade bits, and a good flash (FL-50R). This left me to source the 1" steel pipe, the floor flange, fasteners, a white plastic washtub, a clear acrylic sheet, and the negative holder. The negative holder was a bit pricey, but the rest of it cost me $50 CAD. Could not be happier with my setup:
Nice, looks very good! I have pretty much the same setup as well, minus a SWEBO LS-001 manual focus rail which I need to get soon; I’m using a set of extension tubes and a Nikon El-Nikkor 50mm f/2.8 enlarger lens. Love the Manfrotto clamp, so sturdy and easy to use in this kind of setup.
I’m going to have a stab at something like this myself, one day — I’ve a ton of precious family photos I want to scan and archive, including my parents complete wedding album (sadly, it’s now all I have left of them).
If anyone’s up for the task of providing some further details on the design and building of their efforts, I’d like to someday get all these fantastic accomplishments collated into a GitHub repo (as long as everyone’s happy to do so, of course) so they can be shared with the community. What do you all think?
That looks excellent, thanks for sharing! The results on the linked Flickr page look good too. I wonder where the slide carrier is from? Is it a repurposed bit of something else, or something specific>
I think a macro lens is typically recommended because they tend to be more optimised towards having a flat focus plane than regular lenses (there are probably more correct terms for what I"m describing…). So if you focus on the center of the film, the edges will also be in focus while with a regular lens the focus might be a bit off there.
I’m not sure how noticeable the difference really is in practice, though.
Not expert but I suppose tubes would work. Macro lenses are less likely to have field curvature, I think. But there must be people with greater expertise than me