my cheap setup, made from an old dead epson scanner


3 Likes
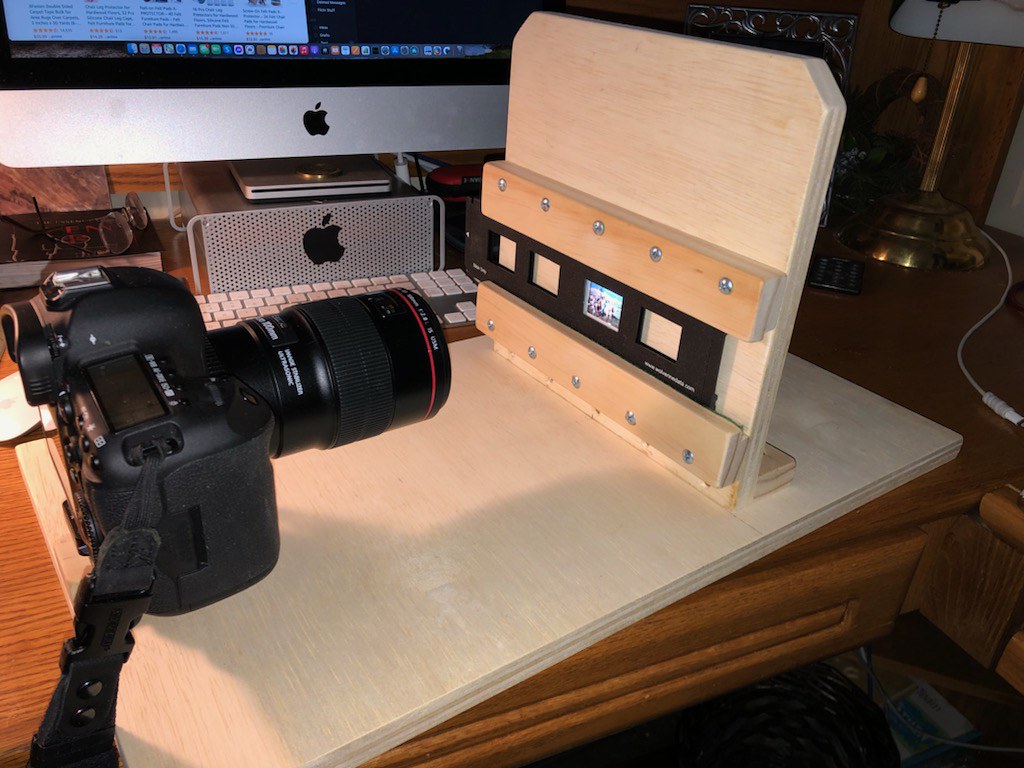
Modified DIY copy stand clamp.
My original DIY copy stand using plumbing pipe, a Manfrotto Super Clamp and a good ball head does a decent job, but was awkward to make fine adjustments to height and alignment.
No change to using the plumbing pipe and floor flange. This is sturdy, collapses easily for storage and works well.
It’s difficult, however, to move the Super Clamp up and down the pipe to precisely crop the film, where you want to be within 1-2 mm.
The other problem is that a ball head is not ideal for alignment because when you loosen it, all the axes change and it requires fiddling to get the alignment right.
My new design eliminates both the Super Clamp and ball head, instead using a small piece of plywood and some readily available hardware parts. The Novaflex Castel-L is wonderful to have, but there are much cheaper options available that would work fine. In a simple setup you can slide an Arca-Swiss plate vertically in its clamp to easily get the exact cropping needed.
Rather than using a leveling base for aligning the camera pitch to the film I opted to use a 5/16" bolt, with a T-nut hammered into the plywood. This way I can loosen the top 1/4" wing nuts on the upper U-bolt, screw in the 5/16" bolt until the alignment is correct, then tighten the 1/4" wing nuts.
The camera yaw is easily adjusted by loosening up the 3/8" eye bolt and rotating the wood spacer and Novaflex.


8 Likes
Is that an Olympus E-M1 II? And is that an adapted 4/3 lens? My setup is: E-M1 + 35mm f3.5. Hi-res mode should be perfect for digitizing. Still researching DIY copy stands to replace my V700.
I’ve only just now stumbled across this thread, and it’s seemed to have evolved into a really informative resource!
With a view to @patdavid 's post calling for content submissions, I wonder if all this info could be compiled into an article?
3 Likes
Personally, I like the MFT 30mm macro with my E-M1 MkII on a DIY stand copied almost whole from the OP’s. I already had the Super Clamp, a ballhead, a ‘retired’ 1-in thick squarish hardwood cutting board, a drill and spade bits, and a good flash (FL-50R). This left me to source the 1" steel pipe, the floor flange, fasteners, a white plastic washtub, a clear acrylic sheet, and the negative holder. The negative holder was a bit pricey, but the rest of it cost me $50 CAD. Could not be happier with my setup:

5 Likes
Nice, looks very good! I have pretty much the same setup as well, minus a SWEBO LS-001 manual focus rail which I need to get soon; I’m using a set of extension tubes and a Nikon El-Nikkor 50mm f/2.8 enlarger lens. Love the Manfrotto clamp, so sturdy and easy to use in this kind of setup.
These are amazing scans!
Such a pleasure seeing what you were able to achieve!
1 Like
I’m going to have a stab at something like this myself, one day — I’ve a ton of precious family photos I want to scan and archive, including my parents complete wedding album (sadly, it’s now all I have left of them).
Interesting approaches to do the scanning. Thanks for the insights.
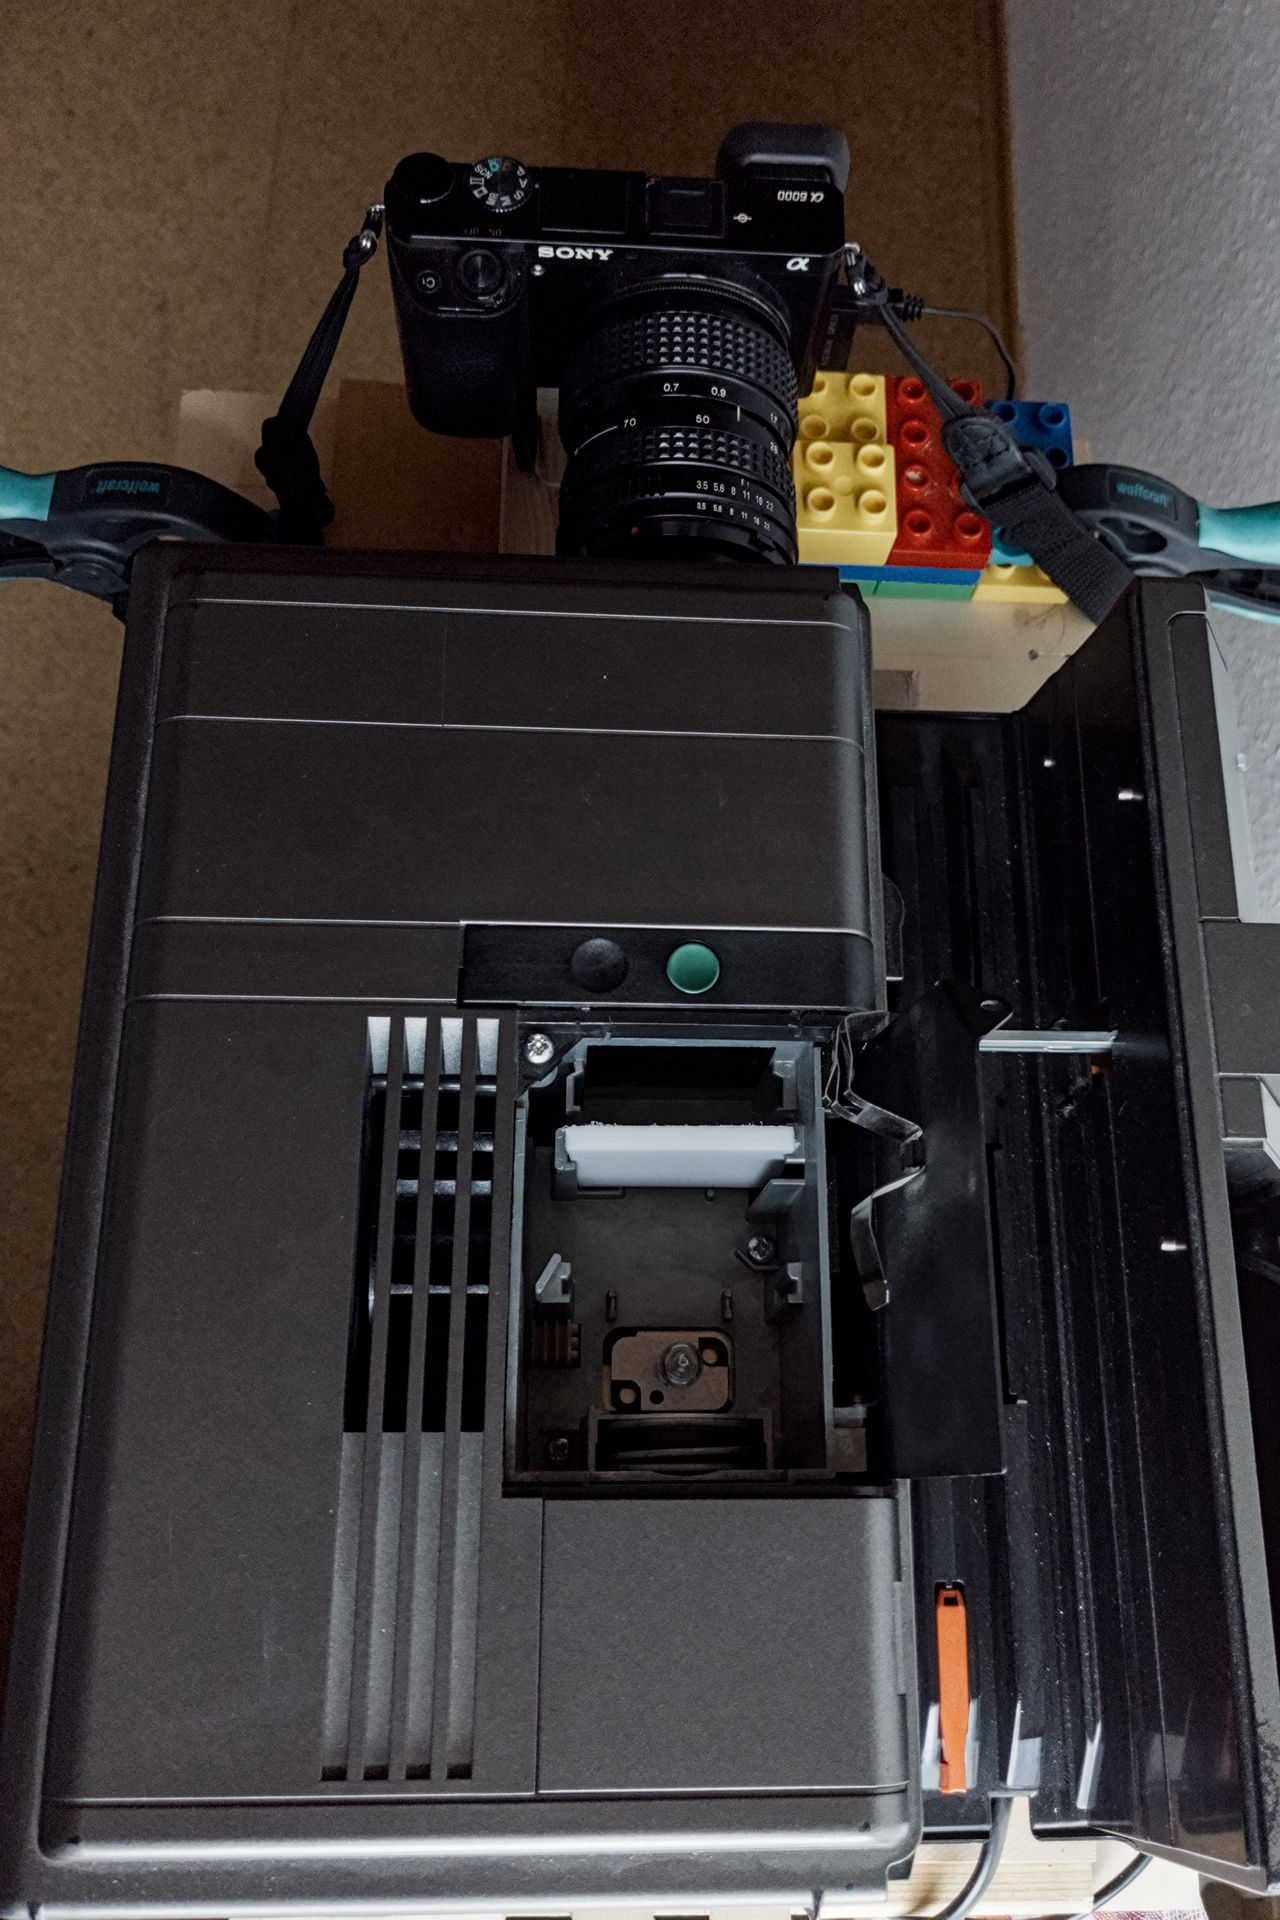
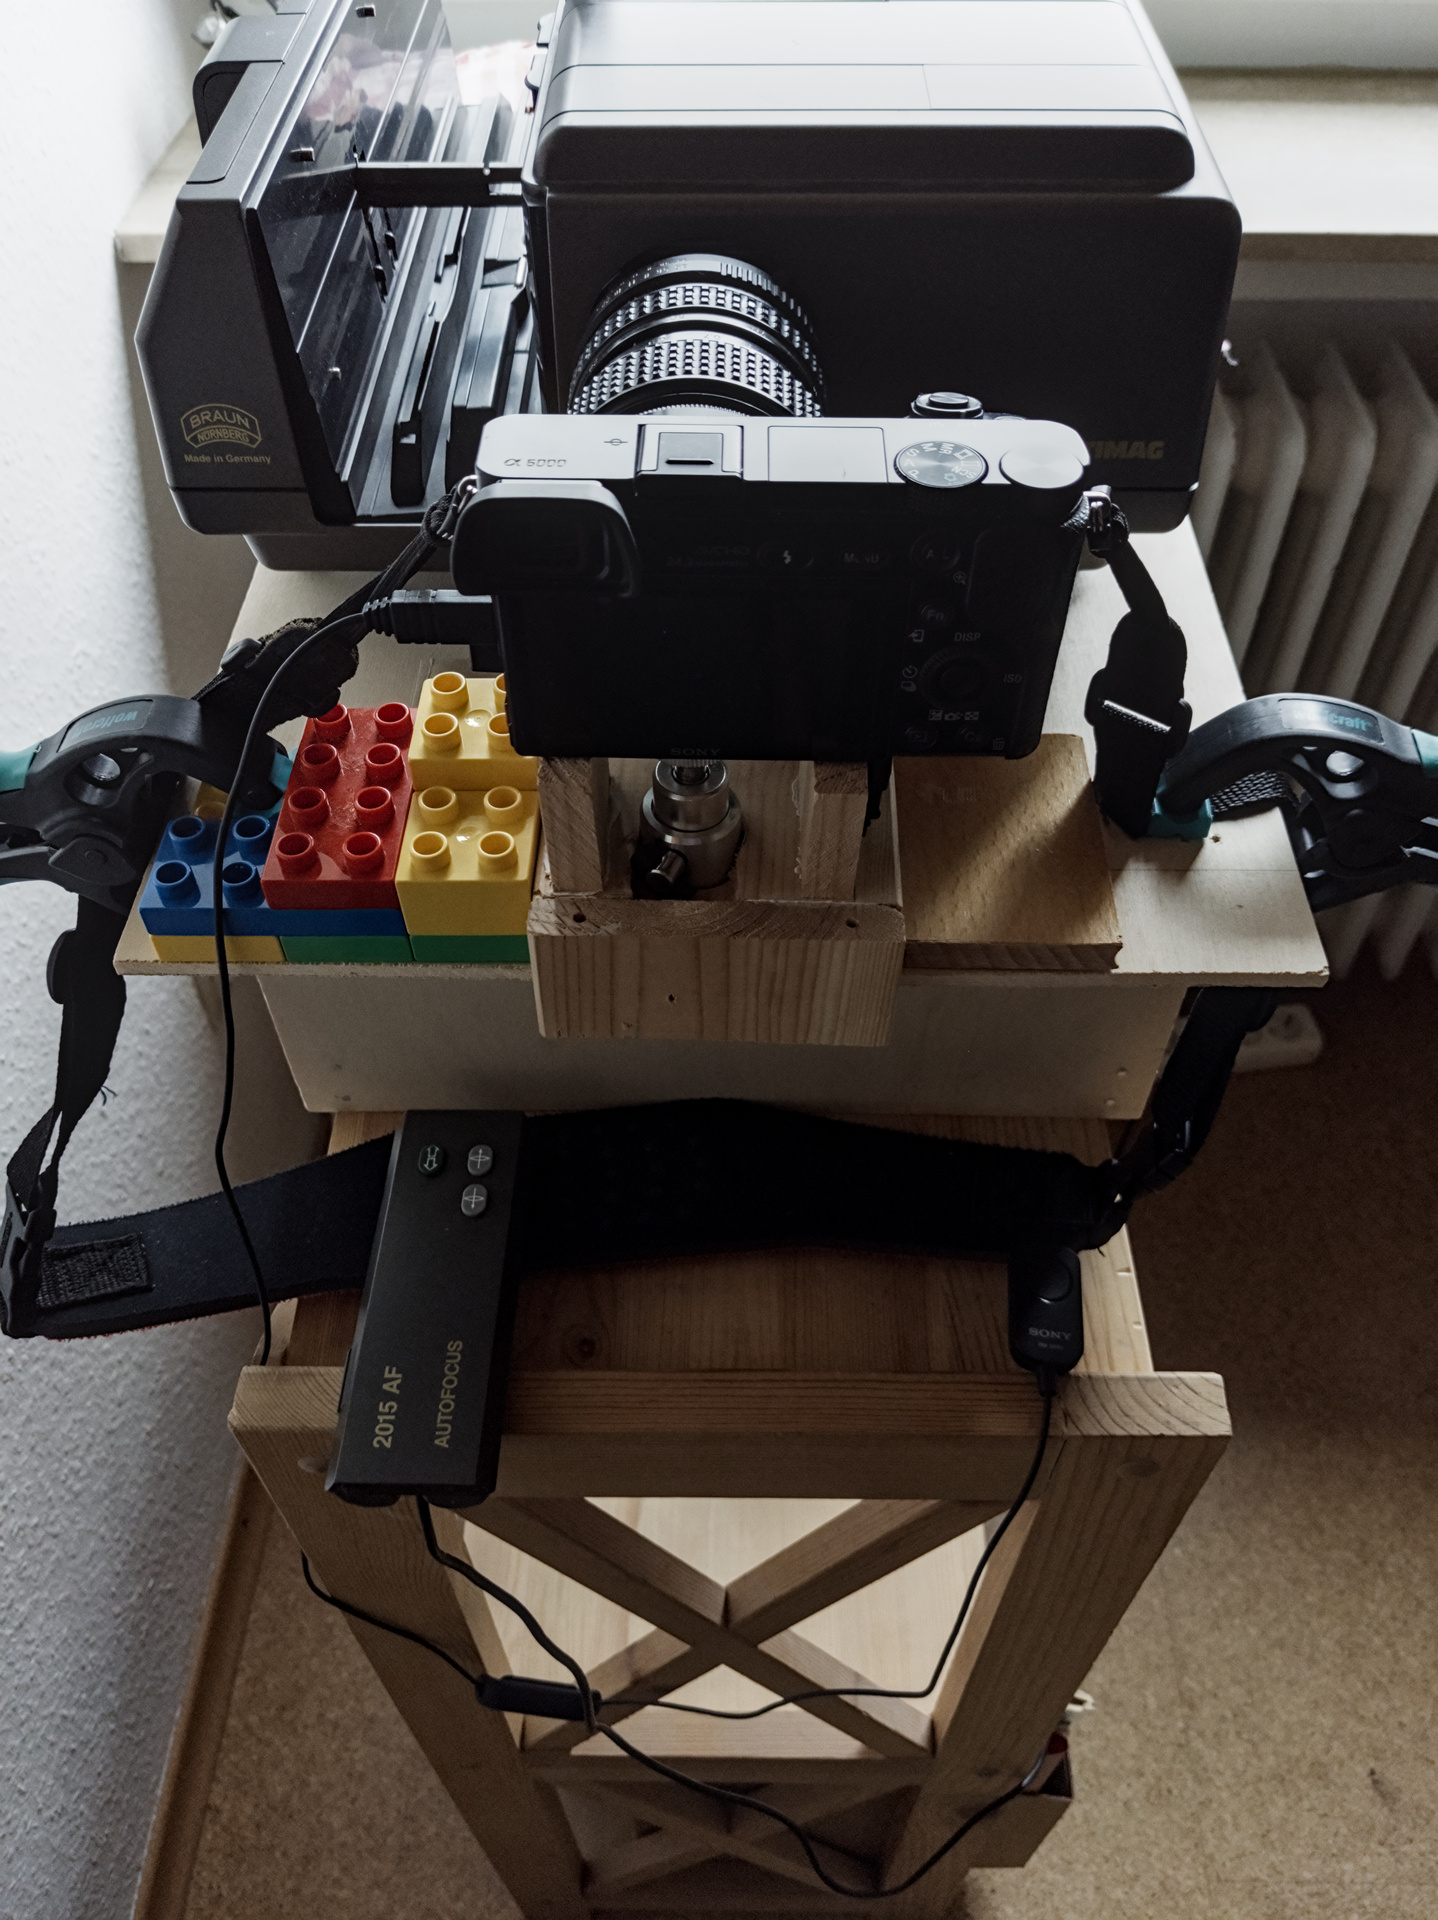
The family owns thousands of dias and so I decided to build a DIY copy stand around an old projector.
Processing of 36 slides takes less than a minute (magazine in, magazine out). I use two remotes. One for the projector and one for the camera.
Postprocessing (moving SD card to PC, copying data, importing into darktable, applying a style [mirroring, rotation, basic setup], culling/deleting and cropping takes 5+ minutes per batch.
I’m quite confident with this solution.
Hardware:
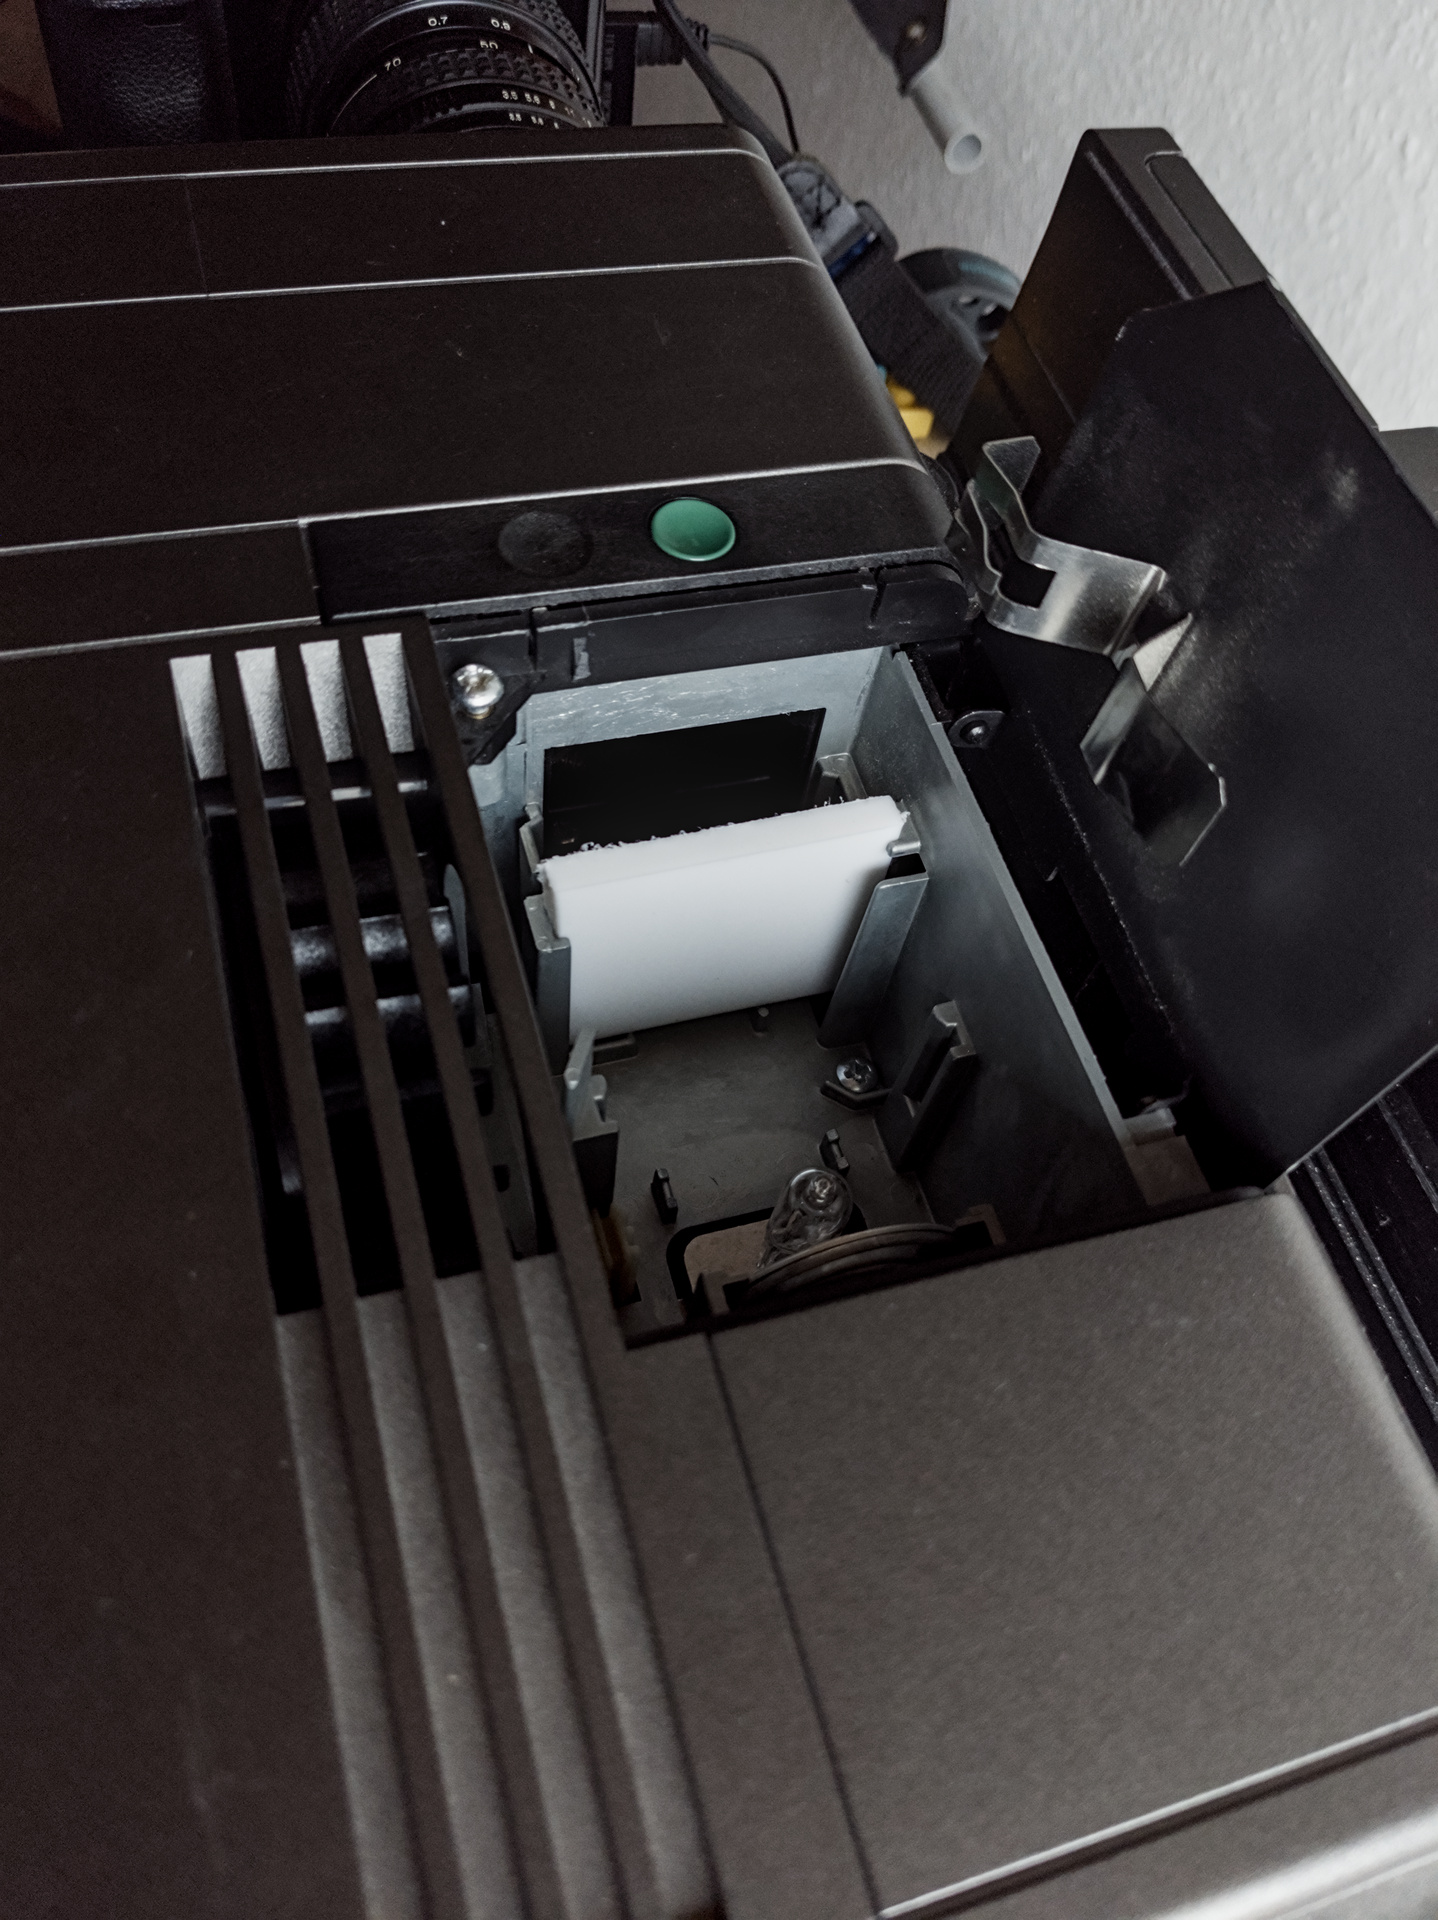
Projector Braun Paximat Multimag:
- 5 mm teflon as screen
- less powerful lamp (150 W?)
- no lens
Sony A6000:
- mounted on a old tripod head, screwed on some wood
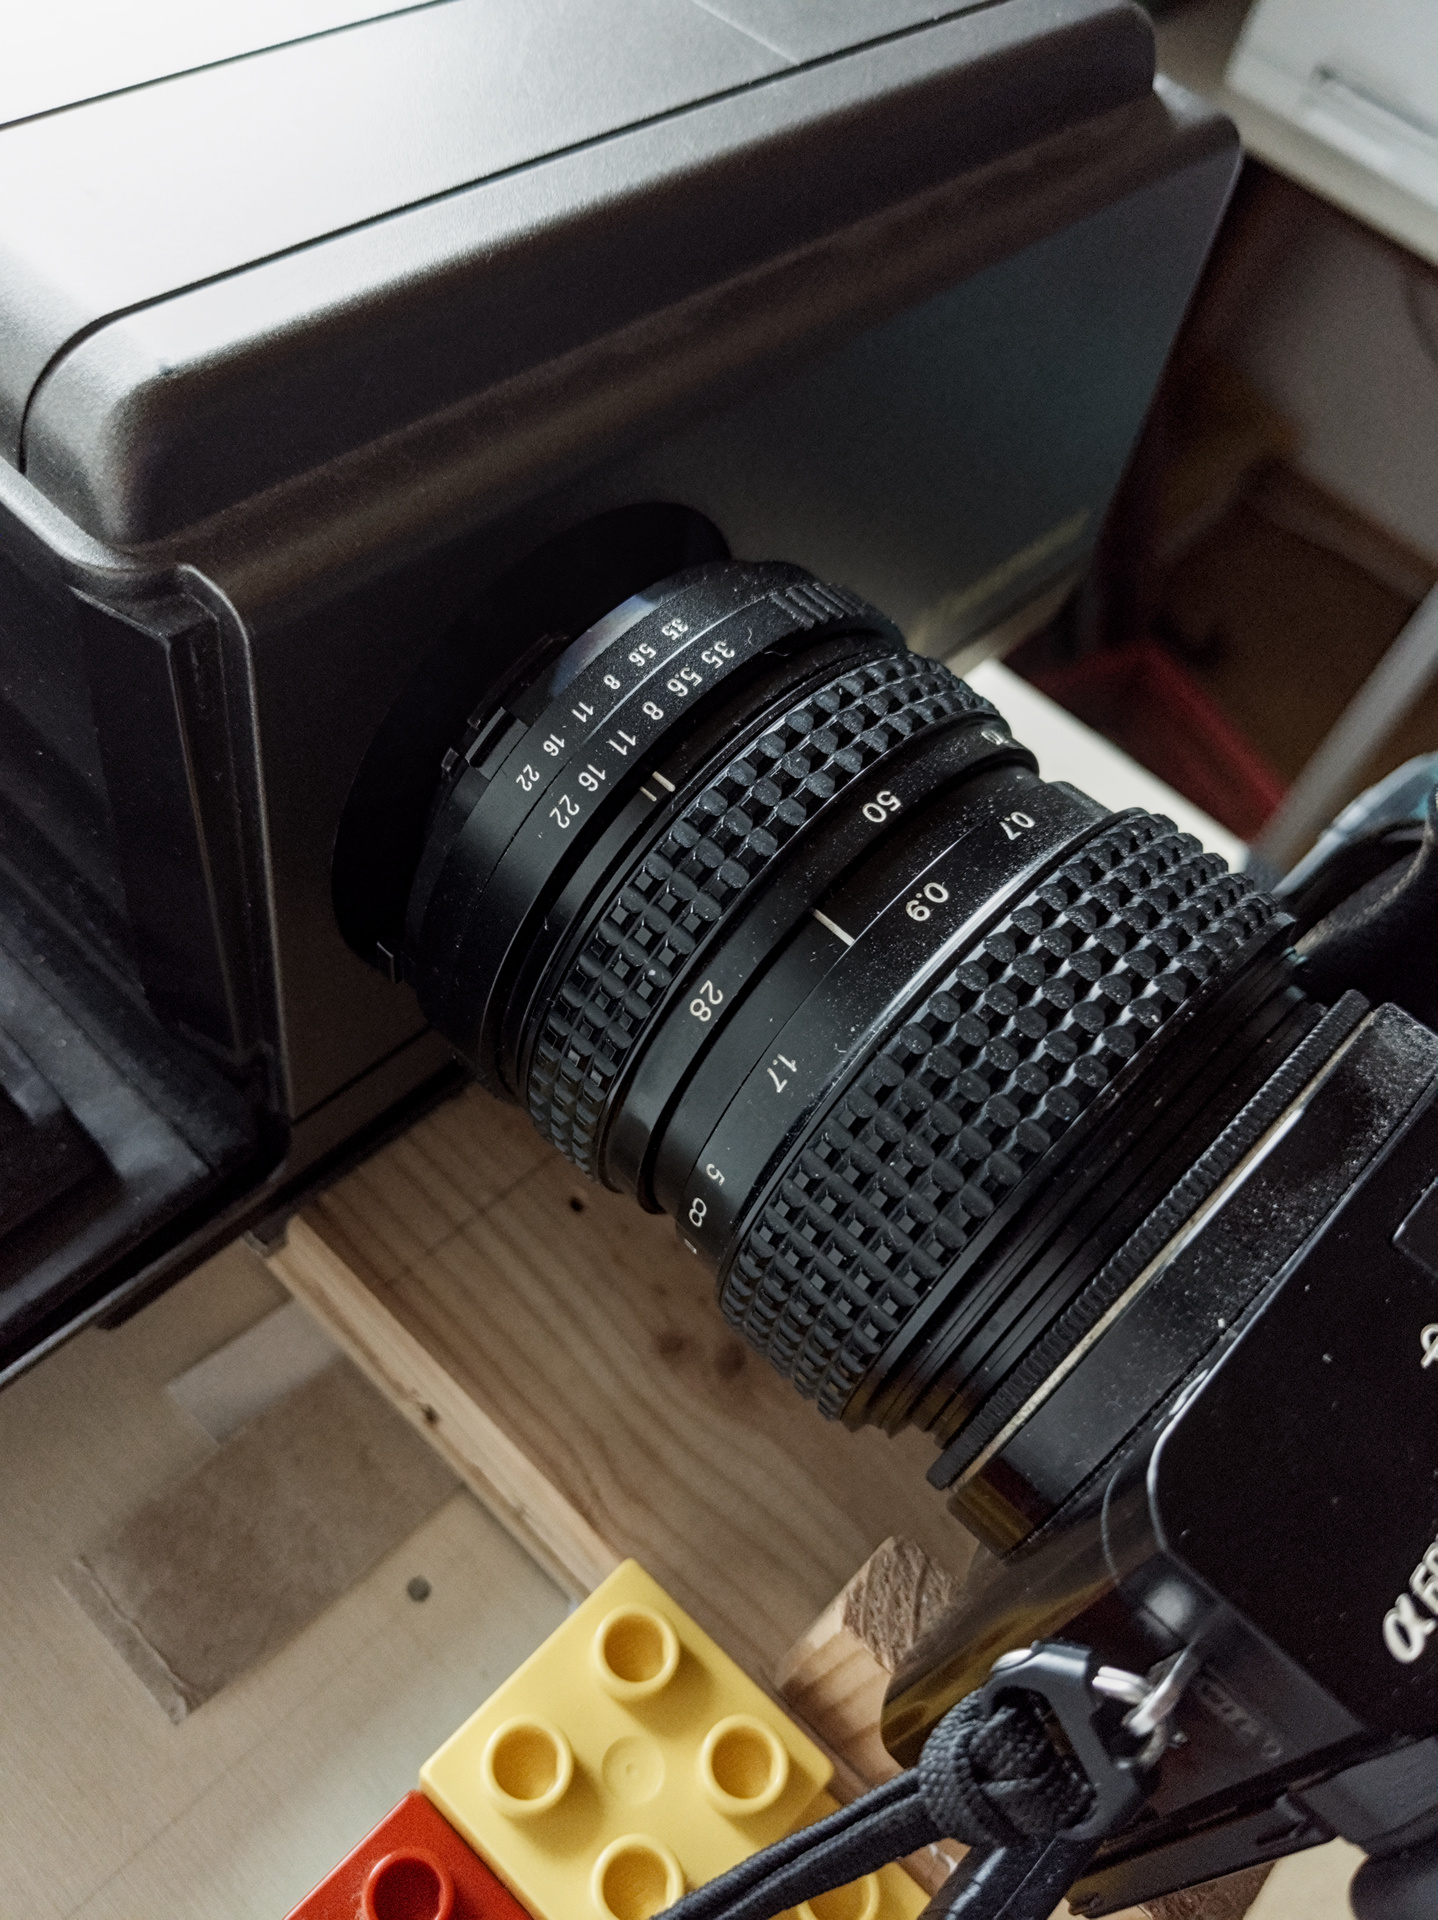
- old Minolta zoom lens 28-70, mounted reverse
- ISO 200
- f/11
- manual mode A


July 1989. The big building is the residence of Wuerzburg.

10 Likes
I created this set up to digitize 1,000 plus dia’s … Used a Canon 100mm Macro lens.
https://flic.kr/s/aHsmWXUqpd

6 Likes
If anyone’s up for the task of providing some further details on the design and building of their efforts, I’d like to someday get all these fantastic accomplishments collated into a GitHub repo (as long as everyone’s happy to do so, of course) so they can be shared with the community. What do you all think?
3 Likes
That looks excellent, thanks for sharing! The results on the linked Flickr page look good too. I wonder where the slide carrier is from? Is it a repurposed bit of something else, or something specific>
2 Likes
They are Wolverine brand and came with that small scanner… Try Amazon here
Wolverine Data Slide Trays Set of 3 https://a.co/d/1Awp2MY
2 Likes
Is macro a must or standard lens would work?
Can extension tubes work instead of macro lens? Any draw backs?
I think a macro lens is typically recommended because they tend to be more optimised towards having a flat focus plane than regular lenses (there are probably more correct terms for what I"m describing…). So if you focus on the center of the film, the edges will also be in focus while with a regular lens the focus might be a bit off there.
I’m not sure how noticeable the difference really is in practice, though.
2 Likes
Not expert but I suppose tubes would work. Macro lenses are less likely to have field curvature, I think. But there must be people with greater expertise than me
1 Like
That’s the term I was looking for ![]()
1 Like
I’d prefer a macro lens for this, because they are indeed supposed to have less field curvature, and (as fixed focus lenses) are easier to correct for abberations, so can give a better overall image quality.
Then again, depending on intended use of the final image, you could only fill say half the image with the slide to copy, and crop in post. That removes the edges and corners, most likely to suffer from lens imperfections. You don’t need 50Mp for display on even a 4k screen…
A (zoom) lens with a macro setting, or macro in the name, is not a macro lens, btw…
But, I see all the focus on the lens side of the copying. How do you ensure a homogenous illumination of the slide to copy? Any irregularities will be visible in the copy…
1 Like
That’s why I like the lens attachment from Nikon (or an eBay knockoff). You can just point it out the window in indirect sunlight
1 Like